Unraveling the Freezer Fallacy: Does Air-Dry Clay Really Dry Faster in the Cold?
You’ve just sculpted a masterpiece with air-dry clay, perhaps a whimsical fairy house or a charming animal figurine. Now, the waiting game begins. You’re eager to paint it, to admire its finished form, but the clay is still soft and pliable. In your haste, a thought might cross your mind: “What if I put it in the freezer? Won’t the cold make it dry faster?” This is a common misconception, a quick-fix idea that, unfortunately, is rooted more in wishful thinking than in scientific reality. You might be surprised to learn that not only will the freezer not speed up the drying process, but it can actually cause significant damage to your carefully crafted piece. Let’s delve into the myths and facts surrounding air-dry clay and the chilly depths of your freezer, so you can achieve the best possible results for your creative endeavors.
The Allure of the Quick Fix: Why You Might Consider Freezing
It’s understandable why you might consider the freezer as a drying shortcut. You associate cold with solidification – ice forms quickly, and perhaps you’ve seen other materials firm up when chilled. This intuitive leap, however, doesn’t quite apply to the nuanced process of air-dry clay drying. Your desire for a rapid outcome is perfectly natural when you’re invested in a project, and the idea of circumventing the usual waiting period is tempting. You want to see your creation come to life, not languish in a state of semi-dryness.
The Misconception of Hardening
You might believe that the cold temperature will somehow extract moisture more rapidly, or that the clay will simply harden faster. When you touch a frozen piece of clay, it does feel hard, almost stone-like. This momentary firmness can be incredibly misleading. You might pull it out, feel its rigid surface, and think, “Aha! It’s working!” But what you’re actually experiencing is the solidification of the water within the clay, not its evaporation. The water molecules are simply locked into an ice crystal structure, not leaving the clay. This distinction is crucial to understanding why freezing is not a viable drying method. The clay is firm because it’s frozen, not because it’s dry. As soon as that ice melts, your piece will revert to its previous, unfrozen state, potentially with added complications.
The Need for Speed in Creative Projects
When you’re deeply engrossed in a creative project, patience can sometimes wear thin. You’ve poured your time and effort into sculpting, and you’re eager to move on to the next step, whether that’s sanding, painting, or glazing. The drying time for air-dry clay, which typically ranges from 24 to 72 hours, can feel like an eternity, especially for larger or thicker pieces. This natural impatience often drives the search for accelerated drying methods. You might find yourself searching online forums or asking fellow crafters for “hacks” to speed up the process. This eagerness to complete your work is a testament to your passion, but it’s important to differentiate between genuinely effective techniques and those that could ultimately jeopardize your creation. Understanding the true nature of air-dry clay and its drying process will empower you to make informed decisions that benefit your art.
The Scientific Reality: Freezing and Its Impact on Air-Dry Clay
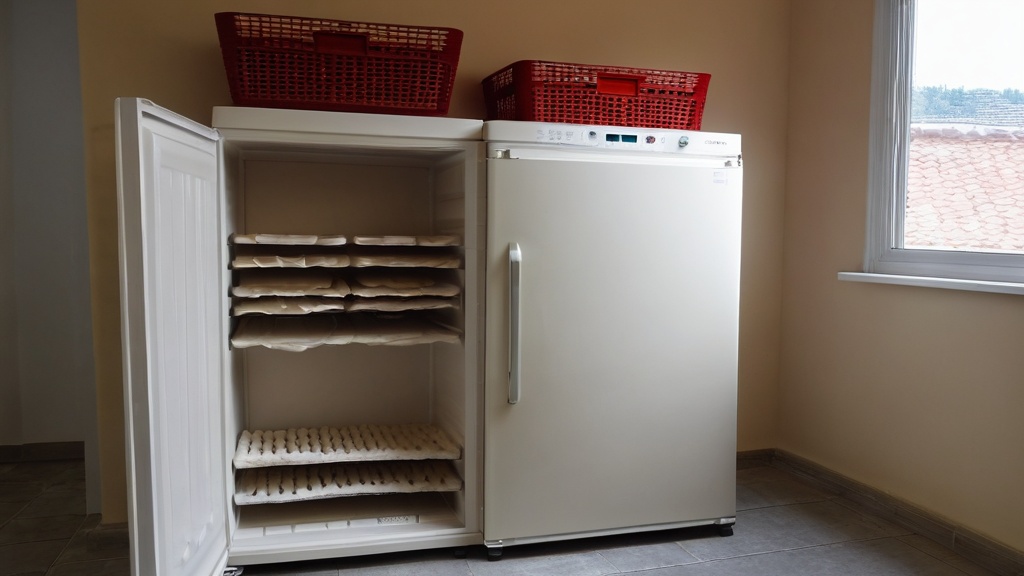
Now, let’s address the core question with scientific accuracy. The idea that freezing accelerates drying for air-dry clay is a complete myth. In fact, the opposite is true. You’ll find that exposing your clay to freezing temperatures can actively hinder the drying process and introduce a host of problems. Understanding why this happens is key to avoiding these pitfalls and ensuring the longevity and integrity of your artwork.
Why Freezing Slows Drying
When you place your air-dry clay in the freezer, you’re introducing it to an environment where the temperature is significantly below freezing. Air-dry clay dries through the process of evaporation, where water molecules transform from a liquid state into a gaseous state and dissipate into the surrounding air. This process requires energy, and it’s most efficient at warmer temperatures.
The Role of Evaporation
Evaporation is fundamentally slowed down by cold temperatures. Think about how quickly a puddle dries on a hot, sunny day compared to a cold, overcast one. The same principle applies to your clay. In the freezer, the air is cold, and the water within your clay freezes. Frozen water, by definition, cannot evaporate. It’s locked into its solid form. For drying to occur, that ice would first need to melt back into liquid water, and then that liquid water would need to evaporate. This multi-step process is far less efficient than simply allowing the liquid water to evaporate directly from the clay at room temperature. You’re essentially adding an extra, energy-intensive phase change into the equation, which drastically impedes the overall drying rate. So, while the clay may feel harder due to the ice formation, it is absolutely not drying faster.
Inhibiting Moisture Release
Beyond the freezing of water, cold temperatures generally reduce the kinetic energy of water molecules. This means they are less likely to break free from the clay matrix and escape into the air. Imagine trying to dry your clothes in a walk-in freezer versus a warm, well-ventilated room. The latter environment facilitates the movement and release of water vapor, while the former actively suppresses it. You’re effectively trapping the moisture within your clay, preventing it from leaving the material. The goal of drying is to remove moisture, and the freezer, by design, works against this fundamental principle. You’re not helping your clay dry; you’re essentially pausing the process of moisture release.
The Risks: Structural Damage from Freezing
Beyond simply slowing down drying, freezing your wet air-dry clay carries significant risks that can permanently damage your creation. These risks stem from a basic scientific principle: water expands when it freezes. This expansion, occurring within the delicate structure of your clay, can have catastrophic consequences.
Cracking and Microfractures
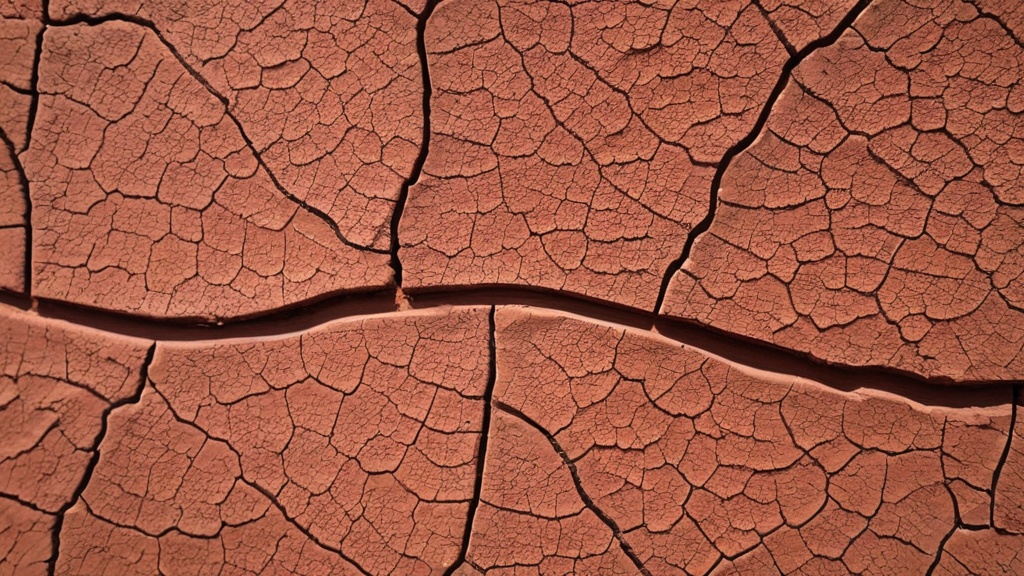
When the water trapped within the clay freezes, it expands. This expansion exerts pressure on the surrounding clay particles. If your piece is even moderately thick or has intricate details, this internal pressure can cause cracks to form. These might appear as noticeable fissures on the surface, or they could be microscopic internal fractures that weaken the overall structure of the piece, making it brittle and prone to breaking later on. You might not see the damage immediately upon removal from the freezer, but as the clay thaws and attempts to dry, these weaknesses will become apparent. You’ve inadvertently compromised the structural integrity of your artwork before it even has a chance to fully cure.
Uneven Drying and Warping
Even if your piece doesn’t visibly crack, freezing can lead to uneven drying and warping. When you remove a frozen piece from the freezer, it will begin to thaw. The outer layers might thaw and begin to release moisture, while the inner core might still be frozen or thawing at a different rate. This disparity in moisture content and temperature within the same piece can cause stresses. As different sections dry at different rates, they will shrink at different rates, leading to warping, distortion, or an uneven, bumpy texture. You could end up with a piece that is no longer true to your original design, or one that has an undesirable, uneven finish. The controlled, gradual drying at room temperature is essential for consistent moisture release and even shrinkage, which is critical for maintaining the shape and smoothness of your piece.
Weakening the Clay’s Cured State
The very nature of air-dry clay involves the binding of particles as moisture evaporates and the internal structure solidifies. Disrupting this process with freezing can weaken these bonds. While the clay might eventually dry, the internal damage caused by the ice expansion can result in a finished product that is far less durable and more susceptible to breakage than a piece that was allowed to dry naturally. You’ve essentially introduced internal stresses that undermine the clay’s ability to achieve its full strength and hardness once cured. Your final piece might feel brittle or crumbly, a direct consequence of the freezer’s harsh intervention.
A Temporary Firming Technique: When Freezing Can Be Useful (with caveats)
Despite the numerous downsides to freezing air-dry clay for drying purposes, there’s one specific scenario where a brief stint in the freezer can be cautiously employed. It’s crucial to understand that this is not for drying, but for temporary firming, and it comes with important caveats. You should never conflate this specific application with a general drying method.
Firming for Manipulation or Mold Release
You might encounter situations where your air-dry clay piece is too soft to handle effectively, or perhaps you’re struggling to release it from a mold without distorting its shape. This is where the freezer can offer a very short-term, temporary solution.
Creating a Temporary Rigidity
A brief period in the freezer (usually 10-20 minutes, depending on the size of the piece) can temporarily firm up the clay. The water within the clay will start to freeze, making the piece more rigid and less pliable. This temporary rigidity can be incredibly useful if you need to add very fine details that would otherwise be smudged, or if you’re trying to achieve a sharper edge that the soft clay won’t hold. You’re not looking to freeze it solid, but rather to give it just enough stiffness to allow for more delicate manipulation.
Easing Mold Removal
Similarly, if you’ve pressed air-dry clay into a detailed mold and find it’s too soft to remove without tearing or losing definition, a quick chill can help. The slight firming allows the clay to hold its shape better as you gently pry it from the mold. Think of it like firming up cookie dough before cutting out shapes; it provides just enough stability to work with. However, you must be extremely careful not to leave it in for too long, as the detrimental effects of freezing will quickly outweigh any benefits.
The Critical Thawing and Drying Step
If you do choose to use the freezer for temporary firming, the subsequent steps are absolutely critical to prevent damage to your piece. This is where the real drying process must begin, and it must be done correctly.
Gradual Thawing at Room Temperature
After you’ve achieved the desired temporary firmness and completed your manipulation or mold release, you must allow the clay to thaw completely at room temperature. Do not attempt to force the thawing with heat, as this can lead to thermal shock and further cracking. Place your piece in a well-ventilated area away from direct heat or drafts. As it thaws, the frozen water will turn back into liquid. Only once it has fully thawed should you proceed with the actual drying process. Rushing this stage will compromise your piece.
Resuming Natural Air Drying
Once thawed, your clay piece is essentially back to its initial wet state. You must then allow it to air dry naturally, following all the best practices for air-dry clay. This means placing it in a warm, dry, and well-ventilated environment. Any moisture introduced by the thawing process still needs to evaporate. The temporary firming simply allowed you to perform a specific task; it did not advance the drying process itself. You are essentially restarting the clock on drying. Skipping this natural drying step or attempting to “dry” it further in the freezer will lead to the same cracking, warping, and structural damage discussed earlier. This technique is a tool for manipulation, not a shortcut for drying.
The Optimal Approach: How to Properly Dry Air-Dry Clay
Now that we’ve debunked the freezer myth, let’s focus on what truly works. The best way to dry your air-dry clay creation is to embrace its intended drying method: natural air drying. By understanding and optimizing the conditions for evaporation, you can ensure your piece dries evenly, thoroughly, and without damage.
The Power of Warm, Dry, Well-Ventilated Air
The most effective and safest method for drying air-dry clay relies on three key environmental factors: warmth, dryness, and good air circulation. These elements work synergistically to promote efficient evaporation and consistent drying.
Maintaining Room Temperature
You’ll find that a consistent room temperature (typically between 68-75°F or 20-24°C) is ideal for air-dry clay. Extremes of heat or cold should be avoided. While warmth encourages faster evaporation, excessive heat can cause the surface to dry too quickly, leading to cracks as the inner layers struggle to keep pace. Think of it like sun-drying a piece of wood – too much direct, intense heat can cause it to warp or split. A moderate, stable temperature allows for a steady and controlled release of moisture from the entire piece, minimizing internal stresses.
Low Humidity is Your Friend
Humidity is the enemy of efficient drying. The more moisture already present in the air, the harder it is for water to evaporate from your clay. If your environment is naturally humid, consider using a dehumidifier in the room where your clay is drying. This will draw moisture out of the air, creating a drier atmosphere that encourages the clay to release its own internal moisture more readily. You’re essentially creating a thirsty environment for the water molecules to escape into. Conversely, a very humid environment can drastically slow down the drying process, potentially leading to mold growth or a longer overall curing time.
The Importance of Airflow
Stagnant air traps moisture. Good air circulation is crucial because it continuously removes the moisture-laden air from around your clay piece, replacing it with drier air. This constant exchange helps to drive the evaporation process. You don’t need a powerful fan blowing directly onto your piece, which could cause the surface to dry too quickly. Instead, aim for gentle, indirect airflow. Opening a window slightly, placing a small fan on a low setting a few feet away, or simply ensuring good ventilation in the room will make a significant difference. Rotating your piece periodically can also expose all its surfaces to fresh air, promoting even drying.
Best Practices for Even Drying
Beyond optimizing the environment, there are specific techniques you can employ to ensure your air-dry clay dries as evenly as possible, preventing common issues like cracking and warping.
Elevating Your Piece
Don’t let your clay sit flat on a solid surface. This traps moisture underneath and prevents air from circulating to that area, leading to uneven drying. Elevate your piece on a wire rack, a mesh screen, or even toothpicks. This allows air to flow freely around all surfaces of your sculpture, promoting consistent moisture release from all sides. Think of how bakers cool cakes on a wire rack; the principle is the same. This simple step can dramatically improve the evenness of your drying.
Turning and Rotating
As mentioned earlier, periodically turning or rotating your piece is beneficial. This ensures that different sides are exposed to the same environmental conditions, preventing one side from drying significantly faster than another. For three-dimensional objects, you might turn them every few hours during the initial drying phase. For flatter pieces, simply flipping them occasionally can help. This proactive approach minimizes the chances of one side contracting faster than the other, which is a common cause of warping.
Patience: The Most Crucial Ingredient
Ultimately, the most important “tool” for drying air-dry clay is patience. While you can optimize the environment, you cannot truly rush the natural process without risking damage. Most air-dry clay pieces will take approximately 24 to 72 hours to fully dry. This timeframe can vary considerably based on the thickness of your piece, the type of clay, and the environmental conditions. Thicker pieces, with more internal moisture, will naturally take longer. Resist the temptation to accelerate the process with ovens, microwaves, or direct high heat, as these methods almost invariably lead to cracking, blistering, or an incomplete cure. Allow your clay the time it needs to fully harden and strengthen. Your patience will be rewarded with a durable, beautiful finished product.
Understanding Drying Timelines and Environmental Factors
| Condition | Drying Time | Effect on Clay | Notes |
|---|---|---|---|
| Room Temperature (20-22°C / 68-72°F) | 24-48 hours | Normal drying, even shrinkage | Recommended standard drying method |
| Freezer (-18°C / 0°F) | No significant drying | Clay remains moist, drying is halted | Freezing stops water evaporation, does not speed drying |
| Refrigerator (4°C / 39°F) | Extended drying time (several days) | Slower drying, risk of mold if sealed | Not recommended for drying |
| Drying in Warm, Dry Air (30°C / 86°F) | 12-24 hours | Faster drying, possible cracking if too fast | Use with caution to avoid cracks |
Setting realistic expectations for drying times is crucial for working with air-dry clay. You’ll find that “24 to 72 hours” is a general guideline, and several factors can significantly influence how long your particular project will take. Understanding these variables allows you to better plan your creative process and avoid premature handling of your fragile, still-wet artwork.
Typical Drying Duration
When you embark on an air-dry clay project, prepare for a waiting period. The 24 to 72-hour window is a good rule of thumb for most average-sized pieces. However, this is just an estimate, and it’s essential to gauge the dryness of your specific piece before moving on to the next stage.
Average Curing Time
For a standard air-dry clay sculpture, roughly the size of your hand and not excessively thick, you can generally expect it to be dry to the touch within 24 hours. However, “dry to the touch” doesn’t mean “fully cured.” The interior of the piece often retains moisture long after the surface feels firm. For complete curing, where all internal moisture has evaporated and the clay has reached its maximum hardness, you’ll typically need to wait the full 48 to 72 hours. Larger or more intricate pieces will almost certainly lean towards the longer end of this spectrum, or even exceed it. You should always err on the side of caution and give your piece extra time, especially if you plan to paint or seal it, as trapped moisture can cause issues with adhesion or even lead to mold.
Impact of Thickness and Size
The most significant factor influencing drying time is the thickness of your clay piece. A thin, flat ornament might dry in 24 hours, while a thick, solid sculpture could take a week or even longer. The reason is simple: water needs to travel from the center of the piece to the surface to evaporate. The further it has to travel, and the more volume of water there is, the longer the process will take. Large, bulky pieces also tend to trap moisture more effectively, making internal drying even slower. If you’re working on a very thick sculpture, consider hollowing it out where possible (while maintaining structural integrity) to reduce the overall volume of clay and thereby shorten the drying time. This technique is often employed by sculptors to prevent cracking in large pieces.
How Environmental Conditions Play a Role
Beyond the physical characteristics of your sculpture, the environment in which it dries is a paramount factor. You have a significant degree of control over these conditions, which can help optimize your drying success.
Humidity Levels Revisited
As discussed, humidity directly impedes evaporation. If you live in a climate with high humidity, or if you’re drying your clay during a particularly damp season, you’ll notice a significant increase in drying time. Conversely, a very dry environment will help your clay dry faster. This is why using a dehumidifier in humid conditions can be incredibly effective. You’re not just waiting for the water to leave the clay; you’re waiting for the air to be able to accept that water. If the air is already saturated with moisture, it has nowhere to go.
Temperature Fluctuation and Airflow Effects
Consistent temperature is better than fluctuating temperature. While a warmer room generally speeds things up, drastic changes between warm and cool can cause uneven drying and stress on the clay. Imagine a warm day followed by a cold night; the clay contracts and expands, which can lead to microfractures. Similarly, consistent, gentle airflow is crucial. A drafty room or an open window can be beneficial, but direct, strong blasts of air from a fan can dry the surface too quickly, forming a “skin” that traps moisture inside and leads to cracking. You’re aiming for a balanced approach: enough air movement to carry away evaporated moisture, but not so much that it creates a rapidly hardened exterior. By understanding and controlling these environmental factors, you can create the ideal conditions for your air-dry clay to dry safely and effectively, ensuring your final piece is strong and beautifully preserved.
FAQs
1. Will air dry clay dry faster in the freezer?
No, air dry clay will not dry faster in the freezer. In fact, placing air dry clay in the freezer can actually slow down the drying process or cause it to dry unevenly, leading to cracks or other imperfections in the clay.
2. Can freezing air dry clay help to preserve it?
Freezing air dry clay can help to preserve it by slowing down the drying process and preventing it from hardening too quickly. This can be useful if you need to pause your project or store the clay for an extended period of time.
3. Will freezing air dry clay affect its texture or consistency?
Freezing air dry clay can affect its texture and consistency. When the clay is frozen, the water content in the clay can expand and contract, potentially causing the clay to become more brittle or crumbly once it thaws. It is important to allow the clay to return to room temperature before working with it again.
4. How should air dry clay be stored to prevent it from drying out too quickly?
To prevent air dry clay from drying out too quickly, it should be stored in an airtight container or wrapped tightly in plastic wrap when not in use. Keeping the clay away from direct sunlight and in a cool, dry place can also help to slow down the drying process.
5. Are there any other methods to speed up the drying process of air dry clay?
Yes, there are other methods to speed up the drying process of air dry clay. Placing the clay in front of a fan, using a dehumidifier, or gently heating it in an oven on a low temperature can help to accelerate the drying process. However, it is important to monitor the clay closely to prevent cracking or warping.