Understanding Air Dry Clay’s Drying Process
When you dive into the wonderful world of air-dry clay, one of the first questions that pops into your mind is often, “How long until I can paint this masterpiece?” Unlike traditional pottery clay that requires a kiln, air-dry clay hardens as its moisture evaporates into the surrounding air. This process, while seemingly simple, is influenced by a fascinating interplay of factors that dictate exactly how long you’ll be waiting.
At its core, air-dry clay’s drying process is about water leaving the material. The clay is essentially a mixture of natural or synthetic binders, fibers, and water. As the water escapes, the binders solidify, locking the clay particles into a rigid form. This transformation from pliable to solid is what allows you to create intricate sculptures, functional objects, or decorative pieces without the need for high-temperature firing. You’ll notice the clay gradually changing color, becoming lighter as it dries, and feeling progressively firmer to the touch. This visual and tactile feedback is your primary indicator of its drying progress.
The Science Behind the Hardening
Think of air-dry clay as a sponge soaked in water. When you expose it to air, the water molecules on the surface begin to evaporate. This evaporation creates a concentration gradient, pulling more water from the interior of the clay towards the surface. As this water moves and evaporates, the internal structure of the clay, held together by binders, begins to compress and solidify. This process isn’t instantaneous because the water has to travel through the dense clay matrix. The more water present, and the further it has to travel, the longer the drying time will be. Understanding this fundamental principle helps you appreciate why a small, thin leaf might dry in hours, while a chunky sculpture of a bear might take days.
Why Air-Dry Clay is Different from Kiln Clay
It’s crucial to distinguish air-dry clay from traditional kiln-fired clay. Kiln clay undergoes a chemical change at extremely high temperatures, fusing its particles into a ceramic. This makes it incredibly durable and waterproof. Air-dry clay, on the other hand, hardens through physical evaporation and the solidification of its binders. While it becomes hard and rigid, it will never achieve the same level of durability or water resistance as kiln-fired ceramics. This difference is important to remember when planning your projects, especially if you envision them for outdoor use or holding liquids. The drying process is also distinct: kiln clay is dried to a “bone dry” state before firing to prevent explosions, but the final hardening only occurs in the intense heat of the kiln. Air-dry clay completes its entire hardening process simply by being exposed to air.
Key Factors Influencing Drying Time
The drying time of your air-dry clay isn’t a fixed constant; it’s a dynamic variable influenced by several environmental and project-specific factors. Understanding these elements allows you to predict and even subtly control how quickly your creations will harden.
Project Size and Thickness
This is arguably the most significant factor. Imagine a thin slice of bread compared to a whole loaf. Which will dry out faster? The same logic applies to your clay creations. Small, thin pieces, like ornaments or flat cutouts, have a larger surface area relative to their volume, allowing moisture to escape quickly. You might find these small wonders are surface-dry in a mere 8-24 hours, and in hot, dry conditions, they could even be ready within a few hours.
Conversely, larger or thicker pieces present a greater challenge. A hefty sculpture or a piece with thick walls means the water from the interior has a much longer journey to reach the surface and evaporate. For such substantial projects, you should anticipate drying times stretching from several days to even a full week. The core of a thick piece can retain moisture long after the surface feels dry, and patience is truly a virtue here to prevent cracking.
Environmental Conditions: Temperature, Humidity, and Airflow
The environment where your clay is drying plays a crucial role. Think of a damp towel in a cool, humid bathroom versus one hanging in a sunny, breezy yard.
Temperature
Warmer temperatures accelerate evaporation. Just as water boils faster at higher temperatures, it evaporates more rapidly from your clay. A comfortable room temperature is generally good, but a slightly warmer spot can gently speed things up. However, avoid extreme heat sources like direct sunlight for prolonged periods or ovens, as these can cause the clay to dry too quickly on the outside, leading to cracks while the inside remains wet.
Humidity
Humidity is the enemy of fast drying. High humidity means there’s already a lot of moisture in the air, making it harder for the water from your clay to evaporate. If you live in a very humid climate or it’s a particularly damp day, expect your clay to take significantly longer to dry. Conversely, a low-humidity environment will naturally draw moisture out of your clay more efficiently.
Airflow
Good airflow is like having a gentle fan blowing over your drying laundry – it helps carry away the evaporated moisture, allowing more water to escape from the clay. Stagnant air allows a localized pocket of humidity to build around your piece, slowing down the process. A well-ventilated room or a gentle, indirect fan can work wonders. Just be cautious not to create a strong, direct draft, as this can lead to uneven drying and cracking, especially on delicate areas.
Type and Brand of Clay
While general guidelines apply, different brands and formulations of air-dry clay can have slight variations in their drying times. Some clays are designed to dry faster due to their specific binder compositions or the inclusion of certain additives. Always refer to the manufacturer’s recommendations on the packaging. Recent product guidance and reviews suggest that while many brands state 12-24 hours for surface drying, real-world testing sometimes shows that pieces may remain soft after 24 hours, requiring more time for a complete cure. It’s always a good idea to factor in an extra buffer based on your personal experience with a particular brand.
Surface and Support
The surface your clay is resting on can also influence drying. A porous surface like untreated wood or cardboard can absorb some moisture from the bottom of your piece, aiding drying. However, if the surface is too absorbent, it might stick. Non-porous surfaces like plastic or glass don’t absorb moisture, potentially slowing drying on the contact points. Regularly turning your piece, especially thicker ones, ensures even air exposure to all sides.
Typical Drying Times You Can Expect
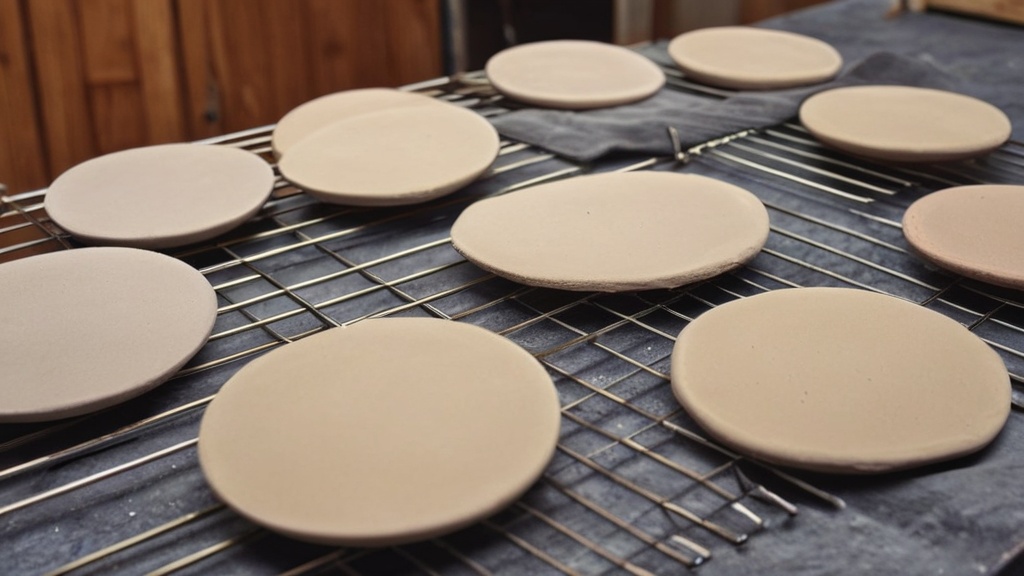
While the factors above introduce variability, there are general timeframes you can anticipate for your air-dry clay projects. These ranges serve as a useful starting point, but always be prepared to adjust based on your specific circumstances.
General Guidelines for Most Craft Air Dry Clay
For most craft air-dry clays, you’ll find that they become dry to the touch within 24 hours. This means the surface will feel firm, no longer sticky or easily dented, and often lighter in color. At this stage, you might be able to handle the piece gently, and it’s often ready for light painting or detailing that doesn’t involve heavy manipulation. However, “dry to the touch” does not mean fully cured.
To reach a state where the clay is truly hard and durable throughout, you should generally expect it to take 24–48 hours for smaller to medium-sized pieces. Many brands will explicitly state 72 hours for full drying. This extended period allows all the internal moisture to dissipate, ensuring your creation is structurally sound and less prone to future cracking or softening. For an average-sized ornament or a small figurine, 2-3 days is a reasonable expectation for complete drying.
Faster Drying for Small or Flat Items
If you’re working on delicate, thin, or small projects, you’re in luck! Items like flat cutouts, thin leaves, small beads, or very shallow dish designs can dry much quicker. In ideal conditions – that is, warm, dry weather with good airflow – these small pieces can be dry and ready for further work in 8–24 hours. In some instances, particularly hot and arid environments, they might even be fully dry within just a few hours. This rapid drying makes air-dry clay fantastic for quick craft projects or when you need a component ready for assembly in a short timeframe.
Extended Drying for Thicker and Larger Pieces
This is where your patience will truly be tested. When you create substantial sculptures, pieces with thick bases, or items with large, solid sections, the drying time can be significantly extended. The deeper the clay, the longer it takes for moisture to migrate from the interior to the surface and evaporate. For these larger endeavors, you should realistically plan for the drying process to take several days, possibly even up to a week.
Imagine a large, solid bust. The surface might feel dry in a day or two, but the core could still be damp for many more days. Rushing this process or ignoring the internal moisture can lead to problems like cracking, especially as the outer layers shrink faster than the inner layers. It’s always better to err on the side of caution and allow extra drying time for your thicker pieces to ensure they are fully cured and stable.
The Nuance of “Dry” – Surface Dry vs. Fully Cured
It’s crucial to understand the distinction between “surface dry” and “fully cured” when working with air-dry clay.
Surface Dry
When your clay is surface dry, it means the outermost layer has hardened. It will feel firm and might have changed color to a lighter shade. At this stage, it’s generally safe to handle gently, turn over, and perhaps even begin very light painting. However, the interior is likely still damp and pliable. Attempting heavy manipulation or adding significant weight to a surface-dry piece can lead to damage or cracking as the inner layers are still soft.
Fully Cured
A fully cured piece of air-dry clay has had all its internal moisture evaporate, and the binders have completely set. It will feel uniformly hard throughout, often lighter in weight than when wet, and its color will have stabilized. This is the stage where your creation is at its maximum strength and ready for more robust finishing, like multiple layers of paint, varnishing, or gentle sanding. Allowing your clay to fully cure is essential for its longevity and structural integrity. Don’t rush this final stage; patience will pay off in the durability of your finished artwork.
How to Optimize and Expedite Drying (Safely)
While it’s important not to rush the drying process too aggressively, there are several safe and effective strategies you can employ to optimize conditions and potentially expedite the drying of your air-dry clay, especially for larger or thicker pieces.
Enhancing Airflow
One of the simplest yet most effective ways to speed up drying is to ensure good air circulation around your clay.
Using a Fan
A gentle, indirect fan can significantly boost drying time by continually moving the moisture-laden air away from your piece. Place the fan a reasonable distance away, so it’s creating a gentle breeze rather than a direct blast. A strong, direct current of air can cause the outer layers to dry too quickly compared to the inner layers, leading to stress and cracking. Position the fan to circulate air around the general drying area rather than pointing directly at the clay.
Choosing a Well-Ventilated Space
Drying your projects in a room with open windows or good natural ventilation is always preferable to a stuffy, enclosed space. Fresh air helps carry away evaporated moisture. Avoid drying clay in bathrooms or basements, as these areas tend to have higher humidity levels. A garage, studio, or even a living room with good air exchange are ideal choices.
Controlling Temperature and Humidity
Since temperature and humidity are critical factors, managing them can significantly impact drying speed.
Maintaining Moderate Warmth
A consistently warm environment promotes faster evaporation. Aim for typical room temperature, perhaps slightly warmer if comfortable, but avoid extreme heat. Placing your clay near a warm (not hot!) radiator or a gentle heat vent in a large room can help, but ensure the heat isn’t too intense or directly focused on the clay, which can lead to cracking. Think of a comfortable, warm day, not an oven.
Reducing Humidity
If you live in a humid climate or it’s a particularly damp season, a dehumidifier in the drying room can work wonders. By removing excess moisture from the air, a dehumidifier creates a more favorable environment for your clay to release its own moisture, significantly speeding up the process. Even placing silica gel packets (the kind found in new shoe boxes or electronics) near smaller pieces can help absorb ambient moisture.
Strategic Sculpting Techniques
You can even influence drying time during the creation phase itself.
Hollowing Out Thicker Sections
For large sculptures, hollowing out the interior is a game-changer. Instead of a solid block of clay that takes ages to dry, a hollow structure has less mass and more internal surface area for moisture to escape. You can sculpt your piece and then carefully cut it in half, hollow out the inside to an even thickness (aiming for no more than 1/2 to 3/4 inch walls), and then score and slip the pieces back together. This not only speeds drying but also reduces the chances of cracking and makes the final piece lighter.
Creating Uniform Thickness
Uneven thickness is a common culprit for cracking. When one part of your piece is thick and another thin, the thin part will dry and shrink much faster, putting stress on the still-wet thicker section. Try to maintain a relatively consistent thickness throughout your sculpture. If you must have varying thicknesses, try to make the transitions gradual and smooth rather than abrupt.
Making Test Pieces
If you’re working on a new project or a particularly large one, creating a small, similarly thick test piece from the same batch of clay can be incredibly helpful. Dry it alongside your main project and use it as an indicator of how quickly the larger piece is progressing. You can even break the test piece open to check the internal moisture content without risking your main artwork.
Recognizing When Your Clay is Fully Dry
| Type of Craft Air Dry Clay | Thickness | Drying Time | Drying Conditions | Notes |
|---|---|---|---|---|
| Standard Air Dry Clay | 1/4 inch (6 mm) | 24 hours | Room temperature, low humidity | Drying time increases with thickness |
| Standard Air Dry Clay | 1/2 inch (12 mm) | 48 hours | Room temperature, low humidity | May require flipping for even drying |
| Lightweight Air Dry Clay | 1/4 inch (6 mm) | 12-24 hours | Room temperature, low humidity | Dries faster due to lighter composition |
| Modeling Air Dry Clay | Varies | 24-72 hours | Room temperature, low humidity | Drying time depends on size and thickness |
| Polymer Air Dry Clay | Thin layers | 24 hours | Room temperature, low humidity | May require sealing after drying |
Knowing for sure when your air-dry clay is completely dry is crucial for ensuring the longevity and stability of your artwork. There are several indicators you can look for beyond just a visually lighter color.
Visual Cues
The most obvious sign is a change in color. Most air-dry clays lighten considerably as they dry, often becoming a pale off-white, light gray, or a significantly lighter shade of their original color. This uniform lightening should be visible across the entire piece, with no darker, damp-looking patches. Look for any areas that appear translucent or shiny; these are often still wet.
Another visual cue is the absence of any “damp” sheen. A wet piece of clay might have a slight sheen due to surface moisture. As it dries, it will become more matte.
Tactile Tests
Feel is your best friend when determining dryness.
Firmness and Rigidity
A fully dry piece of air-dry clay will feel hard and rigid all over. There should be no give or softness when you press gently (but firmly) with your fingernail. If you can still dent it or if any part feels even slightly pliable, it’s not fully dry. The rigidity should be consistent throughout the entire sculpture, not just on the surface.
Weight Change
As water evaporates, your clay creation will become noticeably lighter. Pick up the piece when it’s wet and then again each day. You’ll observe a gradual decrease in weight. A fully dry piece will feel significantly lighter than its wet counterpart. This is a very reliable indicator, especially for larger pieces where internal moisture can be tricky to detect.
Sound (for larger pieces)
For larger or hollow pieces, a subtle sound test can be useful. Gently tap the piece with your knuckle. A fully dry and hard piece will often produce a clearer, more resonant sound, whereas a still-damp piece might sound duller or “thuddy.” This is a more advanced technique and relies on your developing ear, but it can be a good confirmatory test.
What Happens if You Don’t Let it Dry Completely?
Impatience can lead to several problems:
Cracking
This is the most common issue. If the outer layers dry and shrink while the inner layers are still wet and stable, the stress can cause cracks to form, sometimes quite dramatically. These cracks can appear anywhere but are often seen at joints, thinner sections, or where there’s a significant change in thickness.
Soft Spots and Weakness
If a piece isn’t fully dry, it will retain soft spots. This makes it structurally weak and prone to breaking. If you try to paint or varnish it, the paint might peel, and the finish won’t adhere properly to the damp areas. The piece might also feel “spongy” rather than solid.
Mold Growth
One of the more unpleasant consequences of insufficient drying is mold. Trapped moisture, especially in humid conditions, creates an ideal environment for mold and mildew to flourish. This can ruin your artwork and is difficult to remove once it takes hold. You might see fuzzy patches or black spots appearing on your clay.
Issues with Finishing
Trying to paint, seal, or varnish a piece that isn’t fully dry is a recipe for disaster. Paints won’t adhere properly, sealants might trap moisture, leading to internal softening or mold, and the overall finish will be compromised. Your efforts will be wasted if the foundation isn’t completely dry. Always wait until you are absolutely confident your piece is fully cured before moving on to finishing steps.
FAQs
1. How long does craft air dry clay take to dry?
Craft air dry clay typically takes 24-48 hours to dry completely, depending on the thickness of the clay and the humidity levels in the environment.
2. Can I speed up the drying process of craft air dry clay?
Yes, you can speed up the drying process of craft air dry clay by using a fan or a hairdryer on a low setting. Just be cautious not to apply too much heat, as it can cause the clay to crack.
3. How can I tell if craft air dry clay is fully dry?
You can tell if craft air dry clay is fully dry by gently tapping on the surface of the clay. If it sounds hollow, then the clay is dry. Additionally, the color of the clay will lighten as it dries.
4. What should I do if my craft air dry clay is cracking as it dries?
If your craft air dry clay is cracking as it dries, you can try smoothing out the cracks with a wet finger or a small amount of water. You can also try covering the clay with a damp paper towel and letting it sit for a few hours to rehydrate the clay.
5. Can I paint craft air dry clay before it is fully dry?
It is not recommended to paint craft air dry clay before it is fully dry, as the moisture in the clay can cause the paint to not adhere properly. It is best to wait until the clay is completely dry before painting it.