Cricut machines are computer-controlled cutting devices used by hobbyists and professionals for various creative projects. These machines operate by precisely cutting designs from a multitude of materials, directed by digital files created in their proprietary software, Cricut Design Space. The technology behind Cricut machines allows for intricate cuts, making them a versatile tool for crafting.
Historically, cutting machines have evolved from industrial applications to domestic use. Earlier versions were often limited in their material compatibility and design capabilities. Modern Cricut machines, however, offer a broader spectrum of functions, including cutting, scoring, writing, and drawing, on materials ranging from paper and vinyl to fabric and wood. This guide will provide a comprehensive overview of operating and maximizing the utility of Cricut machines.
The primary function of a Cricut machine is to execute precise cuts based on a digital design. Imagine a highly accurate pair of automated scissors, guided by a sophisticated blueprint. This enables users to create custom decals, cards, apparel, and home decor items with a level of detail often difficult to achieve manually.
If you’re interested in exploring more creative projects that can complement your Cricut machine, you might want to check out this article on making air dry clay mobiles. It provides a step-by-step guide on how to craft beautiful and unique decorations that can be customized using your Cricut designs. You can find the article here: How to Make Air Dry Clay Mobiles.
Understanding Cricut Machine Models
Cricut offers several models, each designed to cater to different needs and project scales. Understanding the distinctions between these models is crucial for selecting the appropriate machine for your specific crafting endeavors.
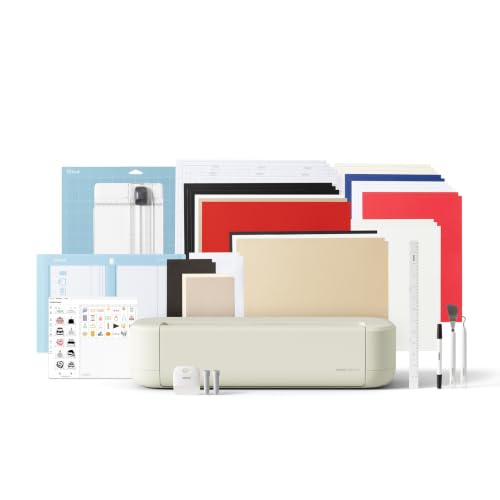
12 IN (30.5 CM) CUTTING MACHINE: Cricut Explore 5 is the newest generation of our Cricut Explore machines — perfect for making a variety of projects like custom decals, personalized apparel, full-color stickers, cards, and so much more. You can even make in multiples! 30% more compact than previous models, Cricut Explore 5 features an aesthetic new look and simplified interface for a more intuitive experience – all with the same dependable 12 in (30.5 cm) cutting performance. Available in a brand-new Taupe color.

CRICUT EXPLORE 3 & DIGITAL CONTENT BUNDLE- This Cricut Machine bundle comes with a digital library of 30 images. In setting up the machine, you will be guided to register & the digital content will automatically be entitled to your account

SEAMLESS CUTTING FOR YOUR CRAFTS - Cut designs of your choice through thicker materials with ease using the Cricut Deep-Point Blade and Housing, a blade that cuts 50+ materials up to 1.5mm in thickness for your projects when used with Cricut Machines
Cricut Explore Series
The Cricut Explore series, including models like the Explore Air 2 and Explore 3, represents a popular choice for many crafters. These machines are known for their balance of features and affordability.
- Cutting Capabilities: Explore machines can cut over 100 different materials, including cardstock, vinyl, iron-on, glitter paper, and bonded fabric. Their cutting force is suitable for most common crafting materials.
- Smart Dial/Material Settings: The Explore Air 2 features a “Smart Dial” that allows users to quickly select common material settings. The Explore 3, a newer iteration, integrates completely with Cricut Design Space for material selection, removing the physical dial.
- Maximum Cut Size: These machines typically handle materials up to 12 inches wide and 24 inches long (or 12 feet with Smart Materials on the Explore 3).
- Tools: Explore machines utilize a Fine-Point Blade for general cutting and can also accommodate a Deep-Point Blade, Bonded-Fabric Blade, and various pens for writing and drawing.
- Connectivity: Both models offer Bluetooth connectivity, allowing for wireless operation from a computer or mobile device.
- Target Audience: The Explore series is well-suited for beginners and intermediate crafters who engage in a wide range of projects without significant need for heavy-duty material cutting.
Cricut Maker Series
The Cricut Maker series, including the original Maker and Maker 3, is Cricut’s flagship line, offering enhanced power and versatility. Think of the Maker as a heavy-duty workshop, capable of tackling more demanding projects.
- Adaptive Tool System: The Maker series features an “Adaptive Tool System” that allows for a wider array of specialized tools. This system intelligently controls the direction of the blade and the cut pressure, offering greater precision.
- Cutting Capabilities: Maker machines can cut over 300 materials, including delicate fabrics like silk, thick materials like balsa wood, and even thin metals. This expanded capability distinguishes it from the Explore series.
- Maximum Cut Size: Similar to the Explore series, Maker machines can cut materials up to 12 inches wide and 24 inches long (or 12 feet with Smart Materials on the Maker 3).
- Tools: Beyond the Fine-Point Blade and pens, the Maker series supports tools like the Rotary Blade (for fabric), Knife Blade (for thicker materials), Engraving Tip, Debossing Tip, Perforation Blade, and Wavy Blade. This diverse toolset expands project possibilities significantly.
- Connectivity: Like the Explore series, Maker machines offer Bluetooth connectivity.
- Target Audience: The Maker series is ideal for advanced crafters, small business owners, and those who require the ability to cut a broader range of materials with precision.
Cricut Joy
The Cricut Joy is a compact and portable cutting machine designed for smaller, quick projects. It is the agile messenger pigeon of the Cricut line, perfect for small tasks.
- Size and Portability: The Joy is significantly smaller than the Explore or Maker, making it highly portable and suitable for small spaces.
- Cutting Capabilities: It primarily cuts various types of vinyl, iron-on, cardstock, and label materials. It excels at making cards and small labels.
- Maximum Cut Size: The Joy cuts materials up to 4.5 inches wide and can cut individual shapes up to 4 feet long or repeat cuts up to 20 feet long with Smart Materials.
- Tools: The Joy uses only a Fine-Point Blade and has specialized pens.
- Connectivity: It offers Bluetooth connectivity.
- Target Audience: The Joy is perfect for beginners, those with limited space, or crafters primarily interested in making cards, labels, and small vinyl decals.
Cricut Venture
The Cricut Venture is Cricut’s large-format cutting machine, designed for professional-grade projects. It is the industrial loom of the Cricut family, built for scale.
- Size and Scale: The Venture is considerably larger than other Cricut machines, designed for cutting materials up to 25 inches wide.
- Cutting Capabilities: It cuts Smart Materials without a mat and a wide range of other materials with mats. Its speed and precision are optimized for large projects.
- Maximum Cut Size: The Venture can cut materials up to 24 inches wide and 12 feet long (or 75 feet with Smart Materials in a continuous cut).
- Tools: It supports a specialized Fine-Point Blade and can also use pens for drawing.
- Connectivity: Offers both Bluetooth and USB connectivity.
- Target Audience: The Venture is aimed at businesses, professional crafters, and individuals needing to produce large-scale decals, signs, and apparel designs rapidly.
Mastering Cricut Design Space
Cricut Design Space is the software interface where all designing and project setup occurs. It acts as the control panel for your Cricut machine. Proficiency in Design Space is fundamental to effective Cricut operation.
Interface Overview
Upon launching Design Space, you will encounter the Canvas, which is your primary workspace. On the left are design tools, including image libraries, text tools, and shape creation. The top bar offers undo/redo functions, alignment options, and project saving. The right-hand panel displays layers, allowing you to manage individual elements of your design.
- Canvas: This is where you arrange, resize, and manipulate your design elements. It represents the space available on your cutting mat or Smart Material.
- Layers Panel: Crucial for complex designs. Each element—text, image, shape—exists on its own layer. You can hide, duplicate, group, and ungroup layers here.
- Tools Panel (Left):
- Templates: Provides pre-sized templates of common items (cards, shirts) to assist with design placement.
- Images: Access to Cricut’s extensive image library (some free, some part of Cricut Access).
- Text: Add and customize text, choosing from hundreds of fonts (system fonts and Cricut fonts).
- Shapes: Insert basic geometric shapes.
- Upload: Import your own SVG, JPG, PNG, GIF, BMP, or DXF files.
Key Design Space Functions
Several functions within Design Space are essential for transforming raw ideas into cut-ready designs.
- Weld: This function merges overlapping shapes or text into a single, cohesive shape. Imagine joining separate puddles of water to form a single, larger pool. This is critical for preventing individual cuts where objects overlap. For example, if you have script text with overlapping letters, welding them creates a single, continuous cut line. Without welding, each overlapping letter would cut through its neighbor.
- Attach: Attach keeps selected layers together on the cutting mat in their precise arrangement. Think of stapling multiple pieces of paper together so they move as one. This is vital for projects requiring specific placement, such as layered vinyl decals or cards with multiple elements.
- Slice: Slice allows you to cut one shape out of another, creating new shapes. This is like using a cookie cutter to remove a section from a larger piece of dough. It’s useful for cutting holes, creating intricate negative space, or splitting an image into multiple parts.
- Flatten: Flatten combines multiple layers into a single, printable image while preserving color and pattern. This function is used exclusively for “Print Then Cut” projects, where the design is first printed by a home printer and then cut by the Cricut machine. Flatten turns all selected layers into a single image that registers for printing.
- Contour: Contour allows you to hide or reveal specific cut lines within a selected layer. This is like using an eraser to remove unwanted details from a drawing. It’s particularly useful for simplifying complex images or removing internal cuts from shapes.
- Group/Ungroup: Grouping allows you to select multiple objects and treat them as one for resizing or moving, without merging their cut lines. Ungrouping separates them again. This is like putting a collection of items into a box; you can move the box, but the items inside remain individual.
- Align and Distribute: These tools help you arrange objects precisely, ensuring even spacing and consistent positioning.
Project optimization within Design Space requires understanding how these tools interact. Experimentation is the key to unlocking their full potential.
Preparing Materials for Cutting
The success of any Cricut project heavily relies on proper material preparation. Think of it as laying a solid foundation before building a house – a weak foundation leads to instability.

【More Economical Replacement】The HTVRONT 12x12 inch cutting mats compatible with Cricut Maker 3/Maker 4/Maker/Explore 3/4/5/Air 2/One machines. Good replacement mats, you will get 6 Pack cutting mat compatible with Cricut: 3PCS Standard Grip Mat + 1PC Light Grip Mat + 1PC Strong Grip Mat + 1PC Fabric Grip Mat , which will meet all your needs of different craft projects
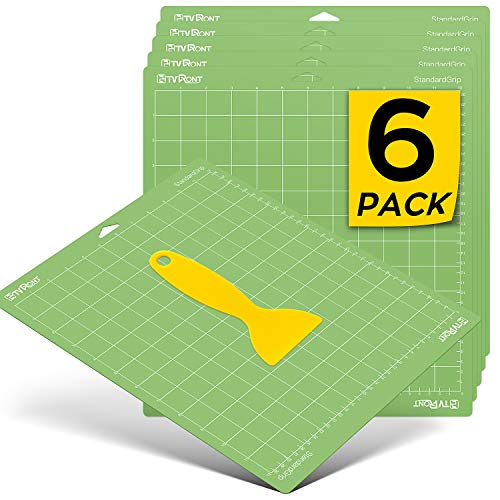
【More Economical Replacement】The HTVRONT 12x12 inch cutting mats compatible with Cricut Maker 3/Maker 4/Maker/Explore 3/4/5/Air 2/One machines. Good replacement for cricut mats, you will get 6 Pack cutting mat compatible with cricut: 6 pcs standard grip mat for cricut which will meet all your needs of different craft projects

【More Economical Replacement】The HTVRONT 12x24 inch cutting mats Compatible with Cricut Maker 3/Maker 4/Maker/Explore 3/4/Air 2/One machines. Good replacement mats, you will get 3 Pack cutting mat compatible with Cricut: 3PCS Standard Grip Mat, which will meet all your needs of different craft projects.Large size cutting mat also saves your time on long patterns, even the same pattern needs to be cut several pieces
Understanding Cutting Mats
Cricut cutting mats are adhesive surfaces that hold your material in place during cutting. They come in various adhesion strengths, each suited for different material types.
- LightGrip Mat (Blue): This mat has the least adhesion and is designed for delicate materials like copy paper, vellum, light cardstock, and thin vinyl. Using a stronger mat with these materials can lead to tearing or damage upon removal.
- StandardGrip Mat (Green): This is the most versatile mat and is suitable for a wide range of materials, including medium cardstock, adhesive vinyl, iron-on vinyl, and poster board. It’s the workhorse mat for most projects.
- StrongGrip Mat (Purple): For thicker and heavier materials, such as glitter cardstock, chipboard, balsa wood (with Maker), and fabric with backing. Its strong adhesive ensures these materials do not shift during cutting.
- FabricGrip Mat (Pink): Exclusively for fabrics, this mat has a specialized adhesive and often a fabric backing to prevent fraying and ensure clean cuts with the Rotary Blade (Maker only).
Proper mat care is crucial for longevity. Always replace the protective cover when not in use to prevent dust and debris accumulation. Clean mats gently with alcohol-free wipes or by lightly dabbing with a lint roller to refresh adhesion.
Material Selection and Placement
Choosing the right material for your project is paramount. Each material has specific properties that influence cutting settings.
- Vinyl: Available in permanent, removable, heat transfer (iron-on), and specialty varieties. Ensure the correct setting is chosen in Design Space. When placing vinyl on the mat, roll it smooth with a brayer to eliminate air bubbles and ensure full adhesion.
- Cardstock: Comes in various weights (e.g., 65 lb, 80 lb, 110 lb). Thicker cardstock may require more pressure or multiple passes. Use a brayer to secure it to the mat. Bending the mat away from the cardstock during removal helps prevent curling.
- Fabric: For projects with fabric, especially on the Maker, consider using a fabric stabilizer or non-fraying fabric type. The FabricGrip mat is essential for these projects. Ensure the fabric is pressed flat and adheres well to the mat.
- Thicker Materials (e.g., Balsa Wood, Chipboard): These materials require the StrongGrip mat and the Knife Blade (Maker only). Multiple passes at low pressure are often more effective than a single, high-pressure pass to achieve a clean cut and prevent splintering. Always follow Design Space’s recommended cut settings for these materials.
When placing materials on the mat, ensure they are positioned within the designated cut area in Design Space. Align the top-left corner of your material with the top-left corner of the adhesive area on your mat. This ensures your design cuts accurately in the intended location.
If you’re looking to enhance your crafting projects with realistic details, you might find inspiration in a related article that offers valuable insights. For example, check out this informative piece on creating realistic air dry food decor, which provides five essential tips that can complement your Cricut designs beautifully. By incorporating these techniques, you can elevate your crafting game and achieve stunning results that impress everyone.
Executing Your First Cut
| Model | Cutting Force (grams) | Max Cutting Thickness (mm) | Connectivity | Compatible Materials | Price Range |
|---|---|---|---|---|---|
| Cricut Explore Air 2 | 350 | 1.5 | Bluetooth, USB | Vinyl, Cardstock, Iron-on, Paper | 200 – 250 |
| Cricut Maker 3 | 4000 | 2.4 | Bluetooth, USB | Leather, Fabric, Wood, Vinyl, Cardstock | 350 – 400 |
| Cricut Joy | 350 | 0.5 | Bluetooth, USB | Vinyl, Cardstock, Iron-on | 150 – 180 |
| Cricut Explore 3 | 350 | 1.5 | Bluetooth, USB | Vinyl, Cardstock, Iron-on, Paper | 250 – 300 |
Performing your first cut can seem daunting, but by following a straightforward process, you can achieve successful results. Think of it as preparing a meal; each step contributes to the final outcome.

REPLACEMENT FINE-POINT BLADE - Cut designs of your choice and create fun projects using the Cricut Premium Fine-Point Replacement Blade, a blade with lasting sharpness that cuts a variety of crafting materials when used with housing (sold separately)

Cutting blades for all paper-cutting Cricut machines

Premium Fine Point Blade + Housing : Chaokant's replacement fine point blade and housing are compatible with Cricut Maker 3, Maker, Explore 3, Air 2, Air, and One. Premuim Fine-Point Blade + Housing designed to cut a wide variety of materials for your projects
Setting Up Your Machine
Before initiating a cut, ensure your machine is properly configured.
- Power On: Connect your Cricut machine to a power outlet and press the power button.
- Connect to Computer/Device: Establish a connection via Bluetooth or USB. For Bluetooth, ensure it’s enabled on both your Cricut machine and your computer/mobile device. Most Cricut machines will automatically connect once paired.
- Insert Blade/Tool: Open the clamp on your machine’s carriage and insert the correct blade or tool. For most initial cuts, this will be the Fine-Point Blade. Ensure it clicks firmly into place.
- Prepare Mat: Place your prepared material onto the appropriate cutting mat, ensuring it is smooth and adhered well. Use a brayer if necessary.
- Load Mat: Align the mat under the guides on the machine. Press the blinking Load/Unload button (double-arrow icon) to feed the mat into the machine.
Design Space Workflow for Cutting
Once your design is complete in Design Space, the cutting process begins.
- Click “Make It”: In Design Space, click the “Make It” button. This takes you to the “Prepare” screen, where you verify your project layout across the virtual mats.
- Verify Mat Layout: Design Space will automatically arrange your design elements onto virtual mats. Review this layout.
- Mirror Image (for Iron-On/HTV): If you are using iron-on vinyl (HTV), always toggle the “Mirror” option for each mat containing HTV. This is crucial as HTV is applied mirrored and then flipped onto the garment. Failure to mirror will result in reversed text or designs.
- Material Size: Ensure the selected material size on the virtual mat matches the actual size of the material you’ve placed on your physical mat.
- Click “Continue”: Proceed to the “Make” screen.
- Select Material Settings: This is a critical step. From the “Browse All Materials” list, select the exact material you are cutting (e.g., “Premium Vinyl – Permanent,” “Heavy Cardstock,” “Iron-On”). If your machine has a physical Smart Dial (Explore Air 2), set the dial to “Custom” and then select your material in Design Space.
- Pressure Settings: Most material settings have a default pressure, but you can often adjust it to “Less” or “More” if needed. For intricate cuts or slightly thicker materials, “More” pressure can be beneficial. For delicate materials, “Less” may prevent tearing.
- Load Tools: Design Space will prompt you to ensure the correct tool (blade, pen, etc.) is loaded.
- Start Cut: Once the material setting is confirmed and the tool is loaded, the “Go” button (Cricut “C” logo) on your machine will blink. Press it to begin the cutting process.
- Unload Mat: After the cut is complete, the Load/Unload button will blink. Press it to unload the mat.
- Remove Material: Gently peel the mat away from your cut material, or peel the material away from the mat, to avoid curling or damage. Use a weeding tool or spatula for assistance.
Always perform a test cut on a small, inconspicuous area of your material, especially when working with new materials or complex designs, to ensure settings are correct before committing to the full project.
If you’re looking to enhance your crafting skills, exploring the world of Cricut machines can be incredibly rewarding. These versatile tools allow you to create intricate designs and personalized items with ease, making them perfect for holiday projects. For inspiration on how to incorporate DIY elements into your Christmas decorations, check out this insightful article on why DIY ornaments make perfect Christmas decor. Whether you’re a seasoned crafter or just starting out, the possibilities are endless when you combine Cricut technology with your creative ideas.
Advanced Techniques and Troubleshooting
Beyond basic cutting, Cricut machines offer advanced features that can elevate your projects. However, like any precision tool, troubleshooting may be required.
Print Then Cut
Print Then Cut allows you to print an image on your home printer and then have your Cricut precisely cut around the printed design. This is ideal for stickers, labels, and intricate designs with multiple colors or gradients.
- Workflow:
- Design your image in Design Space, incorporating multiple colors or patterns.
- Select all layers of your design and click the “Flatten” button in the Layers panel. This converts your multi-layered design into a single, printable image.
- Click “Make It.” Design Space will add a black registration mark around your design. This mark is crucial for the Cricut machine to accurately read where to cut.
- Send the design to your home printer (ensure “Add Bleed” is selected for seamless cuts if needed).
- Once printed, place the printed sheet onto your Cricut cutting mat, aligning it precisely with the top-left corner of the mat.
- Load the mat into your Cricut machine. The machine’s sensor light will scan the registration marks to identify the exact cutting boundaries.
- The Cricut will then cut around your printed design.
Scoring and Writing
Cricut machines can also score and write, adding functional and decorative elements to your projects.
- Scoring: Using a Scoring Stylus (Explore and Maker) or Scoring Wheel (Maker only), your machine can create fold lines on cardstock and other materials. This is invaluable for card making, boxes, and 3D projects. In Design Space, change the Linetype of a line on your canvas to “Score.”
- Writing/Drawing: Cricut pens allow you to add text or drawings to your projects. These pens come in various colors and tip sizes. In Design Space, change the Linetype of text or a drawing to “Draw” and select your desired pen color. The machine will pause, prompting you to insert the pen when it’s time for the drawing step.
Troubleshooting Common Issues
Even experienced crafters encounter problems. Here are common issues and their solutions:
- Inaccurate Cuts/Cuts Not Going Through:
- Dull Blade: Replace your blade. Blades dull over time, especially with frequent use on dense materials.
- Incorrect Material Setting: Double-check that the selected material setting in Design Space matches your actual material. Try increasing the pressure setting to “More” or selecting a slightly thicker material setting.
- Mat Adhesion: Ensure your material is firmly adhered to a clean, adequately sticky mat. Poor adhesion can lead to material shifting during cutting.
- Machine Calibration (Print Then Cut): If your Print Then Cut projects are misaligned, perform a calibration in Design Space. Go to “Menu > Calibration > Print Then Cut.”
- Material Tearing/Dragging:
- Blade/Tool Issue: Check for debris on the blade or replace a damaged blade.
- Excessive Pressure: The material setting might be too strong for your material. Try selecting a “Less” pressure setting or a lighter material setting.
- Overused Mat: A mat that is too sticky (new StrongGrip on delicate material) or too worn (losing adhesion) can cause issues.
- Bluetooth Connectivity Problems:
- Restart Everything: Restart your Cricut machine, computer/mobile device, and Design Space.
- Check Bluetooth Settings: Ensure Bluetooth is enabled on both devices and the Cricut is paired.
- Move Closer: Reduce the distance between your Cricut and your device.
- Update Software: Ensure both your Design Space software and your Cricut machine’s firmware are up to date. You can check for firmware updates in Design Space under “Menu > Firmware Update.”
- Design Space Crashing/Freezing:
- Clear Cache: In Design Space, go to “Settings > General > Clear Cache” to resolve potential data corruption.
- Update Software: Ensure your Design Space is the latest version.
- System Requirements: Verify your computer or mobile device meets the minimum system requirements for Design Space.
Maintaining Your Cricut Machine
Regular maintenance extends the life and performance of your Cricut machine. Treat it as a finely tuned instrument.
Blade Care and Replacement
Blades are consumable components and will dull over time, impacting cut quality.
- Regular Cleaning: After each project, especially with sticky or fibrous materials, check your blade for debris. Use a small brush or a piece of crumpled aluminum foil (jab the blade into the foil a few times) to clean any residue.
- Replacement Schedule: There is no fixed schedule for blade replacement, as it depends on material types and frequency of use. If your cuts become ragged, incomplete, or require multiple passes when they previously didn’t, it’s likely time for a new blade.
- Blade Storage: Store blades and housing units properly to prevent damage or loss. Keep them in their protective caps or designated compartments.
Mat Care and Cleaning
Cutting mats lose their stickiness over time due to dust, material fibers, and general use.
- Protective Cover: Always replace the clear protective sheet on your mat when it’s not in use. This is the most important step to prolong mat life.
- Gentle Cleaning: For LightGrip and StandardGrip mats, a simple lint roller can often pick up fibers and dust. For more thorough cleaning, use alcohol-free baby wipes or a damp cloth with mild soap, scrubbing gently. Allow the mat to air dry completely, adhesive side up, before replacing the protective sheet.
- StrongGrip Mat Cleaning: StrongGrip mats can be cleaned similarly, but may require a bit more effort. Avoid harsh chemicals as they can dissolve the adhesive.
- Restoring Stickiness (Temporary): Some users report success with a very light application of temporary adhesive spray, but this can be inconsistent and may impact machine performance or leave residue. It’s generally better to replace a truly worn-out mat.
Machine Cleaning
Keep the interior and exterior of your Cricut machine free from dust and debris.
- Exterior: Wipe down the exterior with a soft, dry cloth.
- Roller Bar: Periodically, inspect the roller bar for any material scraps or adhesive residue that might accumulate. Gently wipe it clean with a soft, damp cloth. Avoid harsh chemicals.
- Carriage Path: Ensure the carriage path (where the blade housing moves) is free of obstructions. Use canned air to blast away dust if necessary.
- Sensors: For machines with Print Then Cut capabilities (Explore and Maker), ensure the sensor window (a small clear window on the carriage) is clean and free of smudges. A soft, dry cloth can be used.
Regular, gentle maintenance is an investment in the longevity and reliable performance of your Cricut machine. By adhering to these practices, you can ensure your machine remains a dependable tool for your creative endeavors.