Imagine yourself getting your hands dirty, shaping and molding clay into beautiful creations. With air dry clay, the possibilities are endless for beginners like you who crave artistic freedom.
From sculpting adorable animals to crafting unique jewelry, this versatile medium allows you to unleash your creativity without the need for a kiln.
So, dive into the world of air dry clay and discover the joy of bringing your imagination to life through simple and satisfying projects.
Sculpting Animals
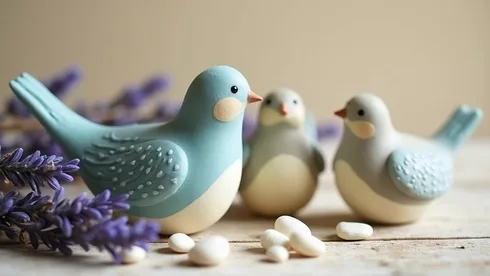
To sculpt animals using air dry clay, you’ll need a variety of tools and your imagination. Creating clay animal figurines can be a fun and rewarding project for beginners.
Start by gathering your materials, including air dry clay, sculpting tools, and references of the animals you want to create.
Begin by shaping the clay into a basic form, focusing on the overall shape and proportions. From there, you can add details like facial features, fur textures, or scales using various animal sculpture techniques.
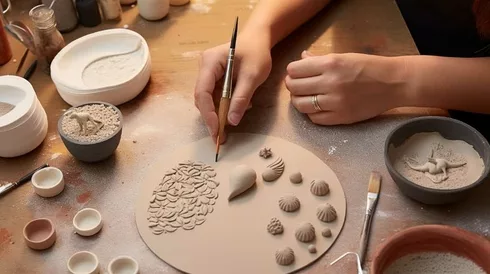
Experiment with different tools to create different textures and patterns. Remember to let your imagination run wild and don’t be afraid to make mistakes.
Sculpting animals with air dry clay allows you the freedom to explore your creativity and bring your favorite animals to life.
Making Jewelry
If you’re looking to add some unique accessories to your collection, making jewelry with air dry clay is a great option.
You can create clay bead necklaces in various shapes and sizes, allowing you to customize your designs to suit your style.
Additionally, you can make earrings and studs that are lightweight and comfortable to wear.
Lastly, clay pendant charms offer a versatile way to showcase your creativity, whether you prefer minimalist designs or intricate patterns.
Clay Bead Necklaces
Create beautiful clay bead necklaces with air dry clay by rolling and shaping the clay into various bead shapes and stringing them onto a necklace.
This project allows you to showcase your creativity and style while enjoying the freedom to design unique accessories.
To start, take a small amount of air dry clay and roll it into a ball. Flatten the ball slightly and use a toothpick or a skewer to create a hole in the center.
You can experiment with different shapes like spheres, cylinders, or even geometric shapes. Once you have made a variety of beads, allow them to dry completely.
Then, string them onto a necklace chain or a piece of string to create your very own clay bead necklace.
This project is a great way to express your individuality and make a fashion statement. So, go ahead and let your imagination run wild as you create beautiful clay bead necklaces that reflect your personal style.
Earrings and Studs
Start by gathering your materials and prepare to make stylish earrings and studs using air dry clay. Clay jewelry making is a fun and creative way to express your personal style.
To make earrings and studs, you’ll need air dry clay, a rolling pin, a small cookie cutter or template for shaping the clay, earring posts or hooks, and some paint or varnish for finishing touches.
Start by kneading the clay to make it soft and pliable. Roll it out to your desired thickness and use the cookie cutter or template to cut out your earring shapes. Make a hole for the earring post or hook, and let the clay dry completely.
Once dry, paint or varnish your earrings and attach the earring posts or hooks. Now you have a unique pair of earrings or studs that you can proudly wear or give as a gift.
Clay Pendant Charms
To continue exploring the world of clay jewelry making, let’s dive into the art of creating clay pendant charms.
Clay pendant charms are a versatile and fun way to express your creativity while making personalized jewelry. There are various techniques you can use to create unique clay pendant designs. One popular technique is stamping, where you can use rubber stamps or even household objects to imprint patterns onto the clay.
Another technique is adding texture using tools like toothpicks or textured mats. You can also experiment with different shapes and sizes, from simple circles to intricate shapes like hearts or animals.
Once you’ve shaped your pendant, allow it to dry completely before painting or adding any decorative elements. Finally, attach a jump ring or bail to your pendant and string it onto a chain or cord to complete your jewelry piece.
With these clay pendant techniques, the possibilities are endless for creating beautiful and personalized jewelry that reflects your style and personality.
Creating Decorative Bowls
One simple project for beginners using air dry clay is to make a set of decorative bowls. With air dry clay, you can create unique and personalized bowls that add a touch of style to your home decor. Here are five ideas to inspire your creativity:
- Marbled Bowls: Mix different colors of clay to create a marbled effect, resulting in stunning and eye-catching bowls.
- Stamped Bowls: Use various objects like leaves, flowers, or even kitchen utensils to create textured patterns on the surface of the bowls.
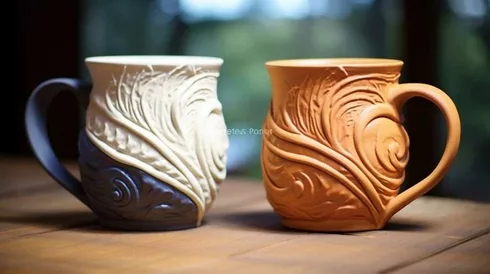
- Embossed Bowls: Press textured materials like lace or fabric onto the clay to leave an imprint and create intricate designs.
- Painted Bowls: After the clay has dried, paint the bowls with acrylic paints to add vibrant colors and unique patterns.
- Gold Leaf Bowls: Apply gold leaf to the surface of the bowls for a luxurious and elegant touch.
Let your imagination run wild and create decorative bowls that reflect your personal style and add a special touch to your home.
Handprint Keepsakes
Continue your creative journey with air dry clay by exploring the world of handprint keepsakes. Handprint ornaments and clay handprint frames are perfect projects for beginners looking to create personalized and sentimental gifts or decorations.
To make handprint ornaments, start by rolling out the air dry clay into a flat, even surface. Press your hand firmly into the clay to create a handprint. Use a straw or toothpick to poke a hole at the top for hanging. Allow the clay to dry completely before painting and decorating.
For clay handprint frames, roll out the clay and press your hand firmly onto it. Cut out a rectangular shape around the handprint and use a smaller cookie cutter to create a window for the photo. Allow the clay to dry, then paint and decorate as desired.
With these simple projects, you can capture memories and create beautiful keepsakes that will be treasured for years to come.
Designing Miniature Figures
Now that you’ve mastered handprint keepsakes, it’s time to explore the world of designing miniature figures using air dry clay.
From popular designs like animals and characters to unique creations of your own, the possibilities are endless.
Learn different sculpting techniques for beginners, such as shaping the clay and adding details, and discover painting and finishing tips to bring your miniature figures to life.
Get ready to unleash your creativity and create your own tiny world.
Popular Miniature Figure Designs
Explore popular designs for miniature figures using air dry clay. If you’re interested in creating your own miniature figures, there are endless possibilities to choose from. Here are five popular designs that you can try using air dry clay:
- Cute animals: From tiny kittens to adorable puppies, sculpting miniature animals is always a hit. You can add details like fur, eyes, and even little accessories to make them even more charming.
- Fantasy creatures: Unleash your imagination and create mystical creatures like fairies, dragons, or unicorns. Let your creativity run wild as you sculpt their unique features and add vibrant colors.
- Food miniatures: Who can resist tiny clay food? Make miniature burgers, pizzas, or even a sushi set. The possibilities are endless, and they make great decorations or jewelry pieces.
- Character replicas: Recreate your favorite characters from movies, TV shows, or video games. Whether it’s superheroes, Disney princesses, or iconic characters, bring them to life in miniature form.
- Miniature landscapes: Create miniature scenes like a cozy garden, a serene beach, or a magical forest. Use polymer clay techniques to sculpt trees, flowers, and other elements to make your landscape come alive.
With air dry clay, you have the freedom to experiment with different designs and techniques. Let your creativity soar and have fun bringing your miniature figures to life.
Sculpting Techniques for Beginners
To begin designing miniature figures with air dry clay, you can start by learning some sculpting techniques for beginners. Sculpting techniques for pottery aren’t only fun but also allow you to unleash your creativity and bring your ideas to life.
One technique you can try is pinch pottery, where you use your fingers to shape the clay by gently pinching and squeezing it. This technique is great for creating small details and adding texture to your sculptures.
Another technique is coil building, which involves rolling out clay coils and then stacking and shaping them to form your desired figure. This technique is perfect for creating larger, more intricate sculptures.
Don’t be afraid to experiment with different tools and techniques to create unique and textured clay sculptures. Let your imagination run wild and enjoy the process of sculpting with air dry clay.
Painting and Finishing Tips
After learning some basic sculpting techniques for air dry clay, it’s time to move on to painting and finishing tips for designing miniature figures. Here are some tips to help you bring your creations to life:
- Experiment with different painting techniques such as dry brushing, washes, and layering to add depth and dimension to your figures.
- Use a combination of acrylic paints and washes to achieve realistic skin tones and vibrant colors.
- Don’t be afraid to add texture to your figures by using techniques like stippling, sponging, or using a toothbrush to create interesting effects.
- Consider adding details such as eyes, hair, and clothing using fine-tipped brushes or even toothpicks for precision.
- Finally, protect your finished figures by applying a clear varnish or sealant to ensure their longevity.
With these painting and finishing tips, you’ll be able to take your air dry clay creations to the next level and create stunning miniature figures that truly capture your imagination.
Crafting Coasters
Start by choosing a few different colors of air dry clay to create your own set of unique coasters. Coasters aren’t only functional but can also be a great way to showcase your creativity.
When it comes to coaster design ideas, the possibilities are endless. You can create geometric patterns, floral designs, or even abstract art.
To add color to your coasters, mix acrylic paints with a little bit of water to create a watercolor effect. You can also use paint pens or markers to draw intricate designs or add details.
Don’t be afraid to experiment with different coaster painting techniques, such as splatter painting or using stencils. The key is to have fun and let your imagination run wild.
Building Plant Pots
For building plant pots, you can use air dry clay to create your own unique and functional containers. Air dry clay is a versatile material that allows you to experiment with various plant pot designs and potting techniques. Here are five ideas to inspire you:
- Geometric Modern: Create sleek and angular plant pots that add a contemporary touch to your space.
- Textured Rustic: Add texture to your plant pots by imprinting them with natural materials like leaves or fabric.
- Animal-inspired: Mold your air dry clay into adorable animal shapes, turning your plant pots into cute and whimsical additions to your home.
- Marble Effect: Mix different shades of clay to achieve a stunning marble effect, giving your plant pots an elegant and luxurious look.
- Hanging Planters: Shape the clay into unique designs that can be hung from the ceiling or mounted on the wall, saving space and adding visual interest to your home.
With air dry clay, the possibilities for creating beautiful and functional plant pots are endless. Let your imagination run wild and enjoy the freedom of designing your own unique pieces.
Decorating Christmas Ornaments
Continuing with your exploration of air dry clay projects, let’s now delve into the creative world of decorating Christmas ornaments.
This is a perfect opportunity to showcase your artistic skills and create personalized gift ideas for your loved ones. With air dry clay, you can mold various shapes and designs, making each ornament unique.
Whether you want to create traditional holiday symbols like snowflakes and Christmas trees or go for more abstract and modern designs, the possibilities are endless. You can also incorporate different techniques like stamping, painting, and adding textures to give your ornaments an extra touch of creativity.
Holiday crafts like these not only add charm to your Christmas tree but also serve as cherished keepsakes for years to come.
Conclusion
In conclusion, air dry clay is a fantastic medium for beginners to explore their creativity and create beautiful projects. Whether it’s sculpting animals, making jewelry, or crafting decorative bowls, the possibilities are endless.
You can even design miniature figures, build plant pots, or decorate Christmas ornaments. With air dry clay, the only limit is your imagination.
So grab some clay and let your creativity soar!

