You might not realize that air dry clay, unlike traditional ceramics, requires no kiln or oven—a relatively modern convenience that’s transformed crafting for hobbyists everywhere. Making air dry clay rabbits is an accessible project that you can complete in just a few days, combining simple materials with basic sculpting techniques. Whether you’re seeking a decorative piece or exploring a new creative outlet, understanding the fundamentals of this craft will set you up for success, so let’s explore what you’ll need to begin.
Key Takeaways
- Build a styrofoam armature base, then cover it entirely with rolled air-dry clay in thin, uniform layers for stability.
- Smooth the clay surface using water-dampened thumbs before adding details to create an even, refined foundation.
- Sculpt facial features by pressing a ball-point pen cap for eyes, carving a nose, and adding small clay balls.
- Dry the rabbit in a warm, well-ventilated room for 24–48 hours, rotating periodically to prevent uneven cracking.
- Apply two coats of acrylic paint, then seal with varnish or wax finish for durability and polished appearance.
History
While air dry clay might seem like a modern invention, it’s actually the product of creative experimentation throughout the twentieth century, developed by multiple inventors and craft enthusiasts rather than a single creator.
Early versions emerged from cold porcelain clay in Argentina, which combined cornstarch and glue into a moldable mixture.
As crafting evolved, developers introduced paper clay by mixing cellulose fibers into traditional clay formulas.
European and American craft labs simultaneously created polymer alternatives, refining these early experiments.
By the mid-twentieth century, breakthrough formulas combined household ingredients like glue, starch, and plasticizers into self-hardening clay.
Modern manufacturers worldwide enhanced these original recipes, producing softer textures, improved durability, and vibrant colors. The availability of wooden tools and shaping implements made the sculpting process more accessible and precise for hobbyists.
This democratization of clay-working meant you could create detailed sculptures at home without expensive kilns or specialized equipment.
Project
Creating an adorable air dry clay rabbit is a rewarding craft project that requires minimal supplies and can be completed in just a few days. This sculptural technique combines simple armature construction with clay covering methods to produce a charming bunny figure.
Whether you’re crafting for Easter decorations, gifts, or personal enjoyment, this project offers flexibility in design while maintaining achievable results for crafters of all skill levels.
The beauty of this project lies in its versatility and accessibility. You can customize your rabbit’s appearance through paint colors, size variations, and facial expressions. The fail-proof armature method using styrofoam construction ensures stable results even for beginners.
The process involves building a stable internal structure, carefully layering clay over the armature, allowing proper drying time, and finishing with acrylic paint. With patience and attention to the drying process, you’ll create a polished ceramic-like piece that showcases your creative skills.
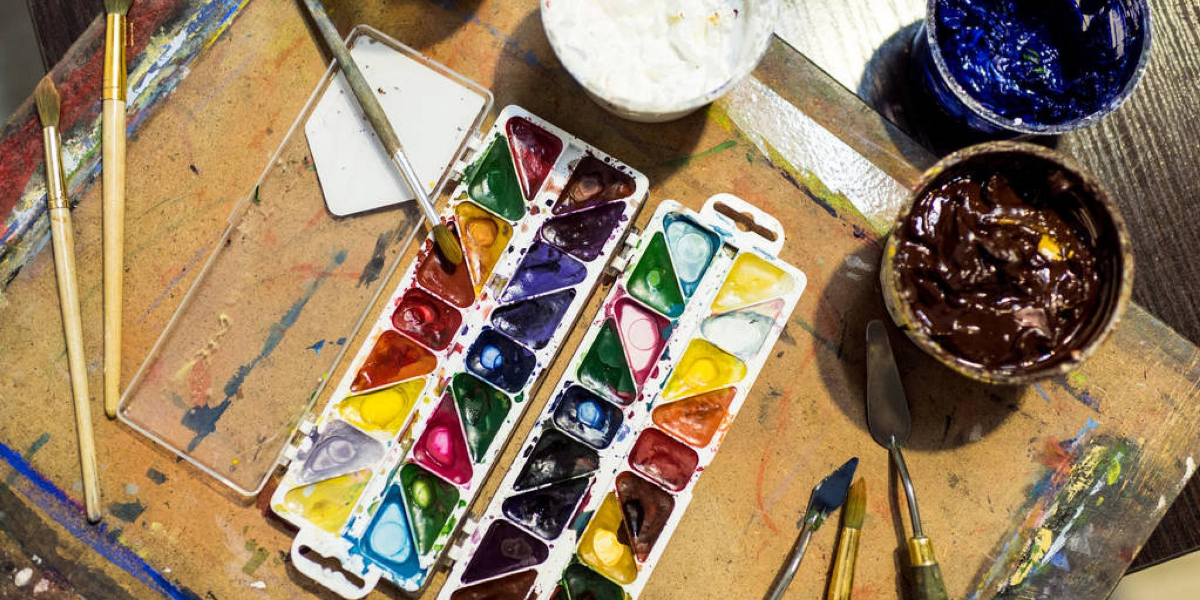
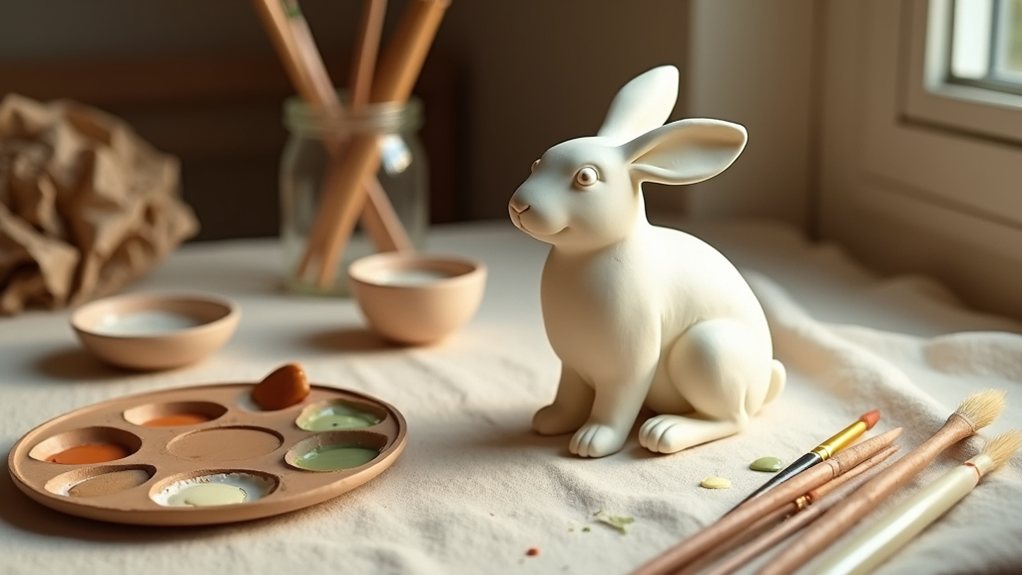
Materials Needed:
- Air dry clay (approximately 1-2 lbs / 450-900 grams)
- Styrofoam, flowerpot, and aluminum foil for armature construction
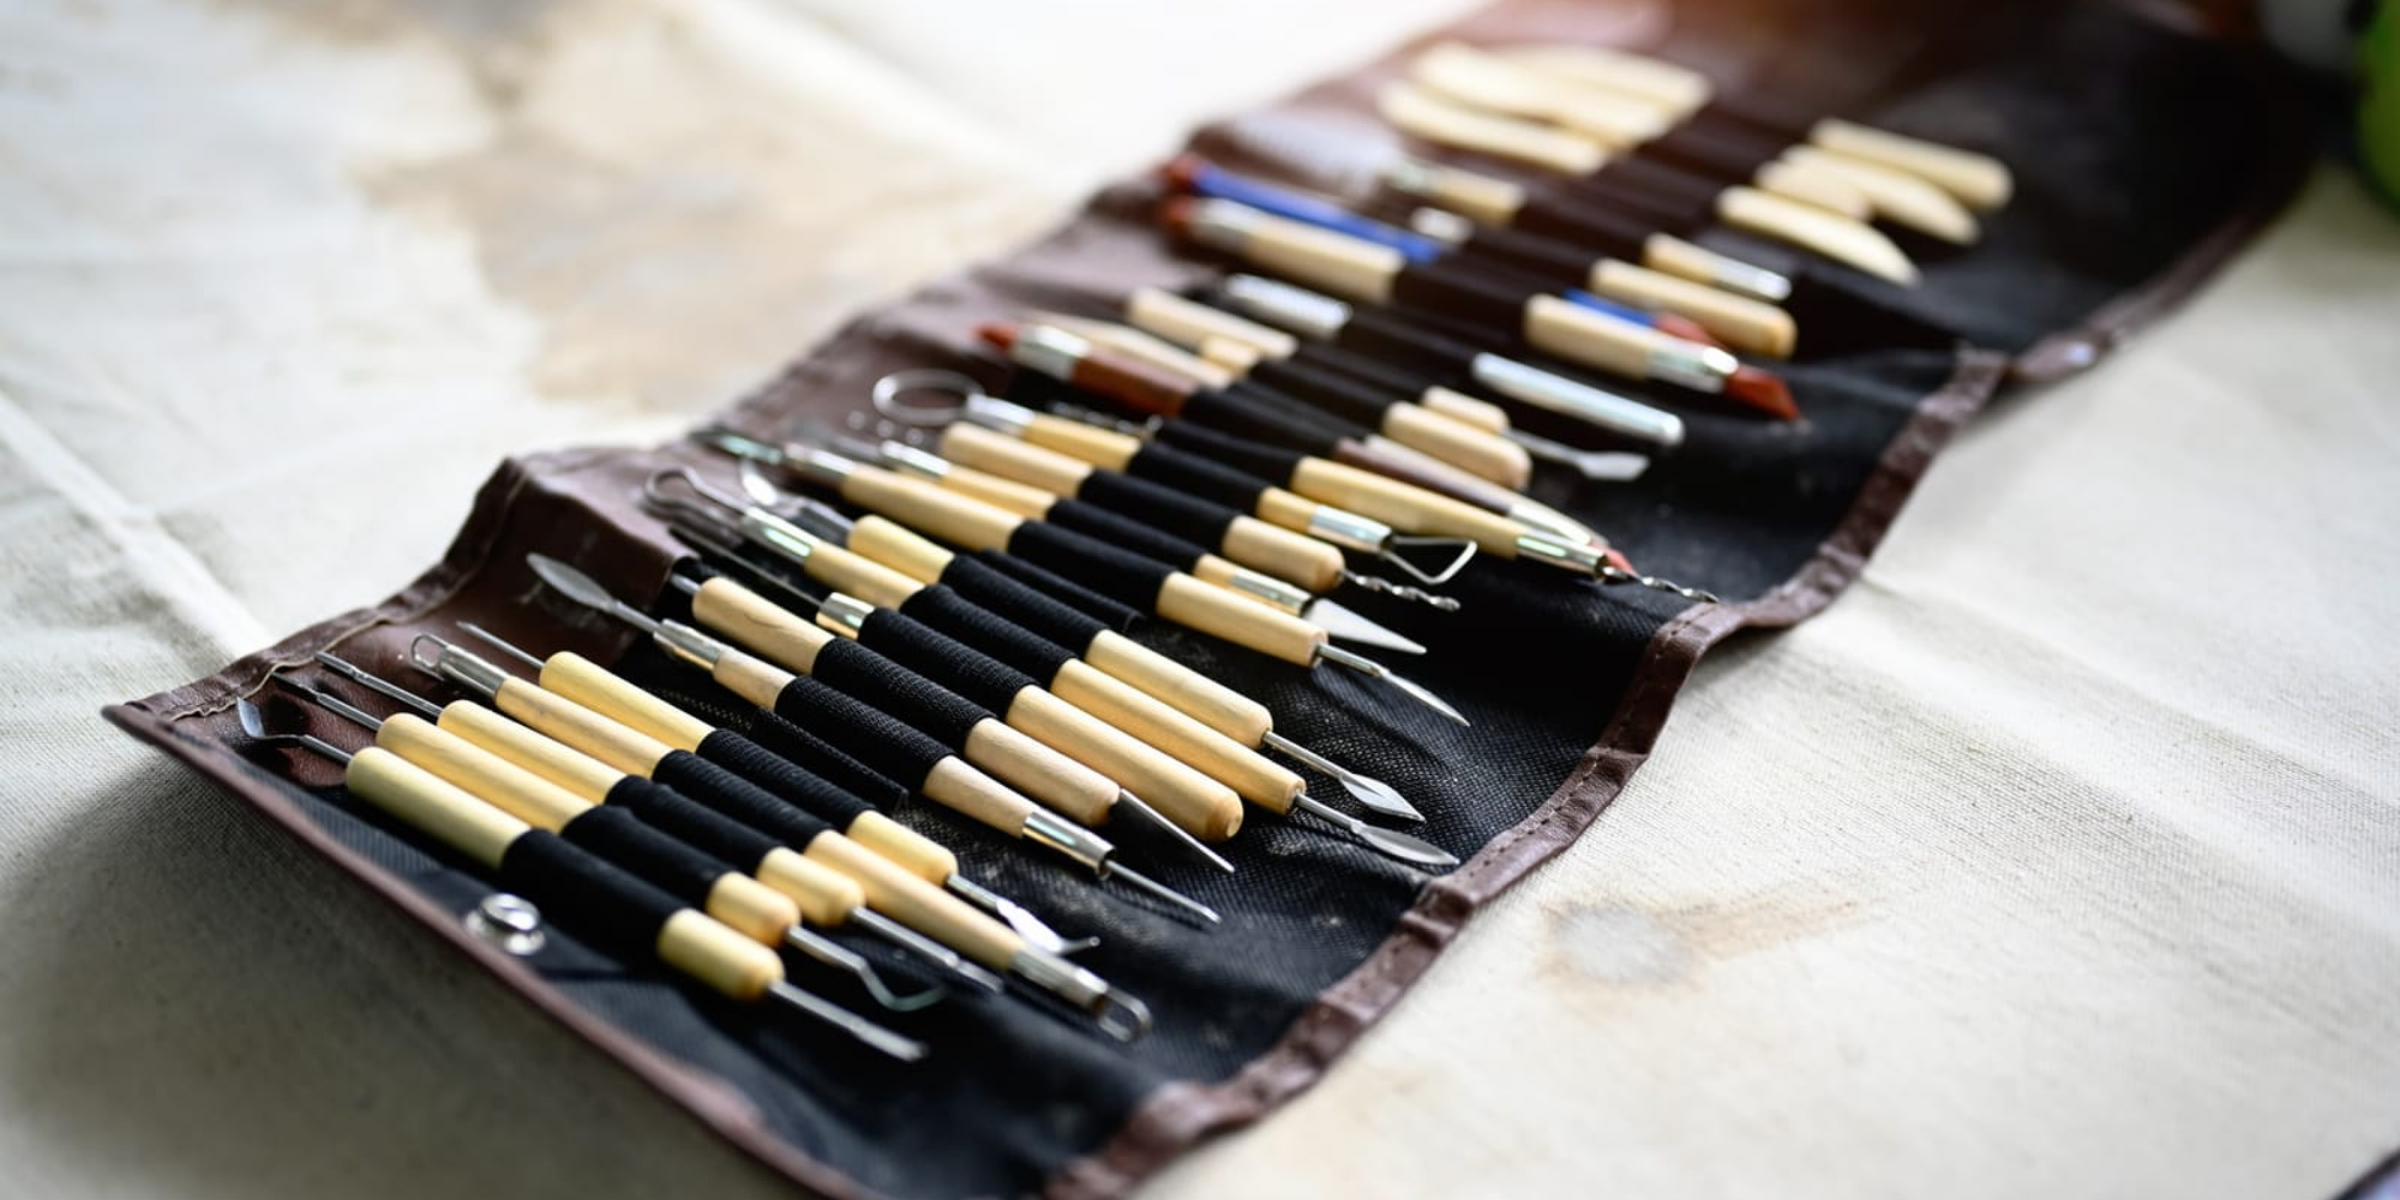
- Sculpting tools or household items (toothpicks, spoons)
- Acrylic paints and paintbrushes
- Water for smoothing surfaces
Instructions:
Begin by constructing your armature using a styrofoam bunny shape or alternative base like a flowerpot turned upside down, securing it with a bolt if needed.
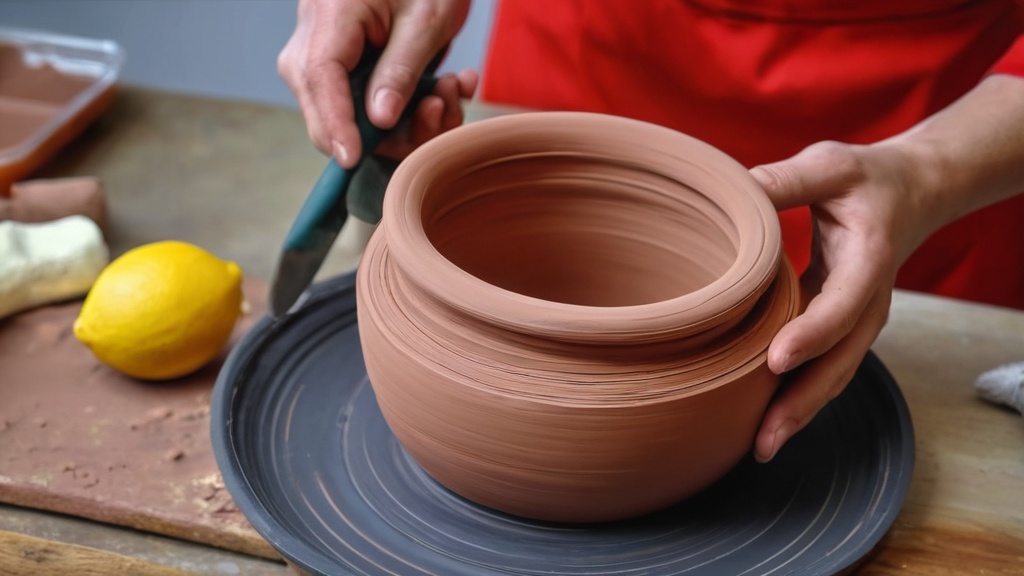
Roll your air dry clay to 1/8 to 1/4 inch (3-6 mm) thickness and gradually press it onto the armature from bottom to upward, ensuring flat adherence and smooth transitions.
Use water-dipped fingers or tools to blend seams, and apply thin layers to prevent breakage during finishing.
Once fully covered, place your rabbit in a well-ventilated, warm room for a minimum of 24 hours, covering it with a plastic bag to slow drying and prevent cracks while rotating periodically for even drying.
Test dryness by pressing a fingernail into the bottom—if it leaves a mark, allow more time.
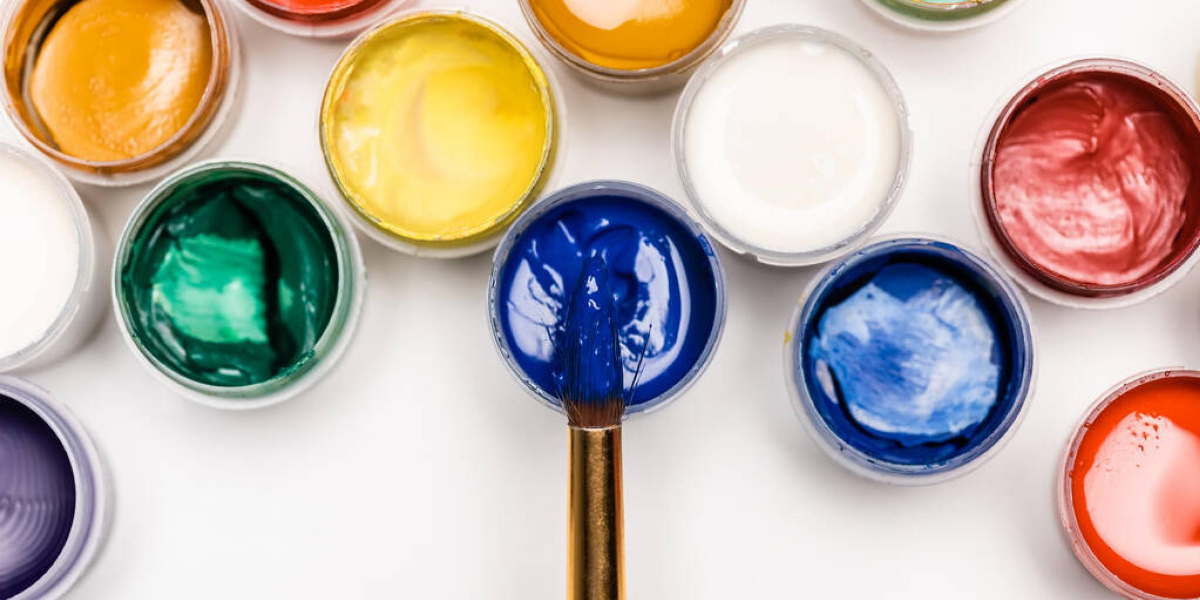
Finally, sand any rough areas, patch cracks with leftover clay, and paint with acrylic paints, applying a wax finish and buffing for a polished shine.
Extra Tips:
Before handling clay, wash your hands to prevent smudges and discoloration on your finished piece.
Use folded plastic wrap as a smoothing tool for delicate clay surfaces, and chop the bottom of an egg-shaped head slightly to create sitting stability.
If you prefer faster drying, use a low convection oven setting rather than traditional baking, and always allow 24 hours for any wax finish to dry completely before handling or displaying your finished rabbit.
Project Steps
You’ll start by rolling your clay into a ball and shaping it into a head with ears, establishing the foundation for your rabbit’s structure.
Next, you’ll form the body and legs, ensuring each piece connects securely to your armature before adding clay details like eyes, nose, and mouth features.
Finally, you’ll complete your project by painting and sealing the rabbit, transforming your clay creation into a finished, durable piece. Allow heat from a warm environment to aid in the drying process, as air dry clay sets faster in warmer conditions.
Step 1. Roll Clay Into Ball
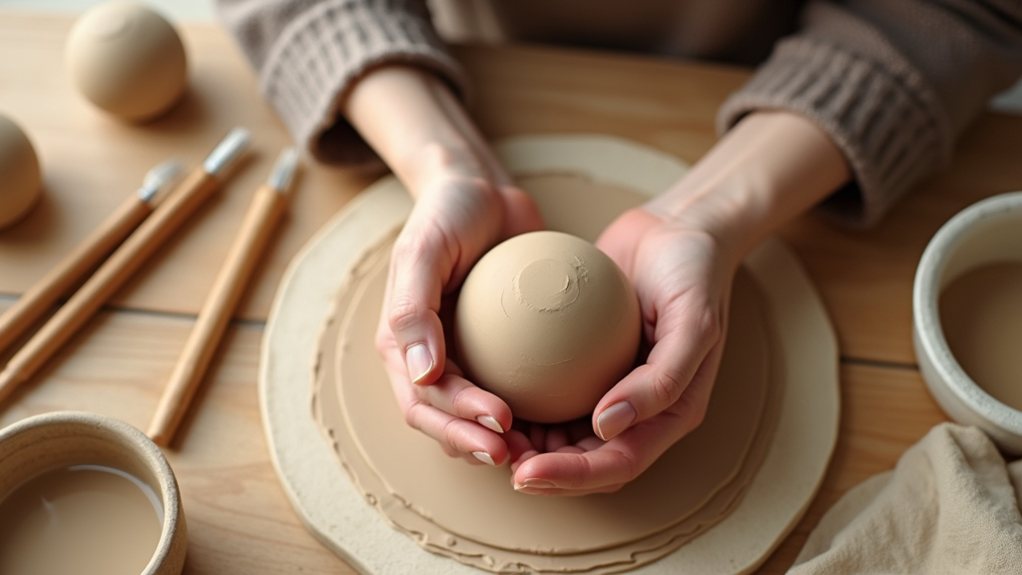
Once you’ve prepared your clay by slamming it to remove air pockets and moistening it to a workable consistency, you’re ready to begin forming the foundational sphere for your rabbit.
Start by rolling the clay between your palms using circular, continuous motions, gradually shaping it into a ball.
You don’t need perfection at this stage—aim for a smooth, sphere-like form that serves as your base structure.
Keep rotating the clay constantly as you work, ensuring even pressure from all angles.
This rotation prevents flat spots and promotes uniform development.
Your finished ball should feel balanced in your hands and maintain its round shape without collapsing under its own weight. For air dry clay projects, ensure your finished sphere maintains smoothness and sphere-like form to provide the best foundation for sculpting rabbit features.
Step 2. Shape Head and Ears
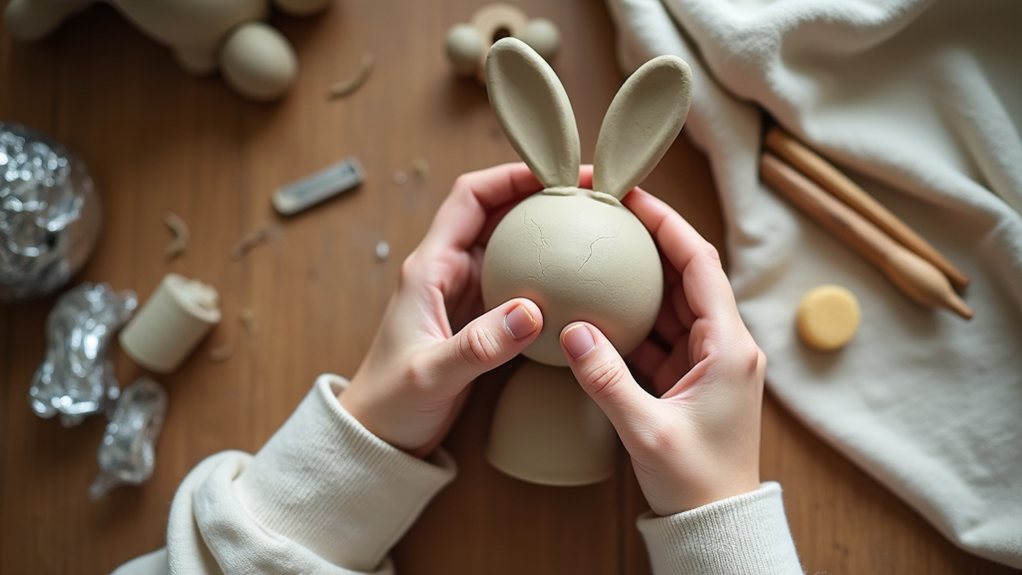
Now that you’ve established your clay body, it’s time to build the head and ears—the features that’ll give your rabbit its distinctive character and charm.
Start by forming an egg shape from tin foil for your head base, then build up the shoulders with additional foil around your armature.
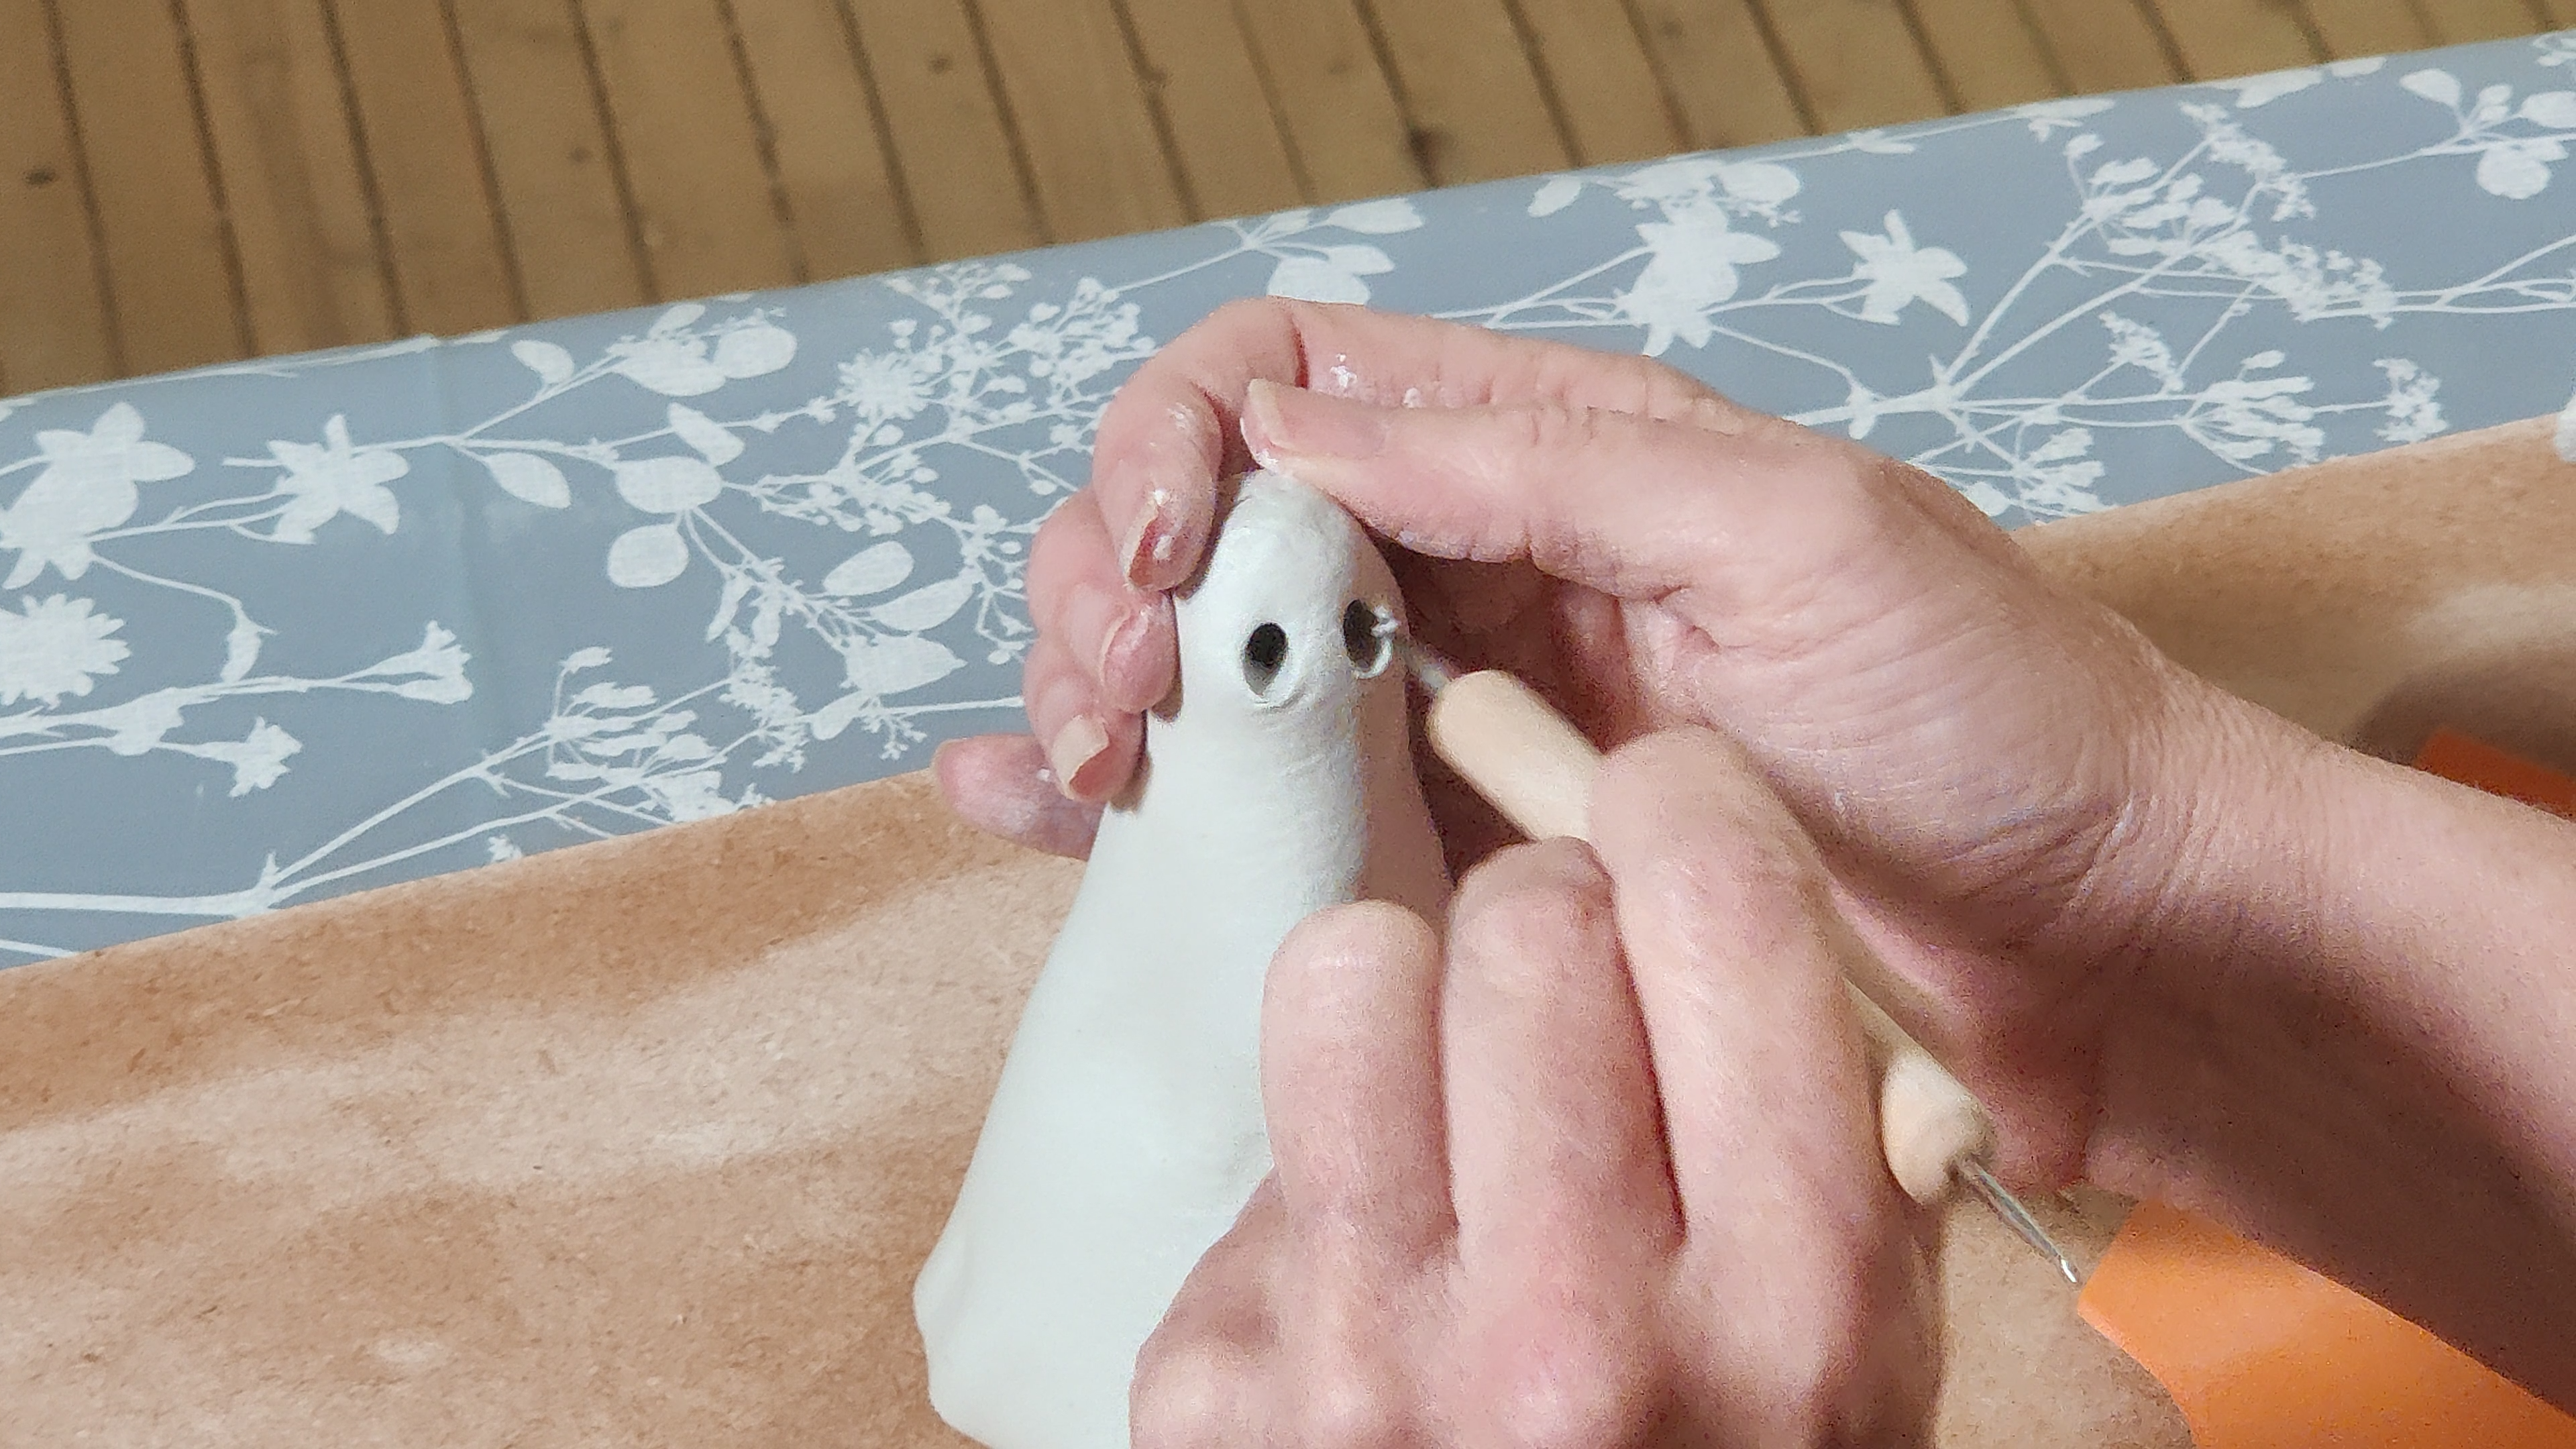
Create eye indents using your index finger knuckle, then add small clay balls for the nose and mouth.
For ears, bend wires into bunny ear shapes and cover them completely with masking tape, leaving a half-inch uncovered at the bottom.
Make a line cut in the head for ear insertion, then push the ear wires deeper into the cut for stability.
Smooth all transitions with water and your tools, blending seams carefully for a polished appearance. Hot glue the bunny ears onto the top of the plastic Easter egg once your clay-covered head is ready for final assembly.
Step 3. Shape Body and Legs
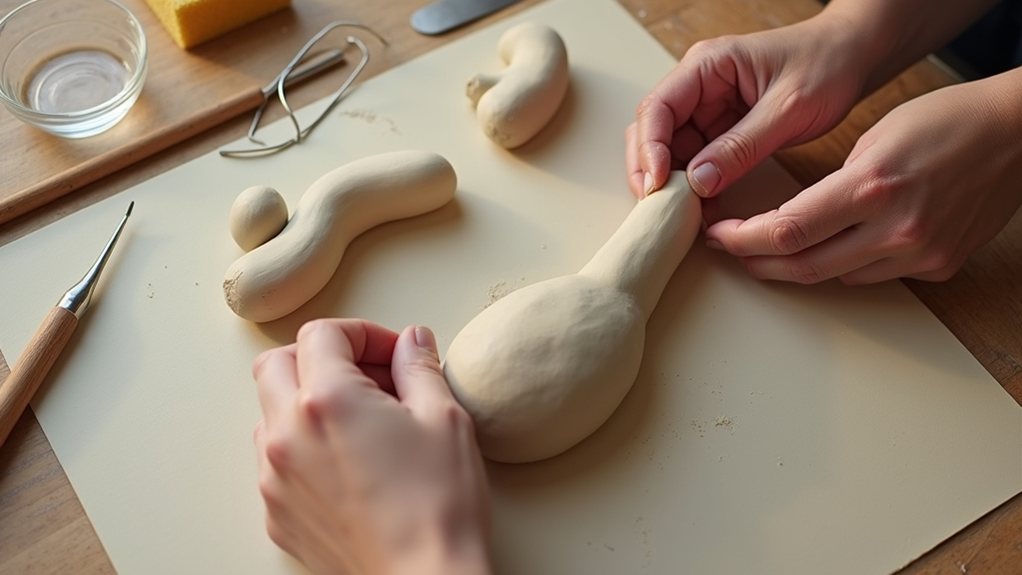
With your rabbit’s head and ears complete, you’re ready to construct the body and legs that’ll support your finished sculpture. Start by carving sockets into your styrofoam body—either a 19 cm cone for standing bunnies or a 15 cm egg for sitting ones.
Cut 7 cm styrofoam eggs in half lengthwise to create four legs. Insert toothpicks into each socket and secure legs with glue for stability.
Once your armature’s assembled, roll air dry clay to 1/8 inch thickness and apply it from the legs upward, keeping it flat against the styrofoam to prevent cracking. Remember that DAS clay will not stick to foil, so ensure any foil components are covered with cardboard or tape before applying your clay layer.
Smooth the clay using water-dampened thumbs, working methodically to eliminate air pockets. This foundational layer ensures even drying and proper integration between legs and body.
Step 4. Add Clay Details and Features
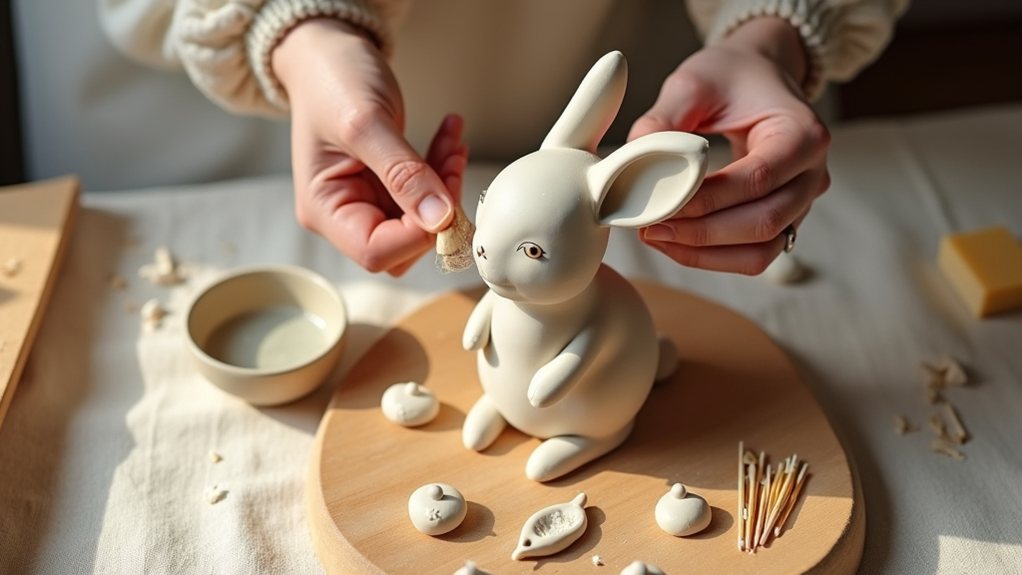
Your rabbit’s basic form is now ready for the details that’ll bring it to life, so you’ll want to cover the entire armature with a smooth clay layer before adding facial features and other embellishments.
Roll air-dry clay to 1/8 inch thickness and apply it gradually from bottom upward, ensuring it lies flat to prevent breakage.
Use a thin, uniform layer for smoothness, dipping your thumbs in water to refine the surface. Resources provided with time and space encourages independent exploration and helps develop creativity throughout the decorating process.
Once dry, create eyes using a ball-point pen cap for round marks, then form small clay balls for eye protrusions.
Carve the nose with a knife or pointed stick, adding a small clay ball to round it out.
Finally, trace metallic paint over these details for definition and visual interest.
Step 5. – Paint and Seal Rabbit
Before you can transform your clay rabbit with color and protection, you’ll need to ensure the clay has dried completely—a process that typically takes 24 to 48 hours in a well-ventilated, warm room. Test dryness by pressing a nail into the bottom; if no mark appears, your rabbit’s ready.
Apply acrylic paint in thin coats, starting with a base color like light grey or white, using two coats for even coverage. Add details such as blushy cheeks with a sponge and eyes using small brushes. For added dimension and a professional finish, consider applying metallic gold paint to highlight specific features like the eyes, nose, or ear tips.
Once painting’s complete, seal your creation with artist-grade varnish or water-based sealant to protect against moisture and preserve the finish for years. Allow the sealer to dry fully before handling or displaying your finished rabbit.
Final Thoughts
Creating air dry clay rabbits doesn’t end when you’ve finished sculpting—the drying, repair, and finishing phases are equally crucial to achieving a polished final product. You’ll invest time ensuring proper drying conditions, patching inevitable cracks, and smoothing surfaces to perfection.
By rotating your sculptures regularly and allowing adequate ventilation, you prevent warping and accelerate hardening. Once fully dry, sandpaper refinement eliminates rough edges, while strategic acrylic painting brings your rabbits to life. For hanging rabbit ornaments, thread narrow ribbon through the hole and knot the ends securely for a polished presentation.
Remember that patience throughout each stage directly impacts your final results. The techniques you’ve applied—from stabilizing bases with bolts to smoothing details with damp sponges—collectively transform raw clay into refined artistic pieces.
Your attention to these finishing details transforms a simple craft project into a display-worthy creation.