Just as giraffes stretch their necks to reach the highest branches, you’ll find that creating a giraffe sculpture extends your artistic abilities to new heights. You’re about to embark on a journey that transforms simple air-dry clay into a detailed representation of Earth’s tallest mammal. While the process requires patience and attention to detail, you’ll discover that mastering the distinctive features – from the patterned coat to those expressive eyes – offers more than just a decorative piece.
Key Takeaways
- Giraffe sculptures stand as decorative art pieces combining basic hand-building techniques to create distinctive features like long necks and spotted patterns.
- Air-dry clay is a popular material for creating 8-inch giraffe sculptures, requiring 2-3 hours of crafting and 24-48 hours drying time.
- The process involves dividing clay into specific proportions: 50% body, 25% neck, 15% head, and 10% for legs and details.
- Sculptors must score and slip connecting surfaces, add detailed features, and ensure even drying to prevent cracks.
- Giraffe sculptures appear throughout history, from ancient African rock art to modern interpretations, using various materials and artistic styles.
History
Sculptures of giraffes have captivated artists and admirers for centuries, with early representations appearing in ancient African rock art dating back thousands of years.
You’ll find that these majestic creatures have inspired artisans across diverse cultures, from Egyptian hieroglyphs to medieval European tapestries.
During the Renaissance, explorers’ accounts of giraffes sparked renewed artistic interest, leading to detailed anatomical studies and sculptures that captured their unique proportions.
In the modern era, you’ll see how sculptors have embraced various materials beyond traditional stone and bronze, with clay becoming increasingly popular in the 20th century.
Today’s giraffe sculptures often combine classical techniques with contemporary interpretations, allowing you to appreciate both the animal’s natural grace and the artist’s creative vision.
Clay has emerged as a particularly accessible medium, democratizing giraffe sculpture for hobbyists and professionals alike.
Project
This charming giraffe sculpture project transforms simple air dry clay into an elegant African wildlife piece perfect for display in any room. Standing 8 inches tall when complete, this sculpture combines basic hand-building techniques to capture the giraffe’s distinctive features, from its elongated neck to its gentle expression.
The project requires approximately 2-3 hours of hands-on crafting time, followed by 24-48 hours of drying time. Suitable for beginners and intermediate crafters alike, this sculpture can be left in its natural clay state for a contemporary look or painted with acrylics for a more vibrant finish.
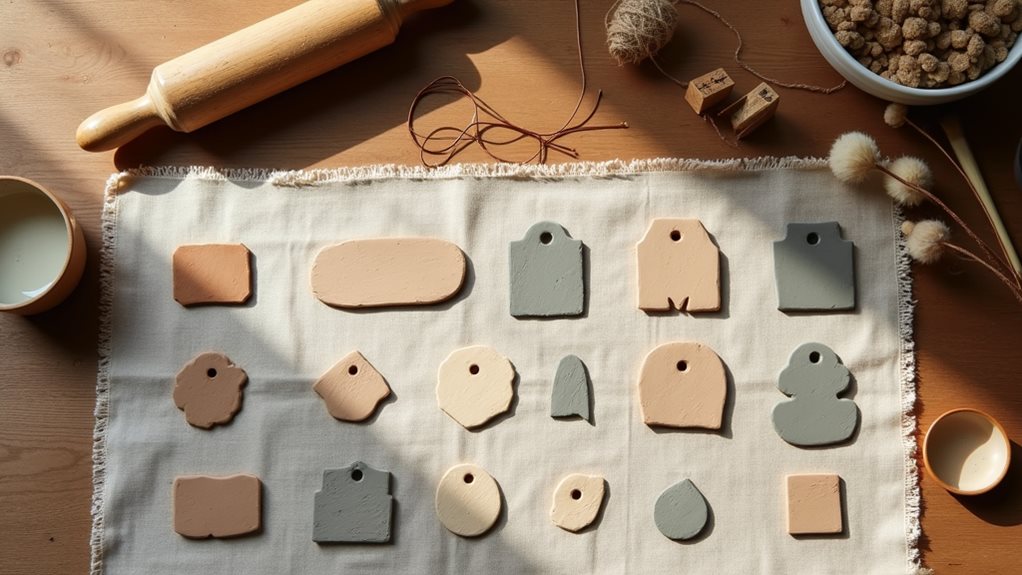
- Air dry clay (1 pound/450g)
- Wooden sculpting tool or butter knife
- Rolling pin
- Small bowl of water
- Paint brush (1-inch/25mm flat brush)
Begin by dividing your clay into proportions: 50% for the body, 25% for the neck, 15% for the head, and 10% for legs and details. Shape the body into an oval, roll the neck into a long cylinder, and form a triangular head with facial features. Create four equal-sized legs with hooves, then score and slip all connecting surfaces before assembly.
Add spots using your sculpting tool, attach small horns and ears to the head, and position the sculpture on a flat surface to dry.
For best results, wrap unused portions of clay in plastic while working to maintain proper moisture. Check the sculpture periodically during drying, rotating it gently every few hours to ensure even curing. If cracks develop, repair them with slip made from clay mixed with water.
Keep the piece away from direct sunlight and heat sources during the drying process to prevent unwanted cracking and warping.
Project Steps
You’ll start your giraffe sculpture by carefully dividing your clay into specific portions: 50% for the body, 25% for the neck, 15% for the head, and 10% for legs and details.
Next, you’ll shape the main body sections, beginning with the oval body and cylindrical neck, before scoring and attaching the parts together with a water-based slip.
Finally, you’ll bring your giraffe to life by adding characteristic spots and textures with your sculpting tool, then smoothing the surface with gentle strokes for a polished finish.
Step 1. Divide Clay Into Portions
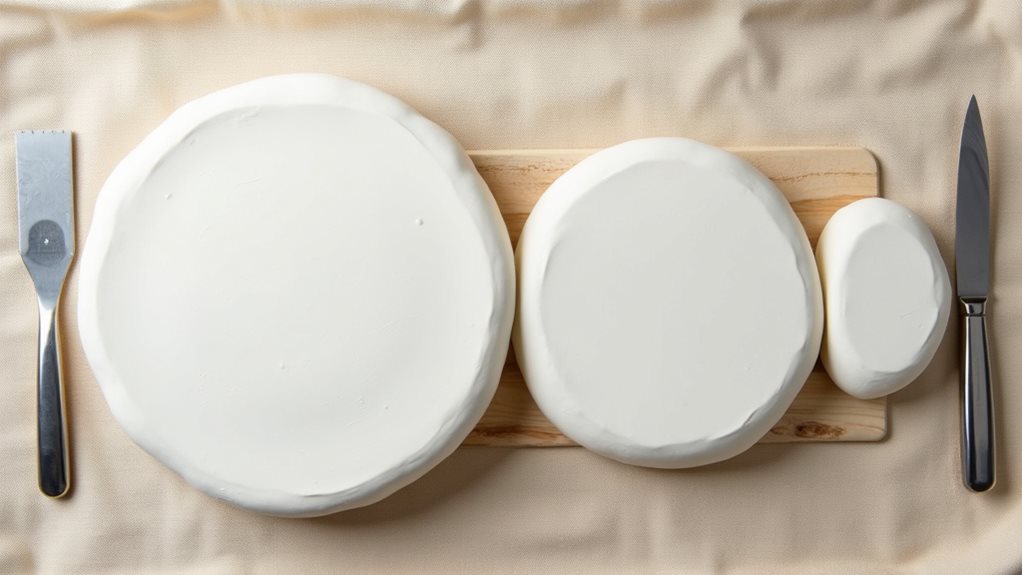
The initial step of creating your giraffe sculpture requires dividing one pound of air-dry clay into four precisely measured portions.
You’ll want to allocate 50% (about 8 ounces) for the giraffe’s body, which will form the main structure of your sculpture. Next, set aside 25% (approximately 4 ounces) for the distinctive long neck that characterizes these magnificent creatures.
Reserve 15% (roughly 2.5 ounces) for crafting the head, including features like the ears, horns, and facial details. The remaining 10% (about 1.5 ounces) will be used for creating the legs, hooves, and any additional decorative elements.
Before proceeding, ensure each portion is clearly separated and wrapped in plastic to maintain proper moisture levels while you work.
Step 2. Shape Main Body Sections
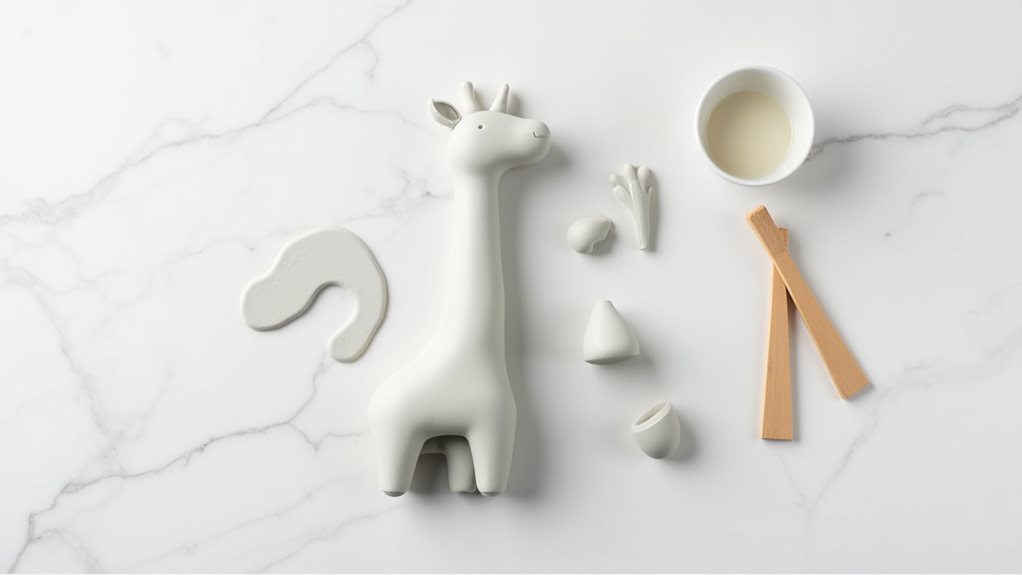
With your portioned clay ready, begin shaping the main body sections of your giraffe sculpture.
Take the largest portion and roll it into an elongated oval shape, approximately 3 inches long, pressing gently to create a slight flatten base for stability.
Next, form the neck section into a long, smooth cylinder that’s about 4 inches in length, tapering it slightly as you work upward.
For the head, shape your clay into a triangular form roughly 1 inch long, then use your sculpting tool to create gentle indentations for the eyes and muzzle.
You’ll want to work carefully with each section, keeping the proportions balanced and ensuring the clay maintains an even thickness throughout.
Once you’re satisfied with these main forms, they’re ready for assembly.
Step 3. Score and Attach Parts
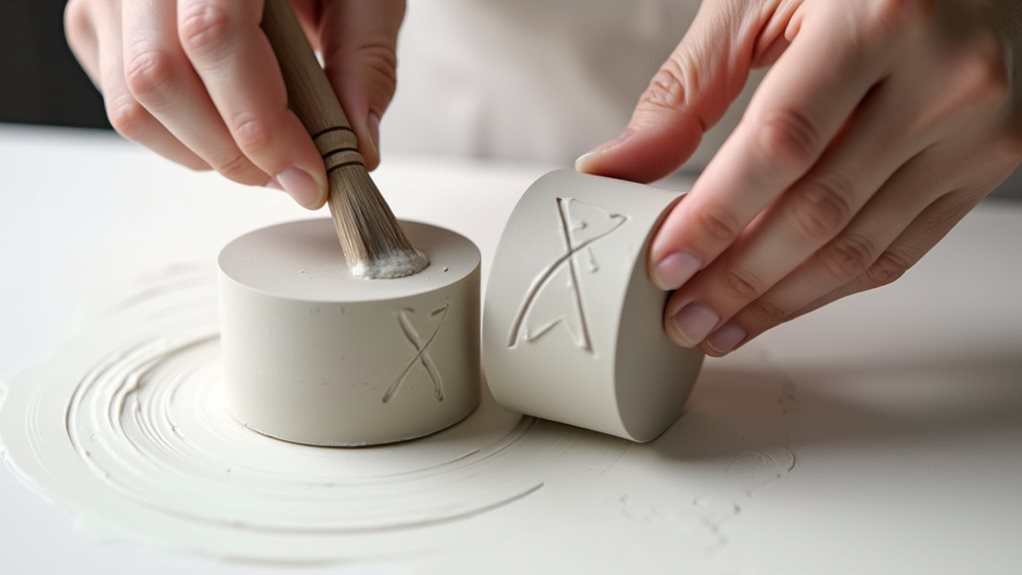
Once you’ve shaped the main sections of your giraffe, carefully score the connecting surfaces using a crisscross pattern with your sculpting tool.
Dip your brush in water and apply it generously to these scored areas, creating a slip that’ll help bond the pieces together.
Press the neck firmly onto the body at a slight angle, ensuring it maintains the giraffe’s natural posture. Attach the head to the neck’s top end, adjusting its position until you achieve the characteristic gentle tilt.
Next, score the body’s bottom surface and attach the legs one at a time, supporting them temporarily with small clay props if needed.
Smooth all the joined areas with your fingers, removing any excess slip and blending the seams until they’re nearly invisible.
Step 4. Add Spots and Textures
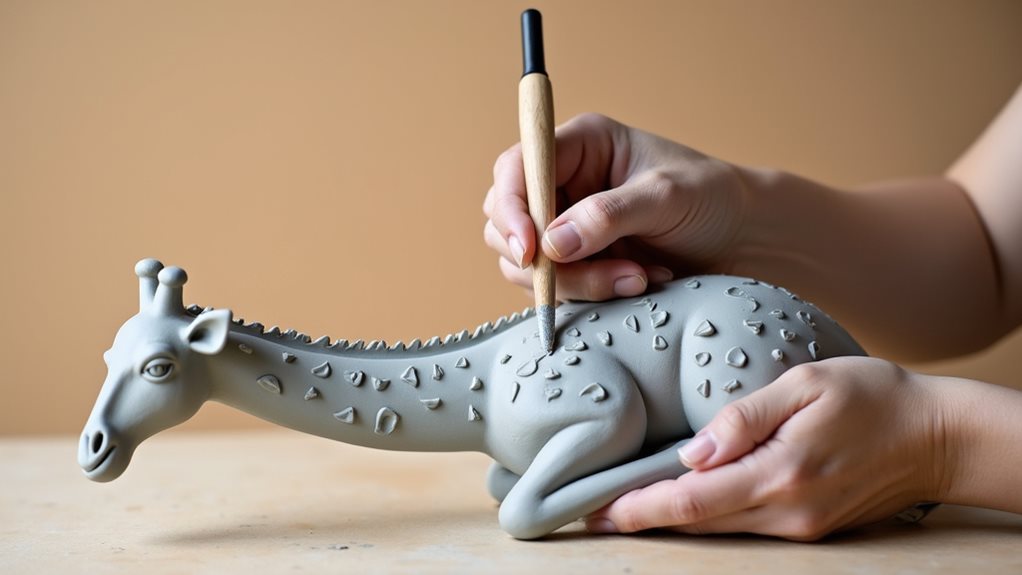
After securing all the major components of your giraffe, you’ll now give life to its distinctive appearance through detailed patterning and surface work.
Using your sculpting tool, gently press irregular polygon shapes across the giraffe’s body and neck, creating the iconic spotted pattern that makes these animals so recognizable.
Start at the neck and work your way down, varying the size and shape of each spot to create a natural look. You’ll want to leave small spaces between the spots, just as you’d see on a real giraffe.
To add texture, lightly scratch tiny lines within each spot using the pointed end of your tool. Don’t forget to add some subtle wrinkles around the joints and neck area to suggest the giraffe’s flexible skin.
Step 5. Polish for Finished Look
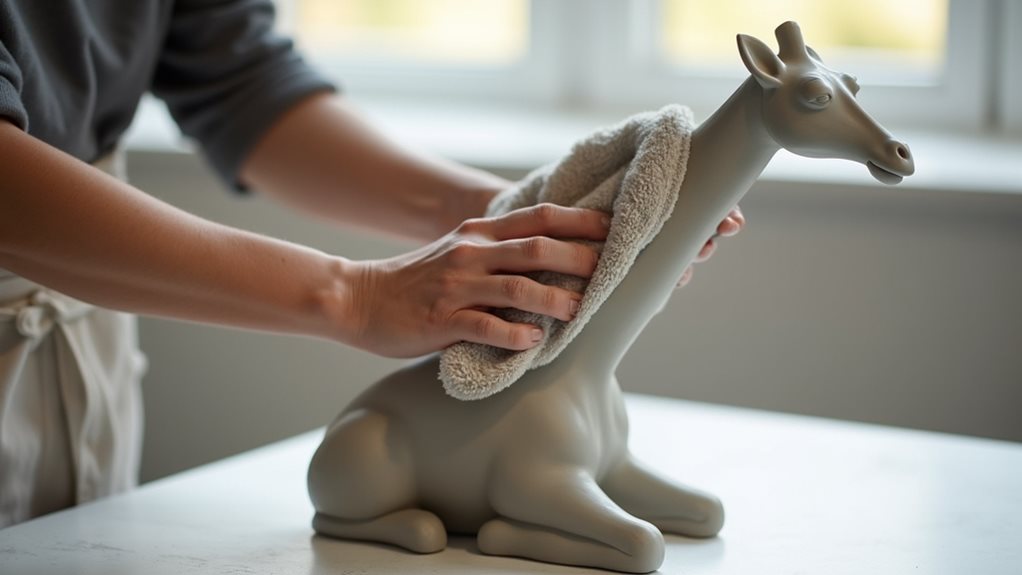
The final polishing stage transforms your giraffe sculpture from a basic clay form into a refined piece of art.
Using a slightly damp paintbrush, gently smooth over any rough spots or fingerprints on your sculpture’s surface. Work in small, circular motions, being careful not to apply too much pressure that could deform your piece.
Pay special attention to the joints where you’ve connected different parts, ensuring they’re well-blended and seamless.
Don’t forget to polish the delicate features like the facial details and hooves. If you notice any small imperfections, you can carefully smooth them out with the tip of your finger.
Once you’re satisfied with the surface texture, let your sculpture dry completely before considering whether you’d like to add paint or keep its natural clay finish.
Final Thoughts
Creativity blossoms when you pour your artistic spirit into crafting this graceful giraffe sculpture. As you’ve discovered, working with air dry clay offers a rewarding experience that combines technical skills with artistic expression.
You’ll find that each sculpture develops its own unique personality through subtle variations in neck curve, facial features, and spotted patterns.
Don’t be discouraged if your first attempt isn’t perfect – sculpting skills improve with practice, and every piece teaches valuable lessons about clay handling and design.
Remember that this project isn’t just about creating a decorative piece; it’s about developing patience, attention to detail, and confidence in your artistic abilities.
Whether displayed on a shelf or given as a heartfelt gift, your handcrafted giraffe serves as a testament to your creative journey.