Air drying clay is perfect for little decorations and figurines, why not use it to conjure up some spooky ghosts, then decorate them individually to give them a unique personality.
Things you’ll need
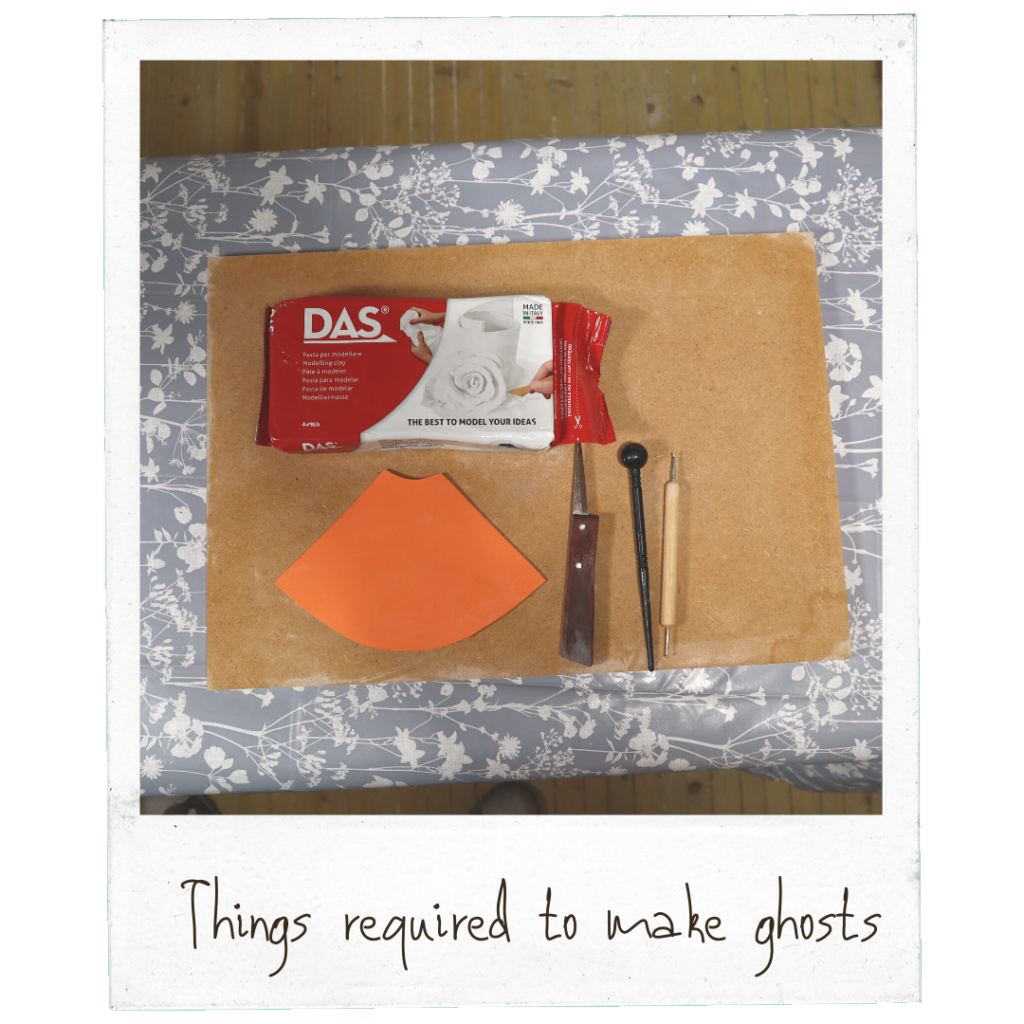
For this project you will need:
- Clay (we used DAS modelling clay)
- Rolling pin
- Knife
- Ball clay sculpting tool
- Ball stylus
- Ghost template
- Acrylic paing and brush for decorating
The template is included in our project book at the end of the article. Have a read through, grab the book, and get crafting, or in this case, conjuring! 👻
How to craft air dry ghosts
Start by opening your clay and cutting about 2.5cm to 5cm depending on how many ghosts you want to create. You need enough to roll out and place the template on. Remember to wrap up the rest of the pack.
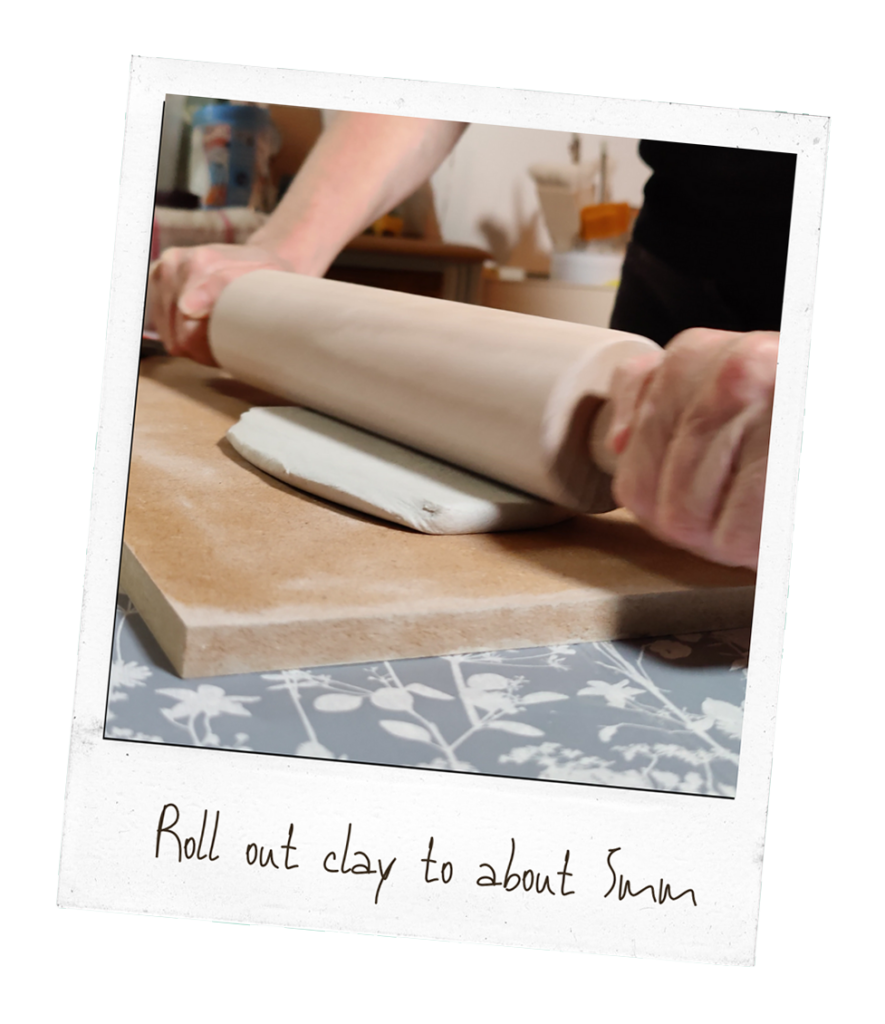
Work the clay with your hands, this helps warm the clay up and makes it easy to roll out.
On a flat, hard, surface use a rolling pin and roll the clay until it’s approximately 0.5cm thick. Roll it forwards, backwards, left and right to get an even layer.
It doesn’t matter if the edges are a little thicker, like a pizza crust, as you’ll be cutting these away.

Now for the magic, you’re going to conjure up ghosts from the flat sheet of air dry clay!
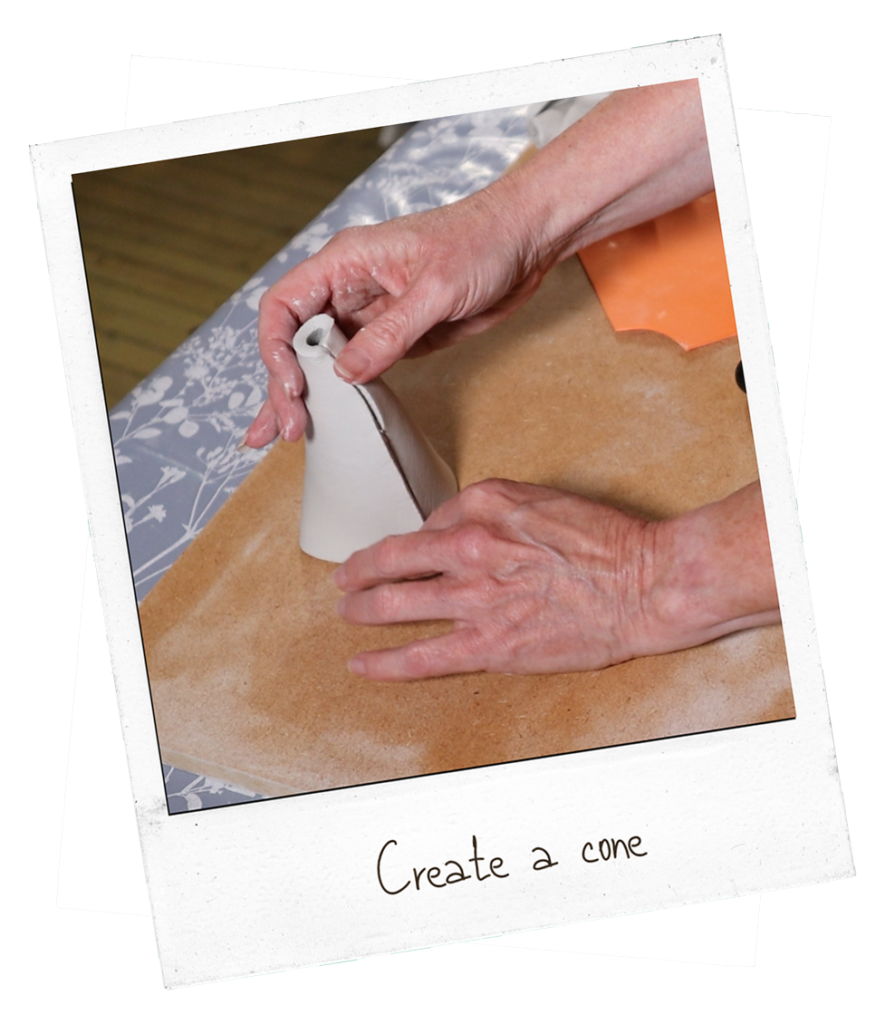
Pick the sheet up and wrap it round to create a cone shape, the template will give you a large bottom and a smaller top. Press the two sides together and smooth one side over the other, so they join.
Take your time, it’s important to make sure the two sides are firmly joined and that the bottom is level, you should be able to stand the ghost up at this stage (it’ll look more like a cone than a ghost).
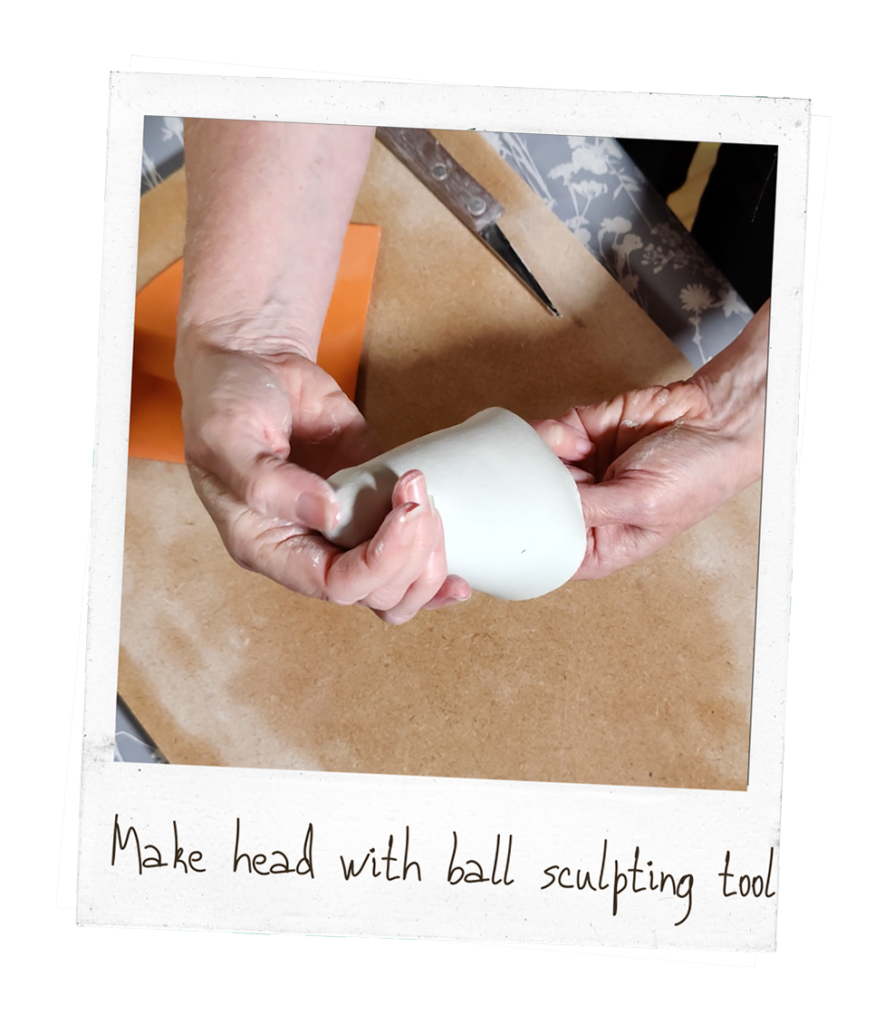
Take a ball headed sculpting tool and place inside the ghost cone until it reaches the head, but don’t press through the top.
Gentle press the clay over the ball to create a rounded head for your ghost, smoothing over any visible joins until they disappear.
Now we need to create a pleated effect. Place a straight tool (a pen or pencil would work if you don’t have a dedicated tool) into the side of the sheet and pinching around it. Don’t overdo this as you may break the clay.
Repeat this pleating action several times around the bottom of the ghost to create a waving look to the sheet.
Poke out eye holes. You can try different eye shapes, I think an oval shape on a slight angle works best but feel free to experiment.
That’s it! You’ve created a ghost! Now it needs to dry before being decorated. Leave it for at least 24 hours.


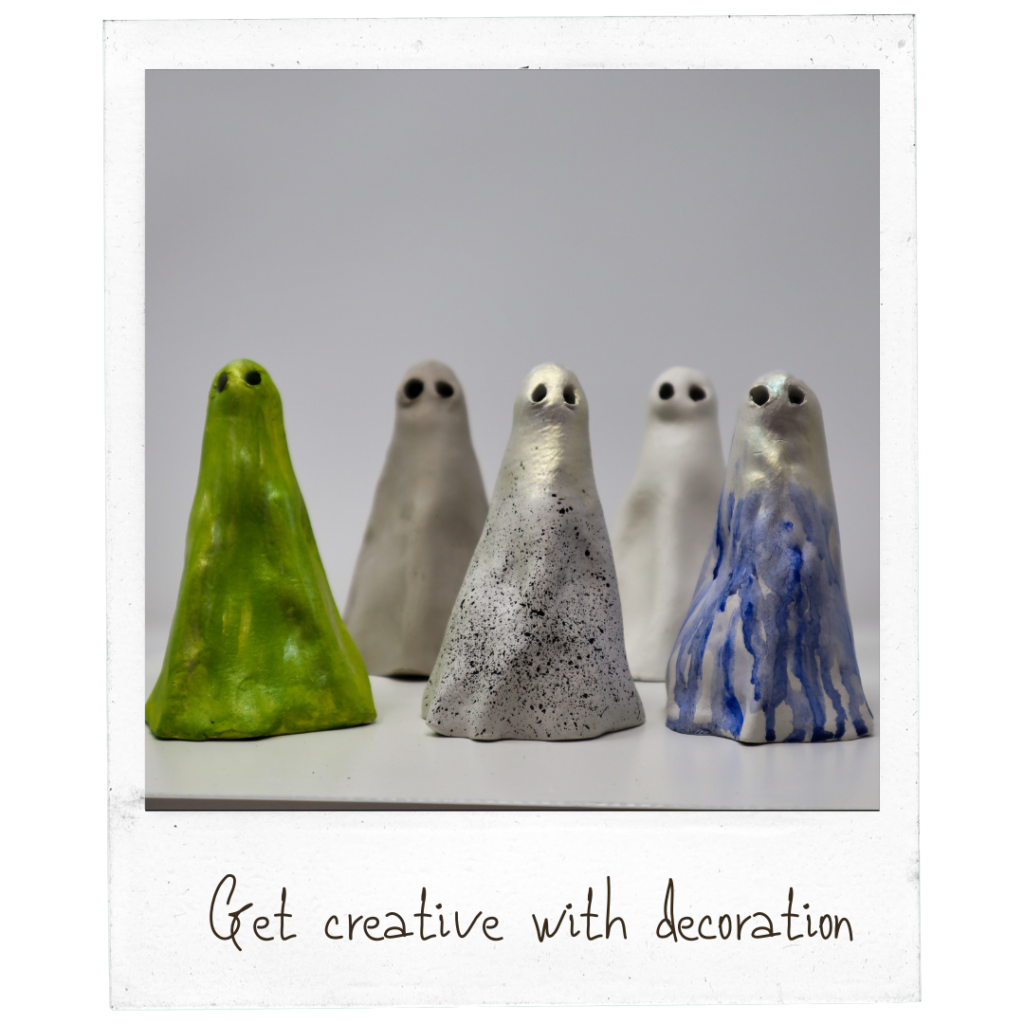
Decorate the air dry ghosts
How you decorate your new spooky friend is up to you, I suggest using acrylic paints and get creative with some of these techniques:
- Mix paint with a little water and sprinkle on for a paint splattering look
- Paint top to bottom in a single colour
- Mix paint with water then allow it to run down the ghosts sheet
Air Dry Ghosts Project Book
Ready to get creative and make your own? Grab our project guidebook which contains the template you’ll need and the instructions to follow, enjoy!
Note: This project was originally published on our sister website (https://cabinceramics.co.uk/how-to-make-ghost-figures/) and a video is available on the Cabin Ceramics YouTube channel.