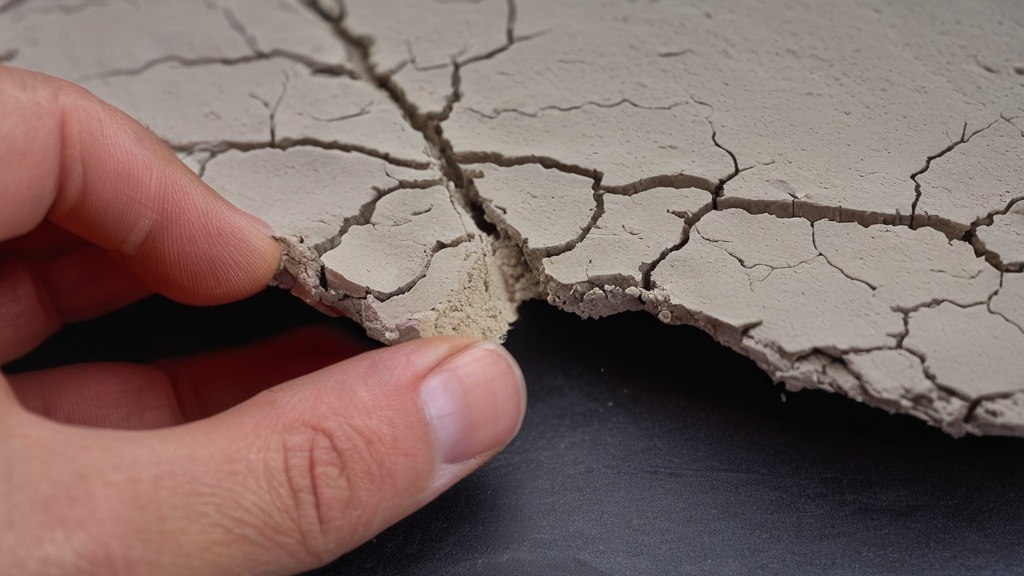
You’ve just completed a beautiful piece with air dry clay, a medium beloved for its accessibility and immediate gratification. No kiln needed, no complex firing schedules – just your hands, imagination, and a block of clay. But as your masterpiece sits patiently, beginning its transformation from soft, pliable earth to solid sculpture, a common fear might creep into your mind: Is air dry clay prone to cracking? The short answer, dear crafter, is yes. And remarkably, this isn’t necessarily a sign of failure on your part, but rather a characteristic inherent to the material itself. It’s a normal part of the process, a consequence of the clay’s natural shrinkage as the water within it evaporates. But understanding why it happens and what you can do about it can make all the difference between a pristine creation and one that, while perhaps still beautiful, shows the scars of unchecked drying.
Understanding the Inevitable: Why Air Dry Clay Cracks
delves into the fundamental reasons behind the tendency of air dry clay to crack. You’re not alone in observing this phenomenon; it’s a widely acknowledged trait of the medium. The key lies in the way the clay interacts with its environment as it dries, a process driven by the gradual departure of water from its structure.
The Core Culprit: Uneven Drying
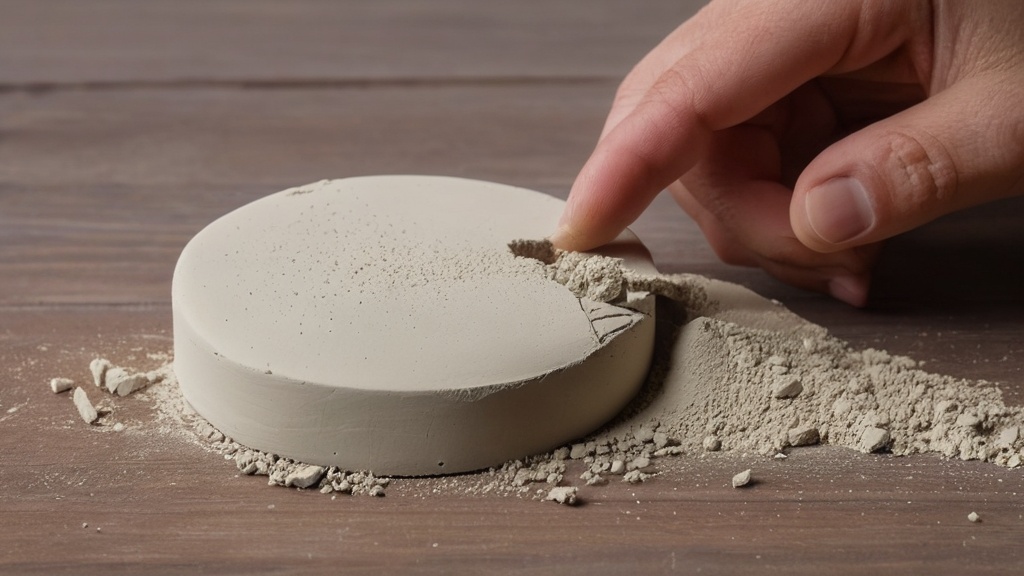
This is perhaps the most critical principle to grasp. Imagine your clay piece, fresh from your hands. It’s saturated with water. As it begins to dry, the surfaces exposed to the air—the thinner areas, the outer layers—will naturally lose moisture faster than the protected, thicker, or internal sections. This differential drying creates a kind of internal tug-of-war. The rapidly drying outer layers shrink, pulling on the still-moist and less-shrunk interior. This stress, if unchecked, will eventually cause the clay to tear itself apart, resulting in those unwelcome cracks. It’s akin to a desert floor, where the sun bakes the surface, causing it to contract and split into fascinating, albeit dramatic, patterns. Your clay, too, is a micro-cosmic desert, and managing its “weather” is paramount.
The Shrinkage Factor: Water’s Escape Act
Every type of clay, including air dry clay, contains a significant amount of water. This water is what makes the clay pliable and moldable. As your piece dries, this water evaporates, causing the clay particles to pull closer together. This reduction in volume is known as shrinkage. For air dry clay, this shrinkage is a natural and expected part of the curing process. Unfortunately, if this shrinkage isn’t uniform across the entire piece, the differential stress leads directly to cracking. The more water that needs to evaporate, the more potential for shrinkage, and thus, the higher the risk of cracks.
Proactive Measures: Preventing Cracks Before They Start
While cracking is normal, it doesn’t mean you have to accept a cracked piece as your ultimate outcome. There are numerous strategies you can employ during the creation and initial drying phases to significantly reduce the likelihood and severity of cracks. Think of these as your preventative medicine for a happy, healthy clay project.
The Slow and Steady Approach: Controlling the Drying Environment
This is, without a doubt, your most potent weapon against cracking. Rushing the drying process is a guaranteed way to invite fissures. Your goal should be to encourage a slow, even loss of moisture from all parts of your sculpture.
The Damp Cloth and Plastic Wrap Technique
Once you’ve finished shaping your piece, resist the urge to immediately expose it to circulating air or direct sunlight. Instead, take a damp (not soaking wet) cloth or paper towel and gently drape it over your creation. This provides ambient humidity. Then, tent your entire piece loosely with plastic wrap. This creates a mini-greenhouse effect, trapping moisture and allowing the clay to normalize its internal hydration. For larger or more intricate pieces, you might need to leave it covered like this for several days, progressively allowing more air in as time passes. The idea is to extend the drying period, giving internal and external layers a chance to dry in unison.
Avoiding Harsh Environments
Steer clear of placing your drying clay near heat sources like radiators, open windows with strong drafts, or in direct sunlight. These environments will accelerate surface drying dramatically, exacerbating the uneven drying problem. A cool, consistent room temperature is ideal.
Uniformity is Key: Managing Clay Thickness
The architectural integrity of your piece plays a significant role in its susceptibility to cracking. A well-designed internal structure can be your best friend.
The 1 cm Rule of Thumb
While not an absolute, striving for a relatively uniform thickness throughout your project is a highly effective strategy. Experts suggest aiming for around 1 cm (approximately 0.4 inches) as a good general thickness. If you have areas that are much thicker than others, they will naturally retain moisture longer, leading to differential shrinkage and stress. If varying thicknesses are integral to your design, consider hollowing out thicker sections or building up areas gradually to minimize stark differences.
Building Smart: Hollowing Out and Armatures
For larger sculptures or pieces with significant volume, it’s often wise to hollow out the interior. This reduces the overall mass of clay that needs to dry, and it helps to equalize the drying rate between the surface and the core. Alternatively, using an armature made of foil or wire can provide internal support and reduces the amount of clay needed, thereby minimizing shrinkage issues. Ensure that any armature is fully encapsulated by clay to avoid creating weak points.
The Secret Ingredient: PVA Glue Additives
You might not think of glue as a clay additive, but for air dry clay, it can be a lifesaver. PVA glue (like school glue or wood glue) acts as a fantastic conditioner.
Enhancing Flexibility and Reducing Shrinkage
When you knead a small amount of PVA glue directly into your air dry clay, you’re essentially increasing its elasticity and improving its internal bonding. The glue adds “stretch” to the clay, making it more forgiving during the shrinkage process. It also helps to retain moisture more evenly, further slowing down the initial drying and reducing the overall magnitude of shrinkage. Start with a small amount, perhaps a teaspoon for a golf-ball sized piece of clay, and thoroughly mix it in until evenly distributed. You’ll notice the clay feels a little more pliable and less prone to crumbling.
The Unthinkable Happens: Repairing Cracks
Despite your best efforts, sometimes cracks still appear. Don’t despair! This isn’t the end of your project. Air dry clay is remarkably forgiving, and most cracks can be successfully repaired, often becoming virtually invisible. This is where your problem-solving skills come into play.
The Wet and Patch Method: A Second Chance
If you discover a crack, whether it’s a fine hairline or a more significant fissure, you have a solid repair strategy.
Preparing the Surface
First, gently moisten the area around and within the crack with a little water. You can use a paintbrush or your fingertip. This softens the edges of the existing clay and creates a receptive surface for the new clay. Don’t over-saturate it, just enough to make it workable.
Filling the Gap
Next, take a tiny piece of fresh, soft air dry clay. Roll it into a small snake or ball, depending on the size and shape of the crack. Press this fresh clay firmly into the crack, making sure to work it deeply into the fissure. Use your finger or a sculpting tool to smooth it out, blending it seamlessly with the surrounding clay. You want to eliminate any discernible seam.
Re-Drying and Finishing
Once the crack is filled and smoothed, allow the repaired area to dry completely again. It’s often beneficial to treat this small repair as if it were a new, small piece of clay – meaning, allow it to dry slowly to prevent new cracks from forming around the patch. Once fully dry, you can gently sand the area if needed for a perfectly smooth finish before painting or sealing. The clay’s ability to be worked, even after initial drying, is one of its greatest advantages.
The Reality Check: Accepting Imperfection (or Near Perfection)
It’s important to approach air dry clay crafting with a realistic mindset. While you can significantly minimize cracking, achieving a project with zero cracks, particularly for more complex or larger pieces, can be a challenging endeavor without the controlled environment of a kiln.
The Kiln vs. Air Dry Distinction: Why Firing Changes Everything
Traditional ceramic clay, when fired in a kiln, undergoes a chemical transformation called vitrification. This process fuses the clay particles together, creating a strong, permanent, and much less prone to cracking structure. Air dry clay, on the other hand, dries through simple evaporation. It never achieves the same level of molecular bonding as kiln-fired clay. Consequently, it retains some inherent fragility and a greater susceptibility to environmental factors, including the stress of drying. Many experienced crafters will tell you that a completely crack-free air dry clay piece is more often a happy accident than a consistent outcome. The goal, therefore, shifts from absolute perfection to effective management.
Embracing the Process: Minimizing, Not Eliminating
Your aim should be to minimize cracks through careful technique and slow drying, and to skillfully repair any that do appear. Don’t let the thought of cracks deter you from experimenting with this versatile medium. Think of it as a learning curve, an opportunity to hone your patience and your understanding of the material. A well-repaired crack is a testament to your resourcefulness and skill, not a mark of failure. The beauty of air dry clay lies in its accessibility and the sheer joy of creating. With the right approach, you can produce stunning, durable pieces that proudly showcase your artistic vision, even if a tiny crack-turned-invisible-patch is a personal secret between you and your artwork. So, go forth and create, armed with the knowledge to make your air dry clay journey as smooth as your finished sculptures.
FAQs
1. What is air dry clay?
Air dry clay is a type of clay that dries and hardens without the need for a kiln or oven. It is a popular choice for craft projects and sculpting because of its ease of use and accessibility.
2. Does air dry clay crack easily?
Air dry clay can be prone to cracking if not handled and stored properly. Factors such as improper moisture content, uneven drying, and thin or uneven thickness of the clay can contribute to cracking.
3. How can I prevent air dry clay from cracking?
To prevent air dry clay from cracking, it is important to properly knead and condition the clay before use, ensure even thickness throughout the project, and allow the clay to dry slowly and evenly. Keeping the clay covered with plastic or damp cloth while working with it can also help prevent cracking.
4. Can cracked air dry clay be repaired?
Cracked air dry clay can be repaired by using a small amount of water to smooth out the cracks and blend the clay back together. Once the clay is fully dry, any remaining imperfections can be sanded down and filled in with additional clay.
5. Are there any alternative methods to prevent cracking in air dry clay?
Some alternative methods to prevent cracking in air dry clay include adding a small amount of white glue or glycerin to the clay to improve its elasticity and reduce the likelihood of cracking. Additionally, using armatures or supports for larger or more complex projects can help minimize the risk of cracking.