You’ll discover that creating a sleeping cat sculpture offers a perfect blend of artistic expression and technical craftsmanship. The project combines basic sculpting techniques with an appreciation for feline anatomy, allowing you to capture the peaceful essence of a resting cat. Whether you’re working with clay, wood, or metal, understanding the fundamental steps and design considerations will help you craft a piece that conveys both serenity and grace. Let’s explore how to bring this tranquil figure to life.
Key Takeaways
- Cats typically sleep 12-16 hours a day, with periods of deep sleep alternating between light naps throughout the day and night.
- Common sleeping positions include curled up in a ball, stretched out on their side, or lying on their back with exposed belly.
- Cats often seek warm, elevated, and secluded spots for sleeping to feel safe and maintain body temperature.
- A sleeping cat’s twitching whiskers, paws, or tail may indicate they’re dreaming during REM sleep phases.
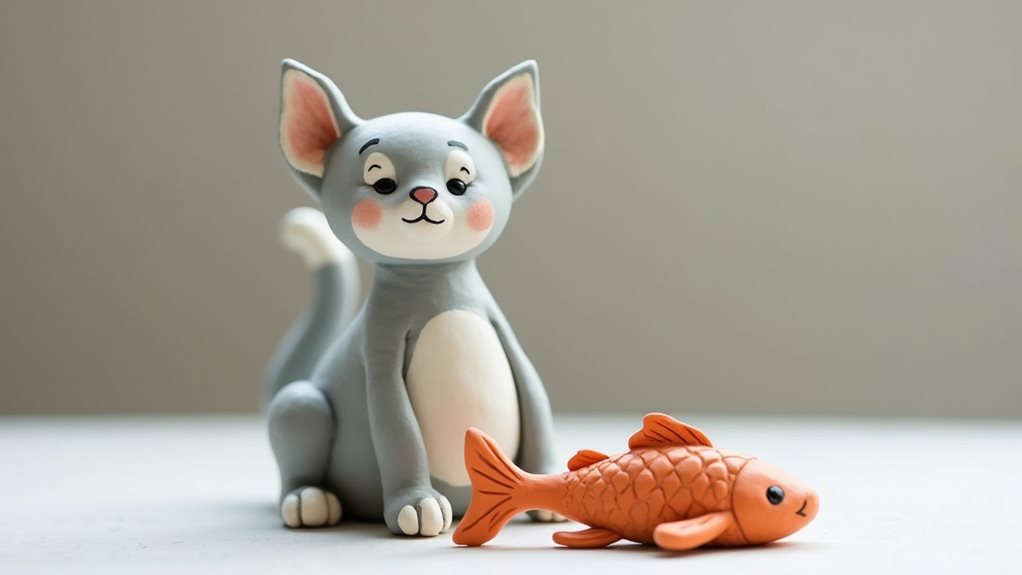
- Sleeping cats symbolize peace and tranquility in art and culture, as demonstrated through ancient Egyptian artifacts and modern sculptures.
History
The art of creating sleeping cat sculptures dates back to ancient Egyptian times, when cats were revered as sacred creatures and immortalized in various art forms.
You’ll find evidence of sleeping cat sculptures in tombs, temples, and households throughout the ancient world, where they served both decorative and spiritual purposes.
During the Renaissance, European artists began incorporating sleeping cats into their works, often as symbols of domesticity and peace.
You’ll notice this tradition has continued into modern times, with contemporary artists using various materials like clay, bronze, and marble to capture felines in repose.
Today’s crafters have embraced air dry clay as an accessible medium for creating these beloved sculptures, allowing you to participate in an artistic legacy that spans thousands of years.
Project
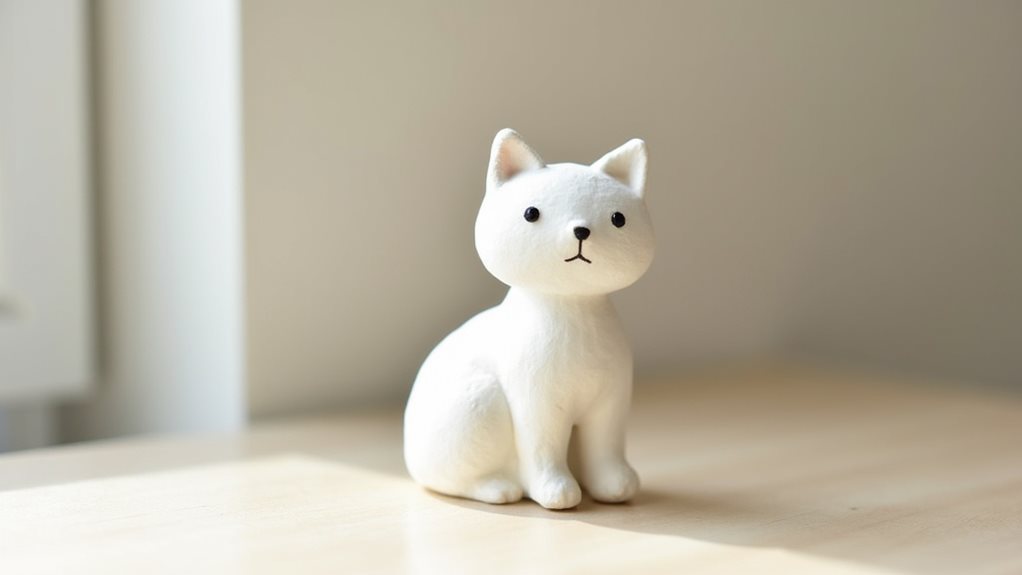
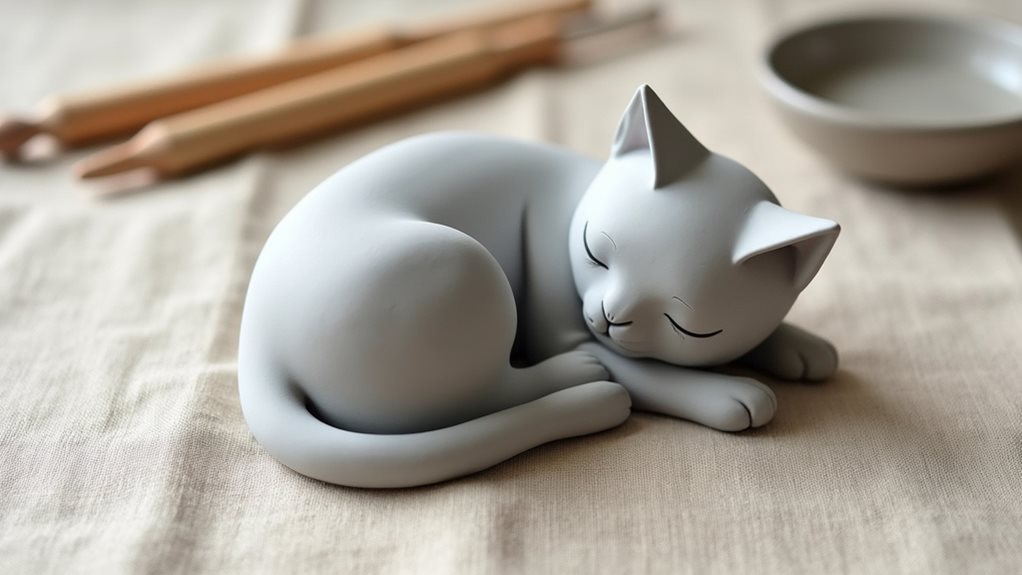
Creating a sleeping cat sculpture from air dry clay is a delightful project that captures the peaceful essence of a resting feline. This beginner-friendly craft allows anyone to explore basic sculpting techniques while creating a charming decorative piece that measures approximately 6 inches in length.
The simple design emphasizes smooth curves and gentle details, making it an ideal project for those new to clay sculpting. The finished piece serves as a perfect desk or shelf decoration that can be customized with paint or left in its natural state for a minimalist look.
- Air dry clay (8 oz / 225g)
- Wooden sculpting tool set
- Smooth work surface (8″ x 8″ / 20cm x 20cm)
- Water in small container
- Clear acrylic sealer (2 oz / 60ml)
Start by conditioning the clay until it becomes pliable, then form a smooth oval base approximately 4 inches long. Shape a larger oval for the cat’s body and attach it to the base, followed by a smaller oval for the head, positioning it at a slight angle to suggest sleep. Create the tail and curl it around the body, add triangular ears, and use wooden tools to create subtle fur texture and facial features.
Allow the sculpture to dry completely for 24-48 hours before applying sealer. When working with air dry clay, maintain consistent thickness throughout to prevent cracking while drying. Keep a damp cloth nearby to smooth unwanted marks or fingerprints, and work in a draft-free area to prevent premature drying.
Position the cat’s limbs close to its body for stability, and avoid making any parts too thin as they may become fragile once dry. Regular misting with water while working helps maintain the clay’s workability and ensures smooth transitions between joined pieces.
Project Steps
You’ll start your clay cat sculpture by forming the clay into a pliable ball and shaping it into a smooth oval base that will support the entire piece.
Next, you’ll create a larger oval for the cat’s body and attach it to the base, followed by crafting a smaller oval for the head and adding triangular ears.
Once the main forms are in place, you’ll use your sculpting tools to add gentle textures that suggest fur and create the subtle facial features of your sleeping feline.
Step 1. Form Clay Into Pliable Ball

Start your sculpting journey by removing approximately 8 ounces of air dry clay from its package and gently kneading it between your palms.
Continue working the clay until it warms and becomes more malleable, which typically takes about 3-5 minutes of consistent manipulation. You’ll know it’s ready when the clay feels smooth and pliable without any stiff or crumbly areas.
Roll the clay into a ball, pressing firmly to remove any air pockets that could cause problems during drying.
If you notice the clay becoming sticky, dust your hands with a small amount of cornstarch.
Keep working the clay until it forms a perfectly smooth sphere about the size of a tennis ball, free from cracks or rough spots.
Step 2. Shape Oval Base First
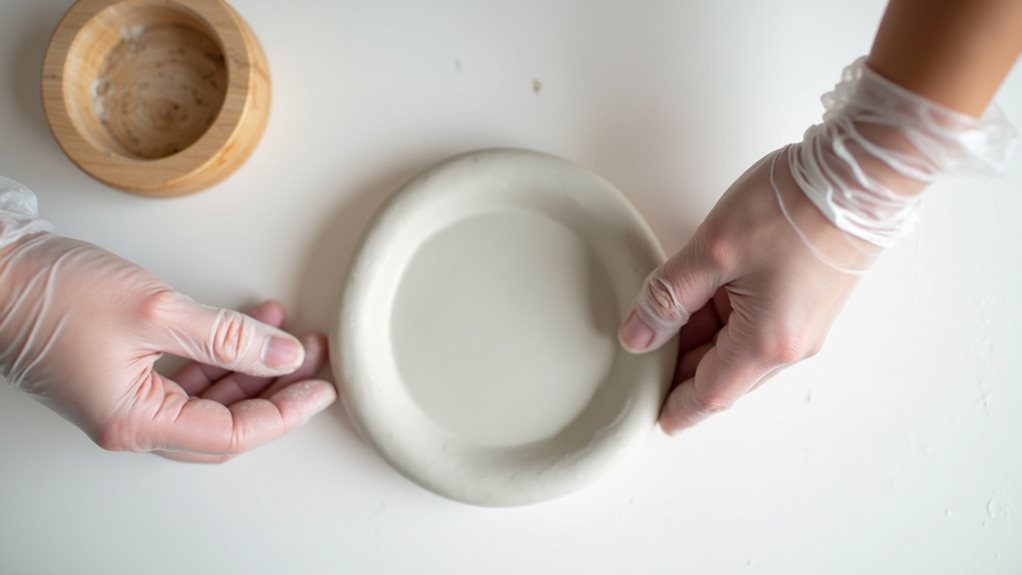
The foundation of your sleeping cat sculpture begins with a smooth oval base that provides stability and structure for the entire piece.
Take about one-third of your conditioned clay and roll it between your palms to form a ball, then gently press it onto your work surface. Using firm, even pressure with your fingers, shape the clay into an oval approximately 4 inches long and ½ inch thick.
As you work, maintain consistent thickness throughout the base, and smooth any cracks or imperfections with your fingertips or a damp tool. Check that the bottom is flat and level by pressing down gently – this will ensure your sculpture stands properly when complete.
If needed, use a wooden tool to refine the oval’s edges.
Step 3. Create Cat Body Oval
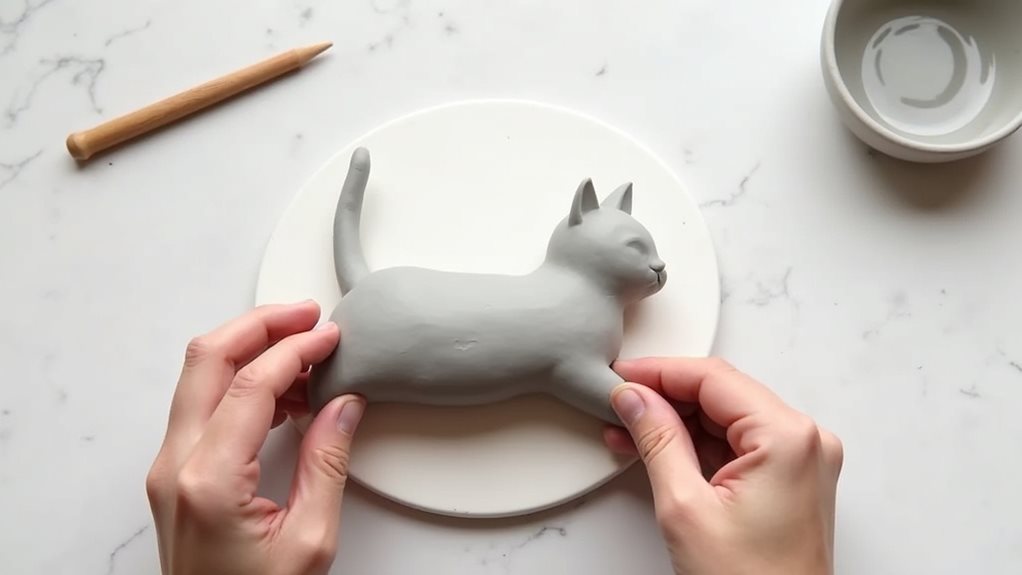
Forming the cat’s body represents the most substantial component of your sculpture, requiring careful attention to proportion and shape. Take approximately 4 ounces of clay and roll it into a smooth oval that’s roughly 3 inches long and 2 inches high, ensuring the surface remains free of creases or dimples.
Position this larger oval directly onto your base, slightly offset from the center to allow room for the head. Press down gently along the bottom edge where it meets the base, using your sculpting tool to blend the connection smoothly.
You’ll want to maintain a rounded top surface while creating a subtle flattening where the body meets the base. Keep your fingers slightly damp to prevent unwanted textures as you refine the body’s curved form.
Step 4. Shape Head and Ears
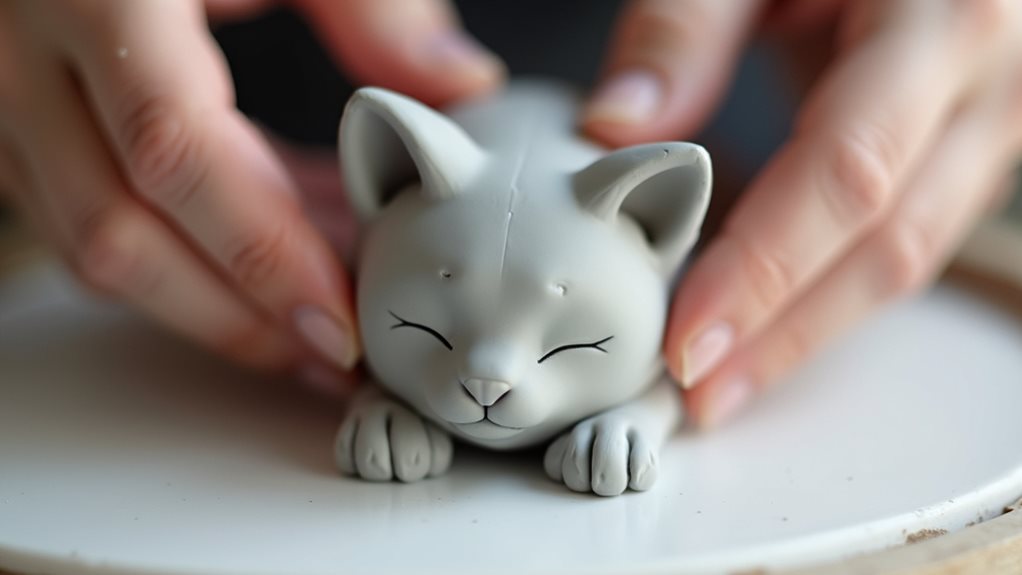
Crafting your sleeping cat’s head and ears requires careful attention to proportion, as these features will define your sculpture’s personality.
Form a smooth oval about one-third the size of the body, gently tapering it at one end to create the face. Using your fingers, blend the wider end into the body at a slight downward angle, suggesting peaceful rest.
Next, roll two small triangles for the ears, each about half an inch tall. Position them at the top of the head, angling them slightly outward and backward for a relaxed appearance.
Press them firmly into place, then smooth the connecting areas with your sculpting tool. You’ll want to ensure the ears are symmetrical and properly sized – too large or small can affect your cat’s overall expression.
Step 5. Add Clay Texture Details
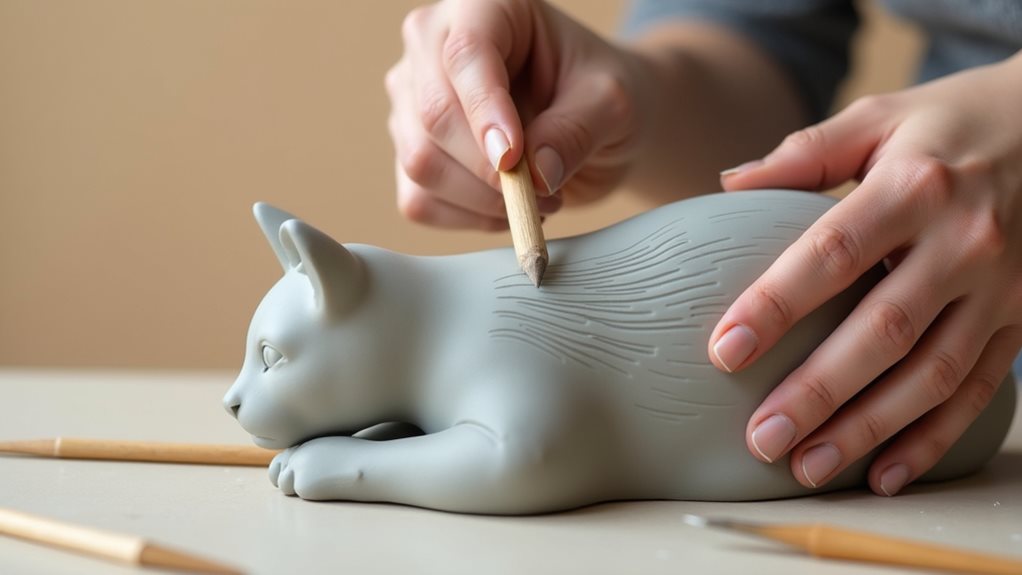
Delicate texturing brings your sleeping cat sculpture to life, transforming smooth clay into a realistic representation of soft fur and subtle features.
Using your wooden sculpting tools, gently press varying patterns into the clay’s surface, creating directional marks that follow the natural flow of a cat’s fur.
Start at the head, making shorter strokes around the face and ears, then work your way down the body with slightly longer strokes.
Don’t press too deeply – you’re aiming for subtle texture rather than deep grooves.
Add gentle indentations where the cat’s paws would naturally fold under its body, and create soft ripples in the tail’s surface.
Finally, use your finest tool to add whisker marks and delicate lines around the closed eyes, keeping the overall effect soft and dreamy.
Final Thoughts
Once you’ve mastered the basics of sculpting a sleeping cat, you’ll discover that air dry clay offers endless possibilities for creating unique variations.
You can experiment with different poses, sizes, and facial expressions to capture your favorite feline moments. Consider adding personal touches like distinctive markings or incorporating multiple cats into a single scene.
Remember that practice improves your sculpting skills, and each piece you create will help you develop better techniques for working with air dry clay.
Don’t be afraid to modify the basic design to match your vision, whether that means creating a larger sculpture or adjusting the proportions to match your own cat’s features.
With patience and attention to detail, you’ll soon be crafting beautiful cat sculptures that bring joy to any space.