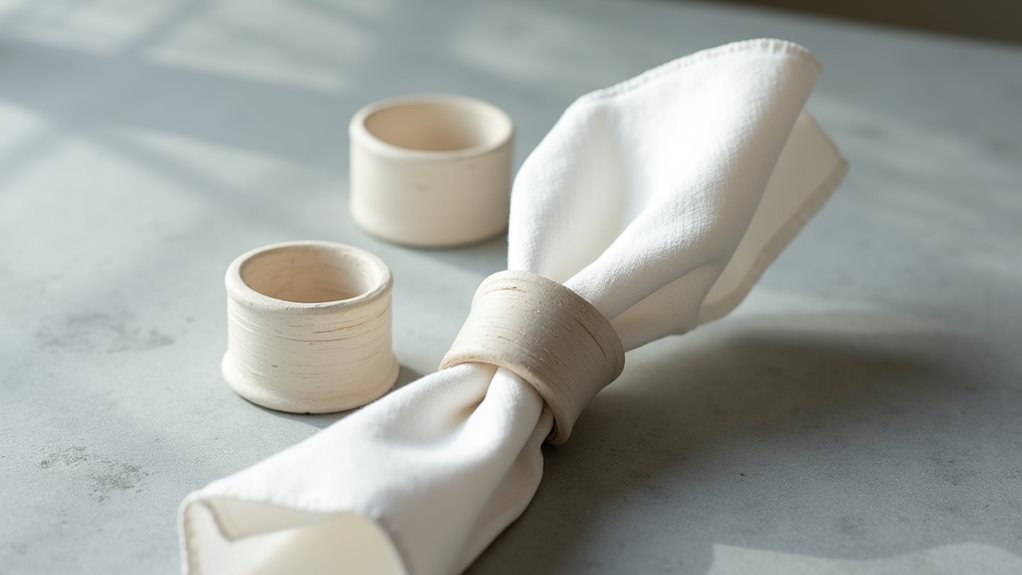
While napkin rings may seem like purely decorative table accessories today, they originally served as essential household items in Victorian times when families would reuse napkins for several days. You’ll find their evolution fascinating, as these simple bands transformed from practical markers that helped identify each family member’s napkin to elaborate pieces of dining art. Whether you’re interested in their rich history or eager to craft your own unique designs, napkin rings offer an intriguing blend of functionality and creative expression.
Key Takeaways
- Napkin rings are decorative table accessories that hold napkins in place and add elegance to dining presentations.
- Originally used in Victorian times to identify personal napkins, they’ve evolved into both functional and ornamental dining pieces.
- Modern napkin rings come in various materials including metal, wood, ceramic, and can be crafted at home using air-dry clay.
- They enhance table settings for both casual meals and formal occasions while serving as conversation pieces.
- Proper storage in cool, dry places away from direct sunlight helps maintain their appearance and extends their lifespan.
History
While napkin rings are now considered elegant table accessories, they originally served a more practical purpose in Victorian-era households.
You’ll find their history rooted in the 1800s when families would reuse their cloth napkins for several meals before washing them. Each family member had a personalized napkin ring to identify their napkin, preventing mix-ups and maintaining hygiene standards.
You’ll discover that these practical items evolved from simple silver bands to elaborate designs crafted from precious metals, ivory, and wood.
As washing machines became commonplace in the 20th century, napkin rings transformed from necessity to decorative elements.
Today, you’ll see them adorning both casual and formal table settings, though they’re no longer used to identify individual napkins but rather to enhance your dining presentation.
Project
Transforming your dining experience doesn’t require expensive accessories when you can craft beautiful napkin rings using simple air dry clay. These handmade table accessories add a personal touch to any place setting while serving the practical purpose of keeping napkins elegantly arranged.
This beginner-friendly project can be completed in one afternoon, requiring only basic crafting supplies and minimal clay-working experience. Once dried, these napkin rings can be left natural for an organic look or decorated with paint to match your dining room decor, making them perfect for both everyday use and special occasions.
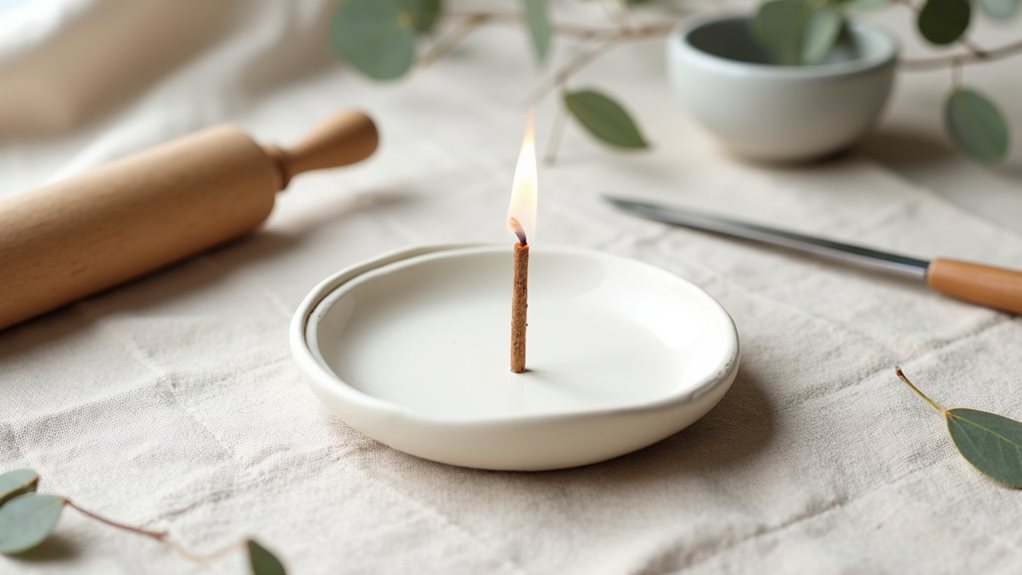
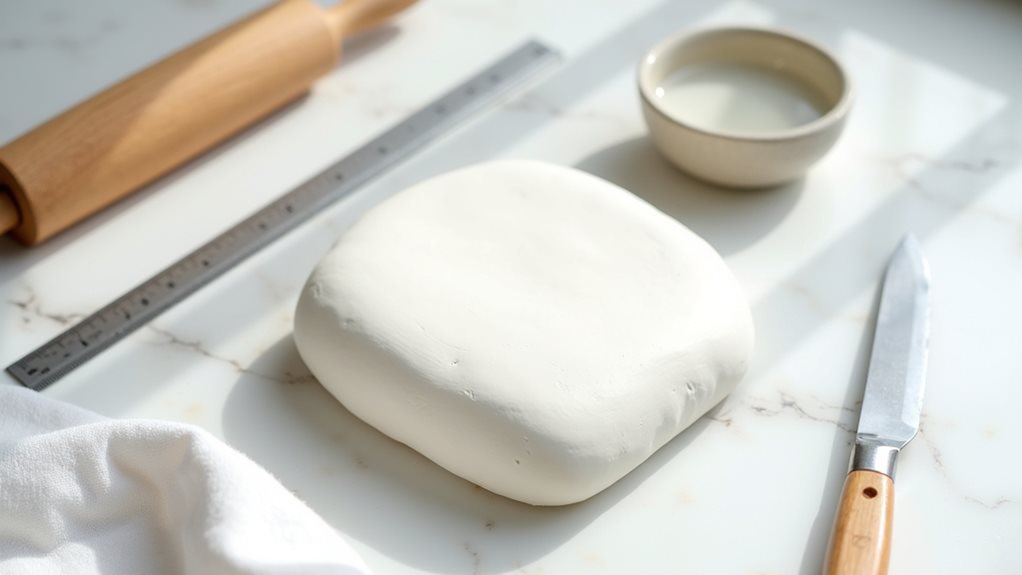
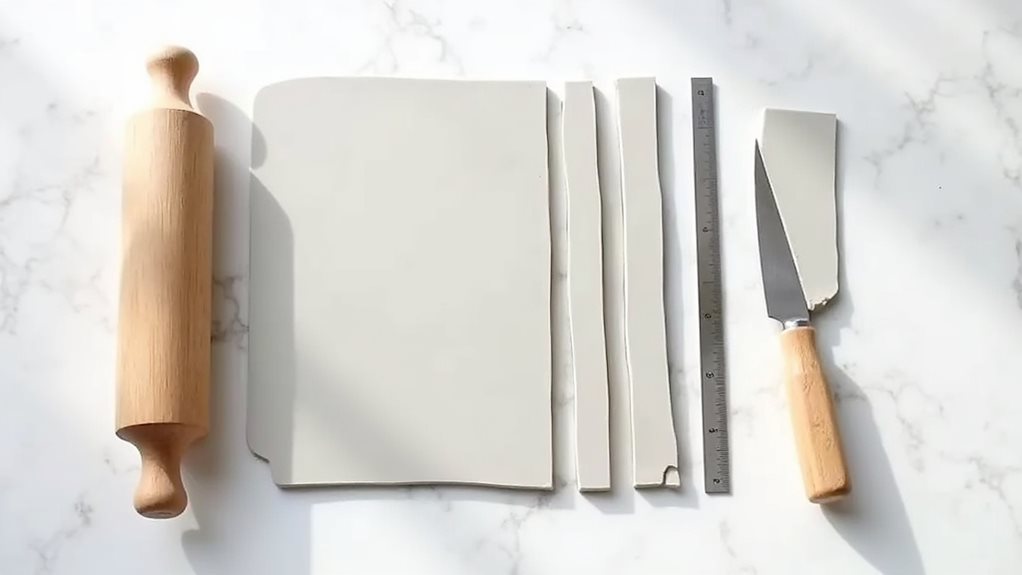
Materials Needed:
- Air dry clay (4 oz/113g)
- Rolling pin
- Ruler (6-inch/15cm)
- Sharp knife or clay cutting tool
- Small bowl of water (4-inch/10cm diameter)
Begin by rolling out the clay on a smooth, clean surface to a thickness of 1/4 inch (6mm). Using your ruler and knife, cut strips measuring 6 inches (15cm) long by 1.5 inches (3.8cm) wide. Smooth any rough edges with slightly dampened fingers, then wrap each strip around a cylindrical object approximately 1.75 inches (4.4cm) in diameter.
To join the ends, score both surfaces with your knife, apply a small amount of water, and press firmly together. Allow the rings to dry completely for 24-48 hours.
When working with air dry clay, maintain a clean workspace and handle the material gently to avoid unwanted marks or indentations. If the clay starts to dry while you’re working, lightly mist it with water or use damp fingers to restore moisture.
Store unused clay in an airtight container, and consider making a few extra rings in case of cracking during the drying process. For best results, allow rings to dry on a flat surface away from direct sunlight or heat sources.
Project Steps
Let’s explore the essential steps you’ll need to create your own handcrafted napkin rings, starting with gathering your materials and setting up a clean workspace.
You’ll begin by rolling clay into uniformly sized strips and shaping them into circles around a cylindrical form, then carefully joining the ends together using scoring techniques and a touch of water.
Once you’ve formed your rings, you’ll need to let them dry completely for 24-48 hours before they’re ready to use.
Step 1. Gather Materials and Prepare Workspace
Success in crafting beautiful clay napkin rings begins with a properly organized workspace and all necessary materials at hand.
You’ll need 4 ounces of air dry clay, a rolling pin, a 6-inch ruler, a sharp knife or clay cutting tool, and a small bowl of water. Clear a smooth, clean work surface that’s free from dust and debris, as any particles can become embedded in your clay.
Cover your workspace with a non-stick mat or wax paper to prevent the clay from sticking, and keep your tools within easy reach. If you’re working on a wooden table, protect it with plastic wrap or a crafting mat.
Position your materials in a logical order of use, and ensure you’ve got good lighting to see the details of your work clearly.
Step 2. Roll Clay Into Strips
Begin by taking your air dry clay and dividing it into manageable portions, each about the size of a tennis ball, which will make rolling easier and give you better control over the thickness.
Place your clay portion on a clean, smooth surface, and use your rolling pin to create an even layer. You’ll want to roll the clay to approximately 1/4 inch thickness, checking occasionally with your ruler to ensure consistency.
If the clay starts sticking to your rolling pin, dust the surface lightly with cornstarch or press down with gentle, steady pressure. Once you’ve achieved the proper thickness, use your ruler and knife to measure and cut strips that are 6 inches long and 1.5 inches wide.
Don’t worry if your first few strips aren’t perfect; you can always roll the clay again.
Step 3. Shape Strips Into Circles
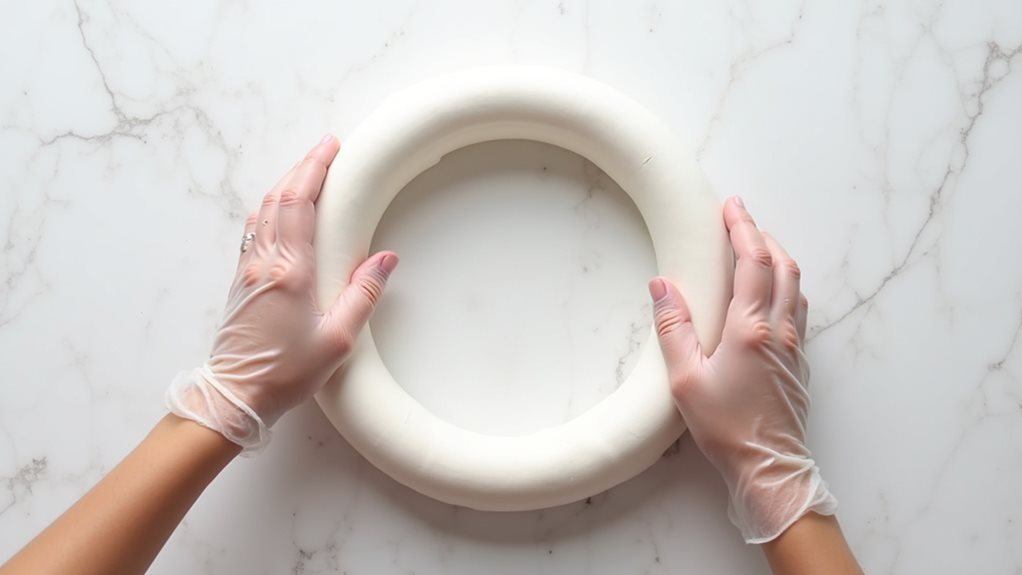
With your clay strips measured and cut to size, transforming them into elegant circular rings requires careful attention to both technique and precision.
Begin by wrapping each strip around a cylindrical object, such as a bottle or rolling pin, that’s approximately 1.75 inches in diameter. You’ll want to overlap the ends by about half an inch to create a secure bond.
Before joining the ends, use your knife to score both surfaces in a crosshatch pattern, then apply a small amount of water with your fingertip. Press the overlapping sections together firmly, smoothing the seam with gentle pressure.
You can refine the ring’s shape while it’s still on the form, ensuring it’s perfectly round. Once you’re satisfied with the shape, carefully slide the ring off and place it on a flat surface to dry.
Step 4. Attach Ring Ends Together
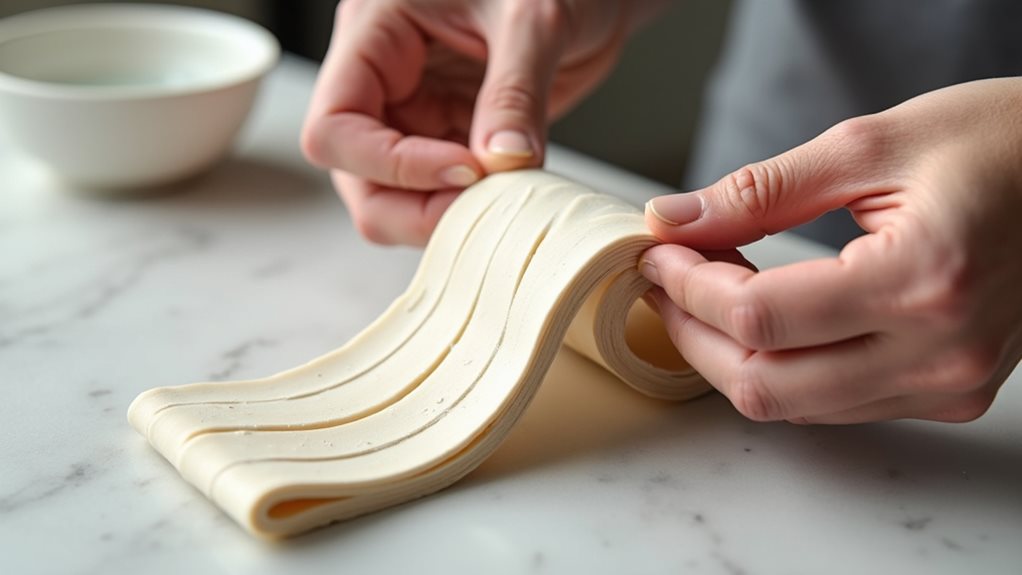
The proper attachment of your napkin ring ends creates a seamless, durable bond that won’t separate during use. Score both overlapping ends with your knife, creating shallow diagonal lines in a crosshatch pattern.
Apply a small amount of water to these scored surfaces using your fingertip, being careful not to oversaturate the clay. Press the overlapping ends together firmly, applying even pressure across the entire joint.
You’ll want to blend the seam slightly with your fingers, smoothing any raised edges until they’re flush with the ring’s surface. Check that the ring maintains its circular shape while working the joint.
Once you’re satisfied with the connection, let the ring rest undisturbed while the clay begins to set. This initial bonding period is crucial for achieving a strong, lasting connection between the ends.
Step 5. Let Clay Dry Completely
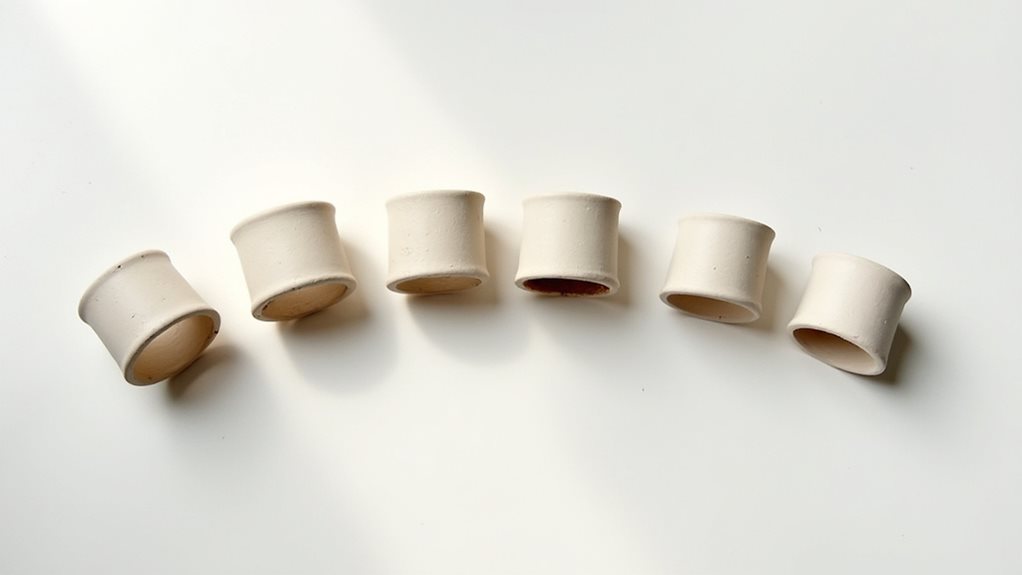
Proper drying time stands as one of the most critical factors in creating durable napkin rings from air dry clay.
You’ll need to set your rings in a well-ventilated area where they won’t be disturbed for 24-48 hours, depending on your local humidity levels. Place them on a flat, non-stick surface, and ensure they’re positioned with enough space between each ring to allow for proper air circulation.
Don’t try to speed up the process with a heat source, as this can cause cracking or warping.
You’ll know your rings are completely dry when they’ve changed from a darker to lighter color and feel firm to the touch. If you’re planning to paint your rings, wait an additional 24 hours after they’ve dried to ensure the clay has fully cured.
Final Thoughts
Creating your own napkin rings allows you to infuse personality into your dining experience while developing a practical skill you’ll treasure for years to come.
As you complete this project, you’ll discover that handcrafted napkin rings offer more than just functionality – they become conversation pieces that reflect your artistic vision and attention to detail.
Remember to store your finished napkin rings in a dry place, away from direct sunlight and moisture that could compromise their integrity.
You can enhance your creations by experimenting with different textures, patterns, or paint finishes to match your dining room decor.
Don’t hesitate to make multiple sets for various occasions, as these versatile accessories will elevate both casual family dinners and formal gatherings, making every meal feel more special.