Crafting a koala bear figurine offers both artistic satisfaction and cultural connection. You’ll find that this engaging project combines basic sculpting techniques with your creative vision, allowing you to capture the endearing features of Australia’s iconic marsupial. Whether you’re an experienced sculptor or a beginner seeking a new hobby, the process of molding air-dry clay into this charming creature will teach you valuable skills that transfer to future crafting endeavors.
Key Takeaways
- Koala bear figurines became popular souvenirs in Australia during the mid-20th century, featuring both handcrafted clay and mass-produced versions.
- Crafting a koala figurine requires basic materials including air-dry clay, sculpting tools, and acrylic paint in gray and black.
- Essential features of koala figurines include round ears, button nose, plump body shape, and realistic texturing for fur details.
- Creating a basic koala figurine takes 2-3 hours to sculpt plus 24-48 hours drying time before painting can begin.
- Decorative elements like miniature eucalyptus branches and wooden bases can enhance the presentation of koala figurines.
History
Although clay figurine crafting dates back thousands of years, the specific art of creating koala bear figurines gained popularity in the mid-20th century as Australia’s iconic marsupials captured global attention.
You’ll find that souvenir shops across Australia began featuring these charming clay representations, often handcrafted by local artisans who drew inspiration from observing koalas in their natural habitat.
The craft evolved significantly in the 1970s when air-dry clay became widely available to hobbyists, making it easier for you to create these figurines at home.
Prior to this innovation, artists primarily used traditional kiln-fired clay, which required specialized equipment and technical expertise.
Today, you’ll see koala figurines crafted in various styles and materials, from realistic sculptures to whimsical interpretations, reflecting both traditional Australian culture and modern artistic sensibilities.
Project
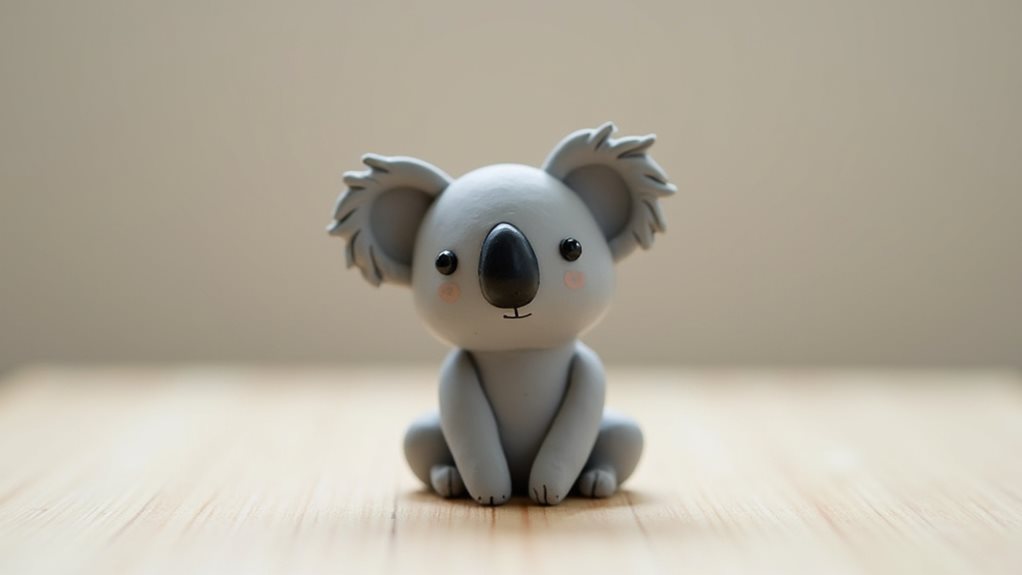
Creating a charming koala bear figurine from air dry clay offers a perfect introduction to sculpting for beginners while producing a delightful decorative piece. The project captures the essential features of these beloved Australian marsupials, including their distinctive round ears, button nose, and plump body shape.
This engaging craft project takes approximately 2-3 hours to complete, with an additional 24-48 hours of drying time. The finished koala stands about 3 inches (7.6 cm) tall and requires basic sculpting techniques that anyone can master with patience and attention to detail.
- Air dry clay (8 oz / 225g)
- Wooden sculpting tool or toothpick
- Small bowl of water (4 oz / 120ml)
- Smooth work surface (8×8 inches / 20×20 cm)
- Acrylic paint in gray and black
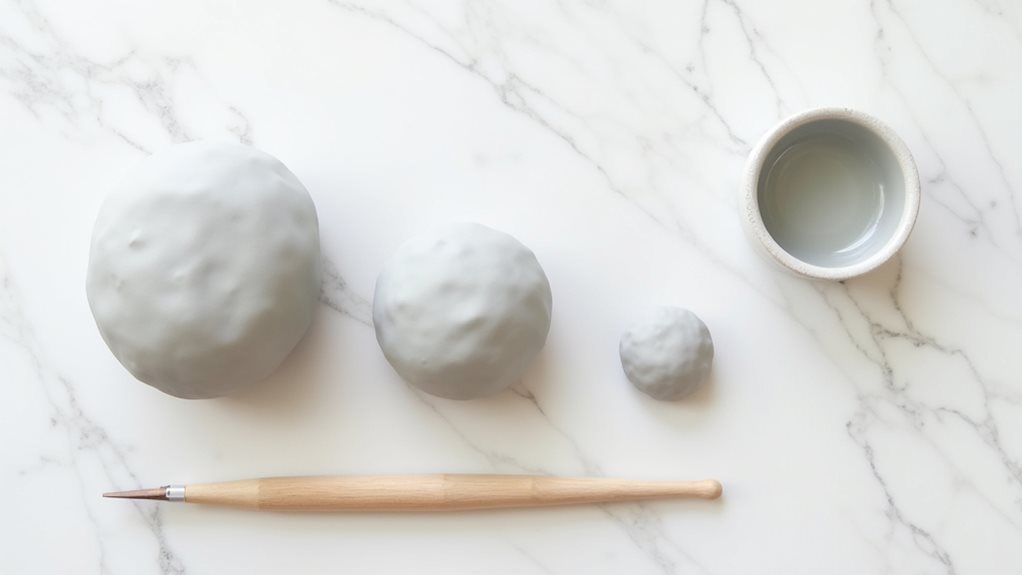
Divide the clay into three portions: 60% for the body, 30% for the head, and 10% for features. Shape the body portion into an egg form and flatten the bottom slightly for stability. Create four small cylinders for the limbs and attach them to the body. Form the head into a rounded triangle shape and join it to the body using water as adhesive. Add two disc-shaped ears and create facial features using the wooden tool. Create fur texture by gently pressing the tool’s tip across the surface in small, consistent motions.
When crafting the koala, maintain consistent thickness throughout the piece, keeping all sections under 1 inch thick to prevent cracking during the drying process. Work with slightly damp hands to prevent the clay from sticking, but avoid over-wetting the surface.
If the clay becomes too soft, pause and allow it to firm up slightly before continuing. Position the figurine in a well-ventilated area away from direct sunlight or heat sources while drying, and avoid moving it until completely hardened to prevent distortion.
Project Steps
You’ll start your koala figurine by dividing the clay into specific portions and carefully rolling them into the basic shapes needed for the body, head, and limbs.
Next, you’ll shape the head with its distinctive features, including rounded ears and a prominent nose, attaching each part securely with a small amount of water.
Once you’ve completed the sculpting and added texture for fur using your wooden tool, you’ll let the piece dry completely before painting it in soft gray tones with black accents for the nose and eyes.
Step 1. Prepare Clay Portions Carefully
Before diving into the sculpting process, you’ll need to divide your clay into precise portions that will ensure proper proportions for your koala figurine.
Start by separating your 8-ounce block of clay into three main sections: 60% (about 5 ounces) for the body, 30% (about 2.5 ounces) for the head, and 10% (about half an ounce) for the detailed features.
From the body portion, you’ll want to set aside small amounts for the limbs while keeping the majority for the main trunk.
The head portion should allow enough clay for the rounded face and ears, while the remaining clay for features will be used to create the distinctive nose, eyes, and any texture details.
Keep each portion wrapped in plastic until you’re ready to use it to prevent premature drying.
Step 2. Shape Body and Limbs
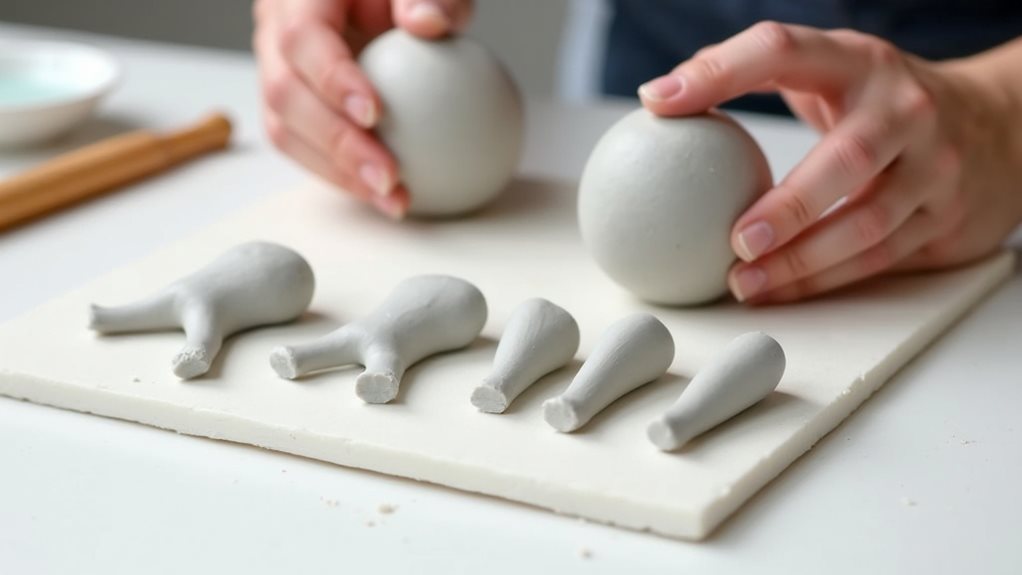
The fundamental stage of your koala figurine begins with shaping the body segment into a smooth egg form. Take the largest portion of clay and roll it between your palms, gradually tapering one end to create the classic koala shape.
Once you’ve achieved the egg form, gently flatten the bottom to ensure your figurine will sit steadily.
Next, create four small cylinders for the limbs, making the back legs slightly thicker than the front ones. Roll each cylinder until it’s about 1 inch long, then bend them slightly at the middle to create natural-looking joints.
Press the limbs firmly against the body where they’ll attach, using your fingertip to smooth the connecting areas. You’ll want to position the front limbs higher on the body than the back ones.
Step 3. Form Head and Ears
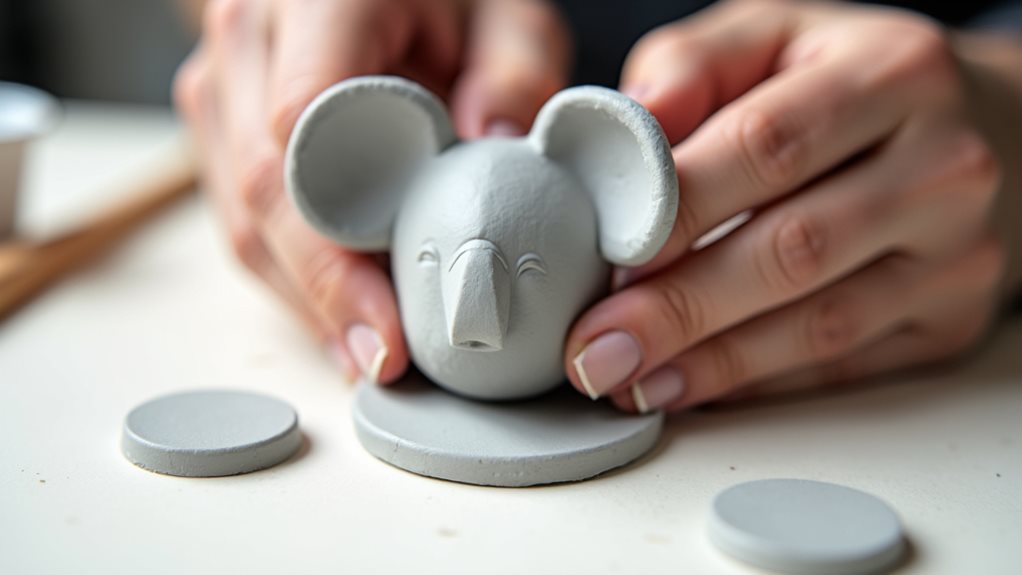
Moving from the body to the upper features, shaping your koala’s head and ears demands careful attention to detail.
Take the clay portion you’ve set aside for the head and form it into a rounded triangle shape, slightly wider at the bottom than the top. Press your thumb gently in the center to create a subtle indentation for the face.
For the ears, pinch off two equal-sized pieces of clay and shape them into small discs, approximately half an inch in diameter. Position these discs on either side of the head, angling them slightly outward.
You’ll want to press the edges firmly into the head while maintaining their round shape. Use your wooden tool to add texture by creating small lines that radiate from the center of each ear.
Step 4. Add Facial Features Carefully
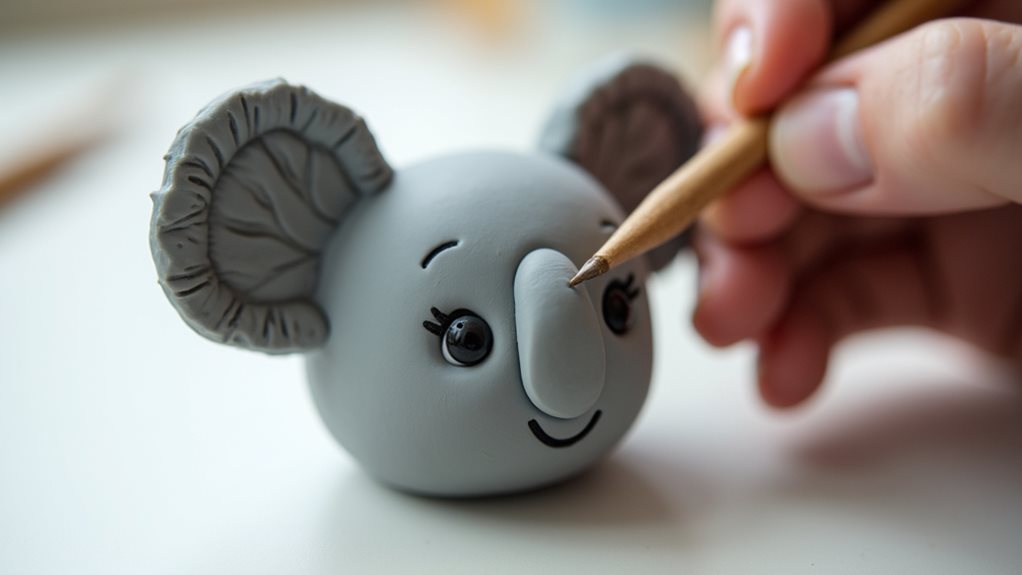
Creating your koala’s facial features requires three essential elements: the nose, eyes, and subtle mouth line.
Using your wooden sculpting tool, carefully press a small round indentation for each eye, positioned about halfway up the face. Roll two tiny black clay balls for the eyes, gently pressing them into the indentations.
For the distinctive koala nose, form a rounded triangle shape from black clay, slightly wider than it’s tall, and position it centrally on the face.
Create a delicate mouth line by drawing a small curved line below the nose with your tool.
Finally, add subtle texture around the facial features by making gentle, irregular marks with your tool’s tip, creating a natural fur-like appearance that enhances your koala’s character.
Step 5. Paint Gray and Black
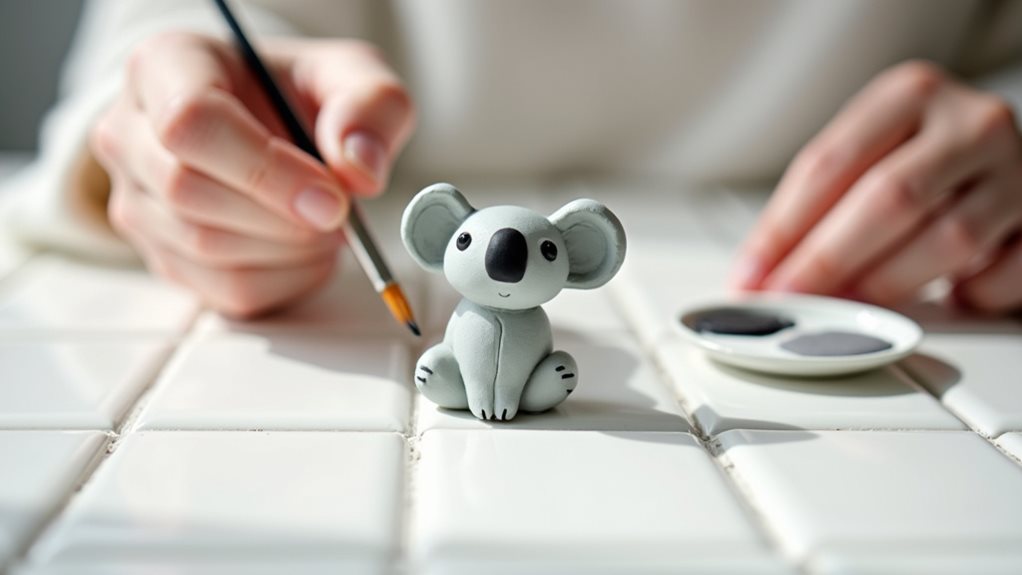
Once your koala figurine has completely dried, painting will bring its charming character to life. Start by applying a base coat of light gray acrylic paint over the entire surface, ensuring even coverage while avoiding thick layers that might obscure the textural details you’ve created.
Allow this first coat to dry for 30 minutes.
Next, mix a darker shade of gray with a touch of black paint to create depth in the fur. Using light brushstrokes, apply this darker color to areas like the ears, around the eyes, and along the sides to suggest natural shadows.
Finally, use pure black paint to carefully detail the nose, eyes, and inner ears. Don’t forget to paint the claws on each paw with a thin black line, and add subtle highlights with white paint for a realistic finish.
Final Thoughts
While making a koala figurine requires patience and attention to detail, you’ll find the end result brings a delightful touch of Australian charm to any space.
Remember to keep your clay at a consistent thickness and work methodically through each step of the process. Once your figurine has dried completely, you can enhance its appearance by adding small decorative elements, such as a miniature eucalyptus branch or a wooden base.
If you’re planning to give your koala as a gift, consider creating a simple display box lined with felt to protect it.
Don’t be discouraged if your first attempt isn’t perfect – each figurine you create will help you develop better sculpting techniques and artistic confidence.