While the earliest hedgehog figurines date back to ancient Egyptian pottery, you’ll find that modern crafting has transformed these woodland creatures into beloved decorative pieces. You can create your own charming sculpture using simple air-dry clay techniques, personalized textures, and custom color schemes. Whether you’re drawn to their spiky appearance or their gentle demeanor, mastering the art of hedgehog sculpting opens up endless possibilities for unique home décor and thoughtful handmade gifts.
Key Takeaways
- Hedgehog figurines gained popularity in 1970s home decor, featuring woodland creatures and natural themes in decorative arts.
- A typical decorative hedgehog figurine measures approximately 4 inches long and 2 inches tall, perfect for shelf or desk display.
- Air-dry clay hedgehog sculptures require basic tools like toothpicks, water, and sculpting tools to create distinctive spiky textures.
- Each hedgehog figurine can express unique personality through facial features, poses, and textural details in the design.
- Completed hedgehog figurines should be displayed away from direct sunlight and moisture, with optional clear sealant for protection.
History
While clay animal figurines have been created since ancient times, the modern hobby of crafting decorative hedgehog sculptures gained popularity during the 1970s arts and crafts movement, when natural themes and woodland creatures became trendy home decor elements.
You’ll find that hedgehog figurines have evolved from simple pinch-pot designs to more intricate sculptures that capture the animal’s distinctive spiny appearance.
In the 1980s, craft magazines began featuring tutorials for creating these charming creatures, and you’ve likely seen their influence in contemporary DIY culture.
Today’s hedgehog figurines often incorporate mixed media elements, such as painted details or natural materials.
Whether you’re a beginner or experienced crafter, you’re following in the footsteps of artisans who’ve helped develop these techniques over the past five decades.
Project
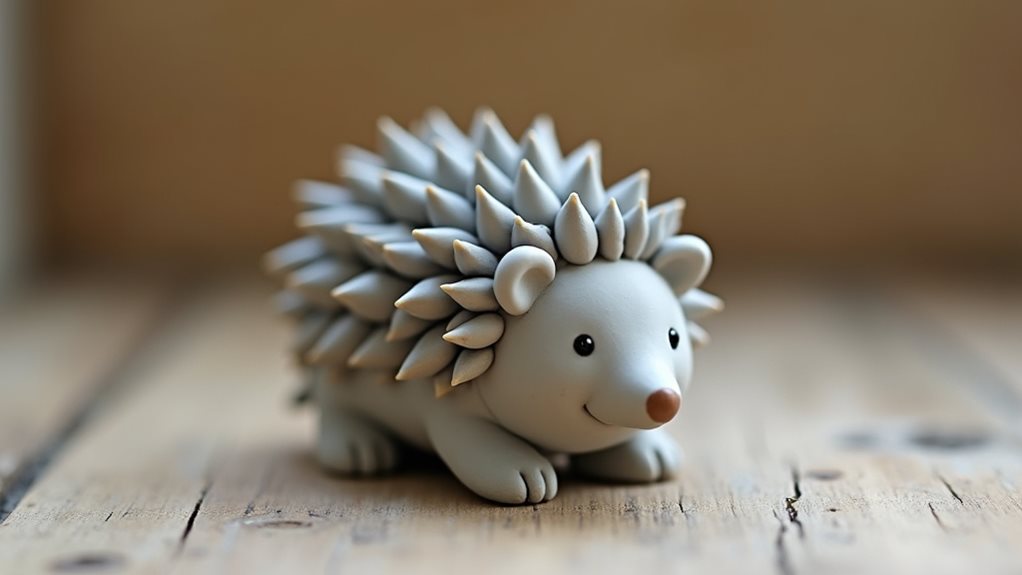
Creating a decorative hedgehog from air dry clay offers a satisfying introduction to sculptural crafting. This charming woodland creature can be completed in a single session and adds a whimsical touch to any home décor collection.
The project yields a hedgehog approximately 4 inches (10 cm) long and 2 inches (5 cm) tall, perfect for display on shelves, windowsills, or desks. With basic sculpting techniques and simple tools, crafters can bring this spiky friend to life in 2-3 hours, followed by a 24-48 hour drying period.
- Air dry clay (8 oz/227g block)
- Wooden toothpick
- Small bowl of water
- Plastic knife or clay cutting tool
- Old pencil or sculpting tool
Begin by rolling a baseball-sized portion of clay into an oval shape for the body. Pinch one end to form a pointed nose, then create four small clay balls for feet and attach them using water as adhesive.
Shape the spines by making small indentations across the back with a pencil or sculpting tool, working from the center outward in a radiating pattern. Create facial features by pressing two small indentations for eyes and forming a tiny nose at the pointed end.
Keep the clay at a workable consistency by maintaining slightly damp hands throughout the process. Work on a non-porous surface and avoid moving the sculpture during the drying period to prevent distortion.
Should any cracks appear while drying, they can be repaired by gently applying a small amount of water and fresh clay while the piece remains partially moist. Position the finished hedgehog in a draft-free area to ensure even drying.
Project Steps
Before you begin crafting your clay hedgehog, gather all materials and arrange them on a clean, non-porous workspace where you’ll have easy access to your tools and water.
Start by molding your clay into an oval shape for the body, then shape and attach the feet, carefully working the spiky quill texture across the back with your sculpting tool.
Finally, add personality to your creation by forming the eyes and nose, ensuring these facial features align naturally with the hedgehog’s pointed end.
Step 1. Organize Materials on Workspace
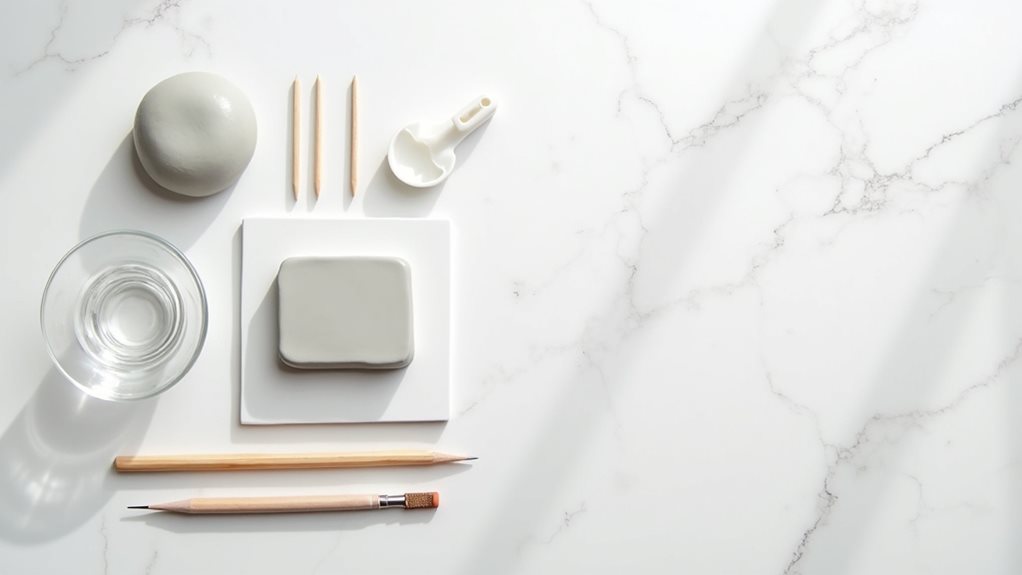
Start your hedgehog project by gathering all materials in a clean, well-lit workspace with plenty of room to move your hands freely.
Place your air dry clay block in the center of your work surface, with your sculpting tools arranged neatly to the right if you’re right-handed, or to the left if you’re left-handed. Keep your small bowl of water within easy reach but not too close to your working area to prevent accidental spills.
Set up a protective covering, such as a craft mat or wax paper, to catch any clay particles and make cleanup easier.
You’ll also want to position your reference materials where you can see them clearly without having to move around. Remember to keep paper towels nearby for quick hand cleaning and clay smoothing.
Step 2. Mold Clay Into Oval
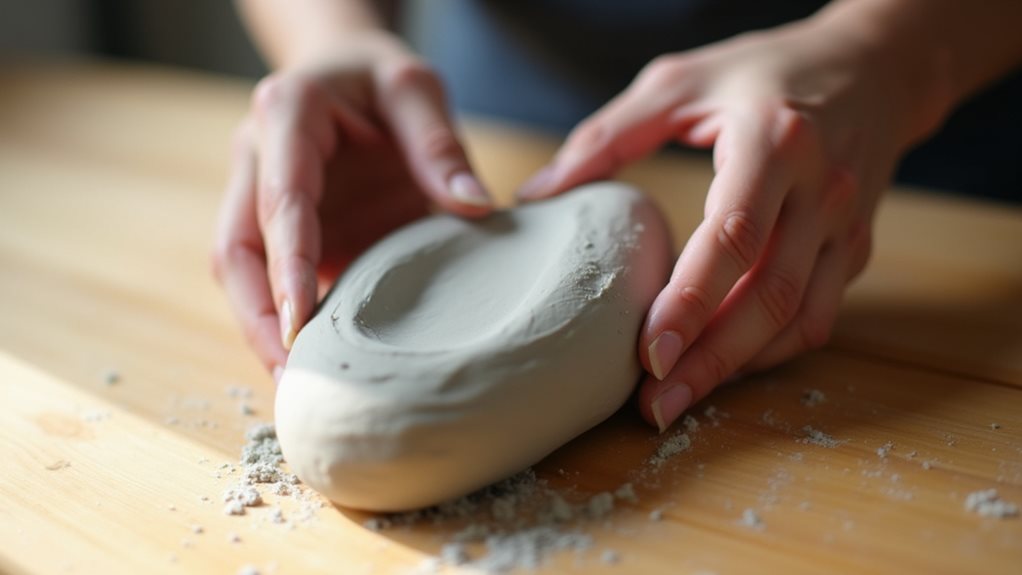
Remove a baseball-sized portion of clay from your block and begin working it between your palms using gentle, circular motions to form the basic oval shape.
You’ll want to maintain consistent pressure as you roll, ensuring the clay stays warm and pliable in your hands. Once you’ve achieved a smooth oval, examine it for any lumps or irregularities.
Press your thumbs gently into the center of the oval, gradually working outward to refine the shape while maintaining an even thickness throughout.
One end should taper slightly to form the hedgehog’s face, while the other end remains fuller for the body. If you notice any air bubbles, carefully press them out with your fingertips, smoothing the surface as you work.
Step 3. Shape and Attach Feet
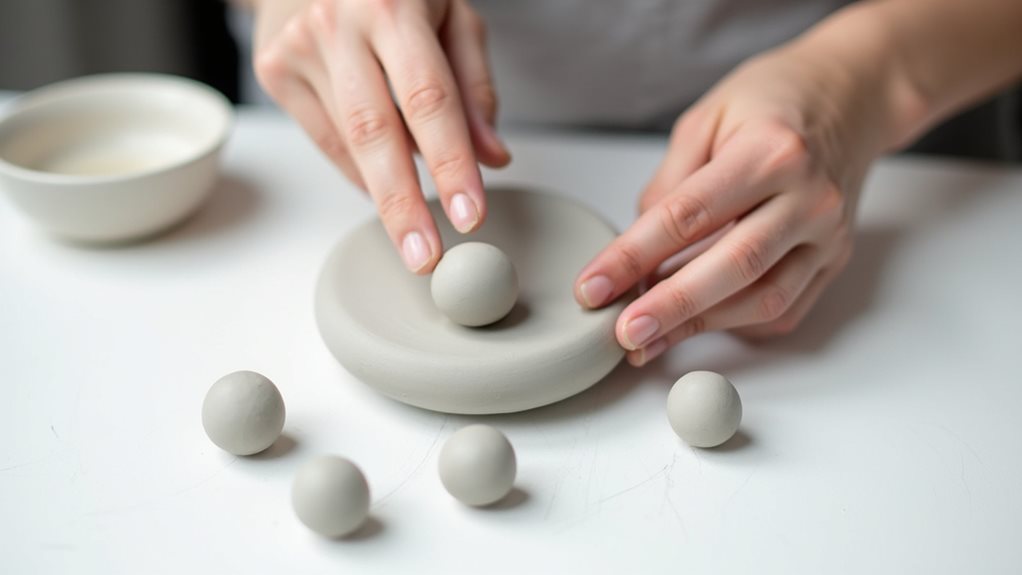
Rolling four small clay balls between your palms creates the foundation for your hedgehog’s feet, with each ball measuring approximately the size of a marble.
Position these clay spheres evenly beneath the oval body, gently pressing them against the surface to establish their placement.
To secure the feet properly, dip your finger in water and lightly moisten both the bottom of the body and the top of each foot where they’ll connect.
Press each foot firmly into place, smoothing the joints with your fingers to blend the clay seamlessly. You’ll want to ensure the feet are sturdy enough to support your hedgehog when it’s standing.
If needed, add small amounts of clay around the base of each foot to reinforce the connections and create a more stable structure.
Step 4. Create Spiky Quill Texture
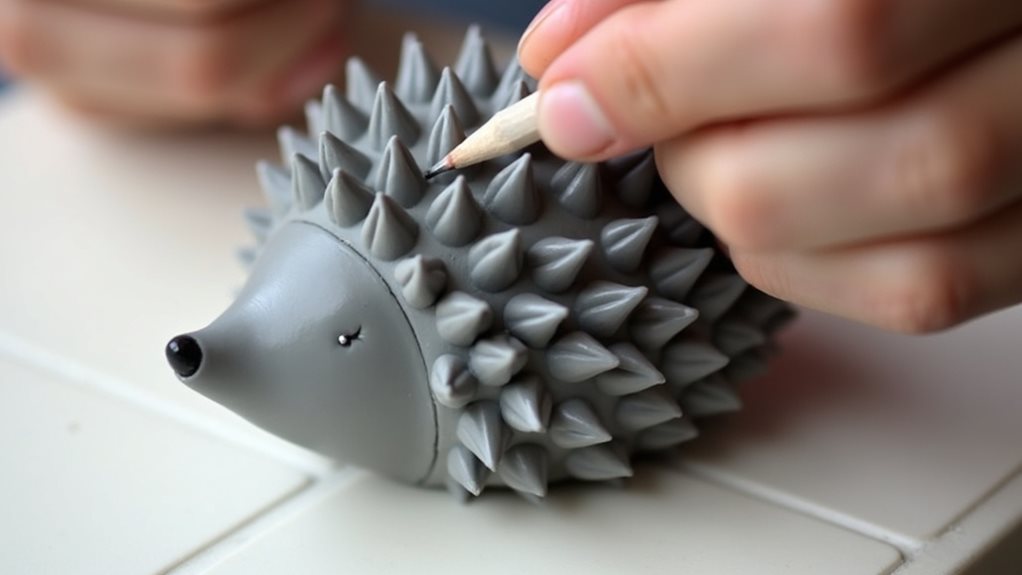
To achieve the distinctive quilled appearance of your hedgehog’s spines, press your pencil or sculpting tool into the clay at a 45-degree angle, creating rows of small, overlapping indentations across the upper surface of the body.
Start from the center of the back and work outward in a radiating pattern, maintaining consistent spacing between each impression. You’ll want to cover approximately two-thirds of the hedgehog’s body with these textures, leaving the face and underbelly smooth.
For added dimension, vary the depth and angle of your impressions slightly as you work. If you’re using a pencil, the eraser end can create broader indentations while the pointed tip produces finer details.
Don’t worry if some marks appear irregular—this natural variation will actually enhance your hedgehog’s realistic appearance.
Step 5. Add Eyes and Nose
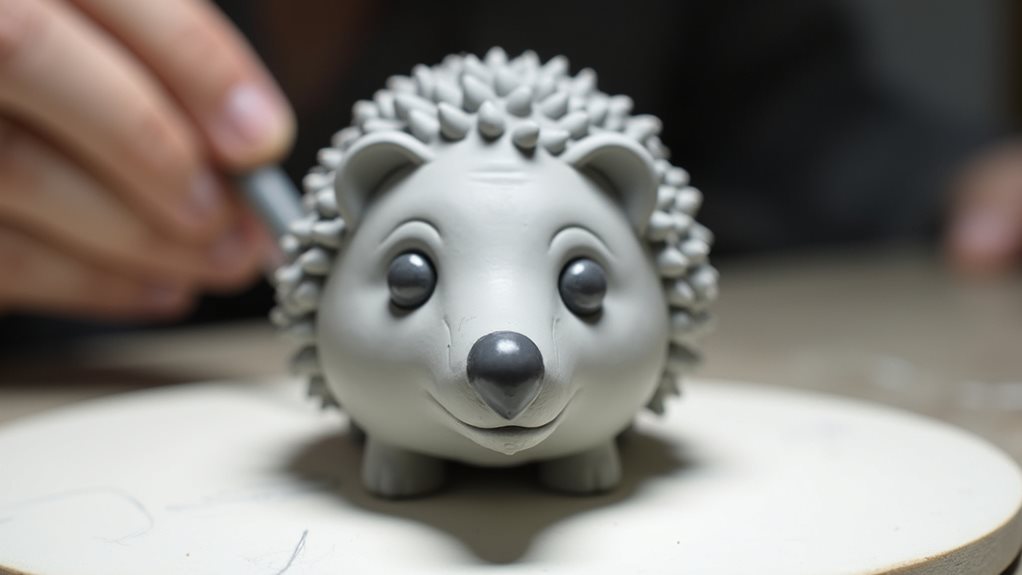
Facial features transform your clay hedgehog from a simple sculpture into an expressive woodland creature. Using your sculpting tool or toothpick, create two small, round indentations for the eyes, positioning them about 1/4 inch apart near the pointed end of your hedgehog’s face. Press gently to achieve uniform depth without piercing through the clay.
For the nose, make a slightly larger triangular depression at the tip of the snout, angling your tool to create a natural-looking slope. You’ll want the nose to be about 1/8 inch deep.
Once you’ve formed these features, carefully smooth the edges of each indentation with your dampened fingertip. If you’d like to add more character, create subtle smile lines by drawing two curved marks extending from the nose toward the cheeks.
Final Thoughts
Creating a hedgehog figurine from air dry clay isn’t just about following steps – it’s an opportunity to develop your sculpting skills while adding a whimsical touch to your home décor.
You’ll find that each hedgehog you create has its own unique personality, reflecting your artistic growth and attention to detail.
Remember to display your finished piece away from direct sunlight and moisture to preserve its quality. If you’d like to protect your creation further, you can apply a clear, non-toxic sealant once it’s completely dry.
Don’t be discouraged if your first attempt isn’t perfect – sculpting takes practice, and each project helps you refine your technique.
Consider creating multiple hedgehogs with different expressions or poses to build a charming woodland collection that showcases your developing skills.