Creating air dry clay owls is like sculpting wisdom itself into your hands. You’ll discover that this straightforward craft combines simple techniques with satisfying results, transforming basic clay into charming decorative pieces. Whether you’re a beginner seeking an accessible project or an experienced crafter looking for a quick creative outlet, these clay owls offer something special—but the real magic happens when you understand exactly how to bring them to life.
Key Takeaways
- Roll clay flat, press a 5-inch bowl indent, then fold sides inward to form the basic owl structure.
- Create symmetrical eye sockets using marker lids, insert toothpick pieces in wet clay, then attach pre-rolled eyeballs.
- Roll a small clay sphere into a pointed cone, curve the tip, and attach below the eyes for the beak.
- Press U-shaped feather marks using a marker cap at 45-degree angles on the owl’s bottom half only.
- Allow clay to dry completely for 24–48 hours, then paint with acrylics and add details with paint markers.
History
Rather than being invented by a single person, air dry clay evolved through experimentation by multiple inventors and craft material developers throughout the 20th century. Early versions emerged from cold porcelain clay developed in Argentina, combining cornstarch and glue into a moldable substance.
European and American craft labs later created polymer alternatives, refining formulas by incorporating household ingredients like glue and starch with plasticizers. These breakthroughs eliminated the kiln-firing requirement that traditional clay demanded, making the material accessible for home and educational use. Educational use of air dry clay expanded significantly as teachers recognized its potential for classroom art projects like creating owl sculptures.
Modern brands progressively improved these original formulations, creating softer, more durable, and more vibrant versions. The non-toxic, ready-to-use nature of contemporary air dry clay attracted both professional artists and hobbyists, fundamentally transforming how people approach sculpture and decorative projects.
Project
Creating adorable air dry clay owls is a fun and accessible craft project suitable for crafters of all ages. These charming little sculptures come together quickly using basic materials you likely already have at home. The process involves simple hand-shaping techniques that don’t require any special sculpting skills, making this an ideal project for beginners, children, and experienced crafters alike.
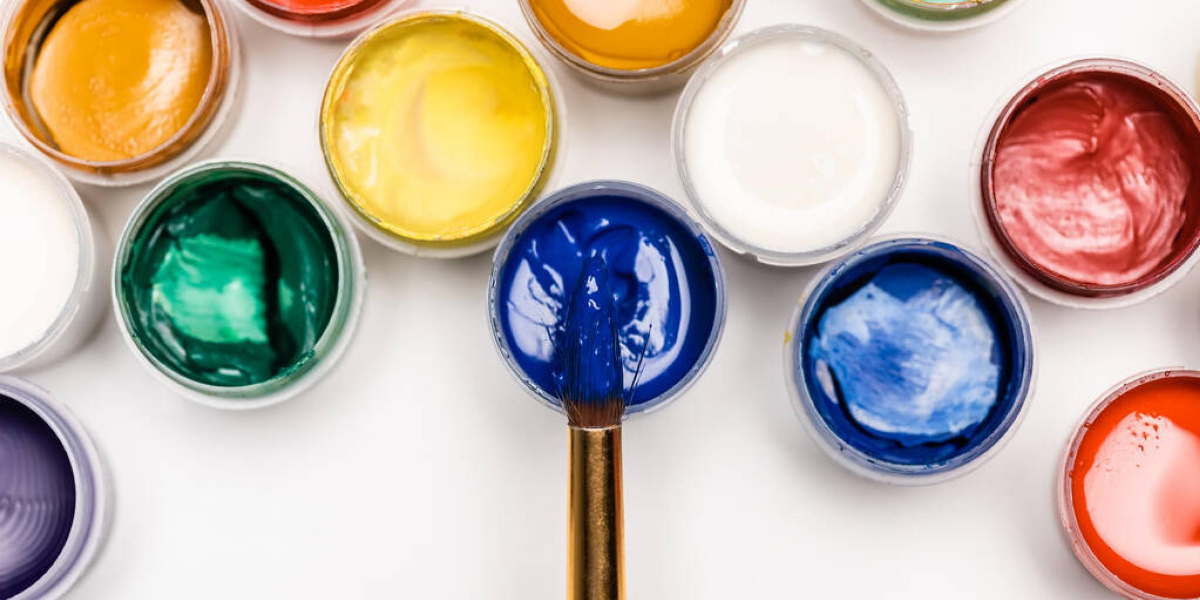
Once your owl takes shape, the real magic happens during the decoration phase. You’ll have complete creative freedom to personalize your owl with vibrant acrylic paints, unique color combinations, and detailed feather patterns. Whether you prefer realistic owl colors or fantastical designs, the customization options are endless, allowing each crafter to express their individual style and create truly one-of-a-kind pieces. For the smoothest results and to reduce cracking, DAS air dry modeling clay is recommended for its affordability and availability.
Materials:
- Air dry modeling clay (approximately 2–3 oz / 56–85 g per owl)
- Acrylic paint in multiple colors
- Acrylic paint markers for detailing
- Water for smoothing and blending
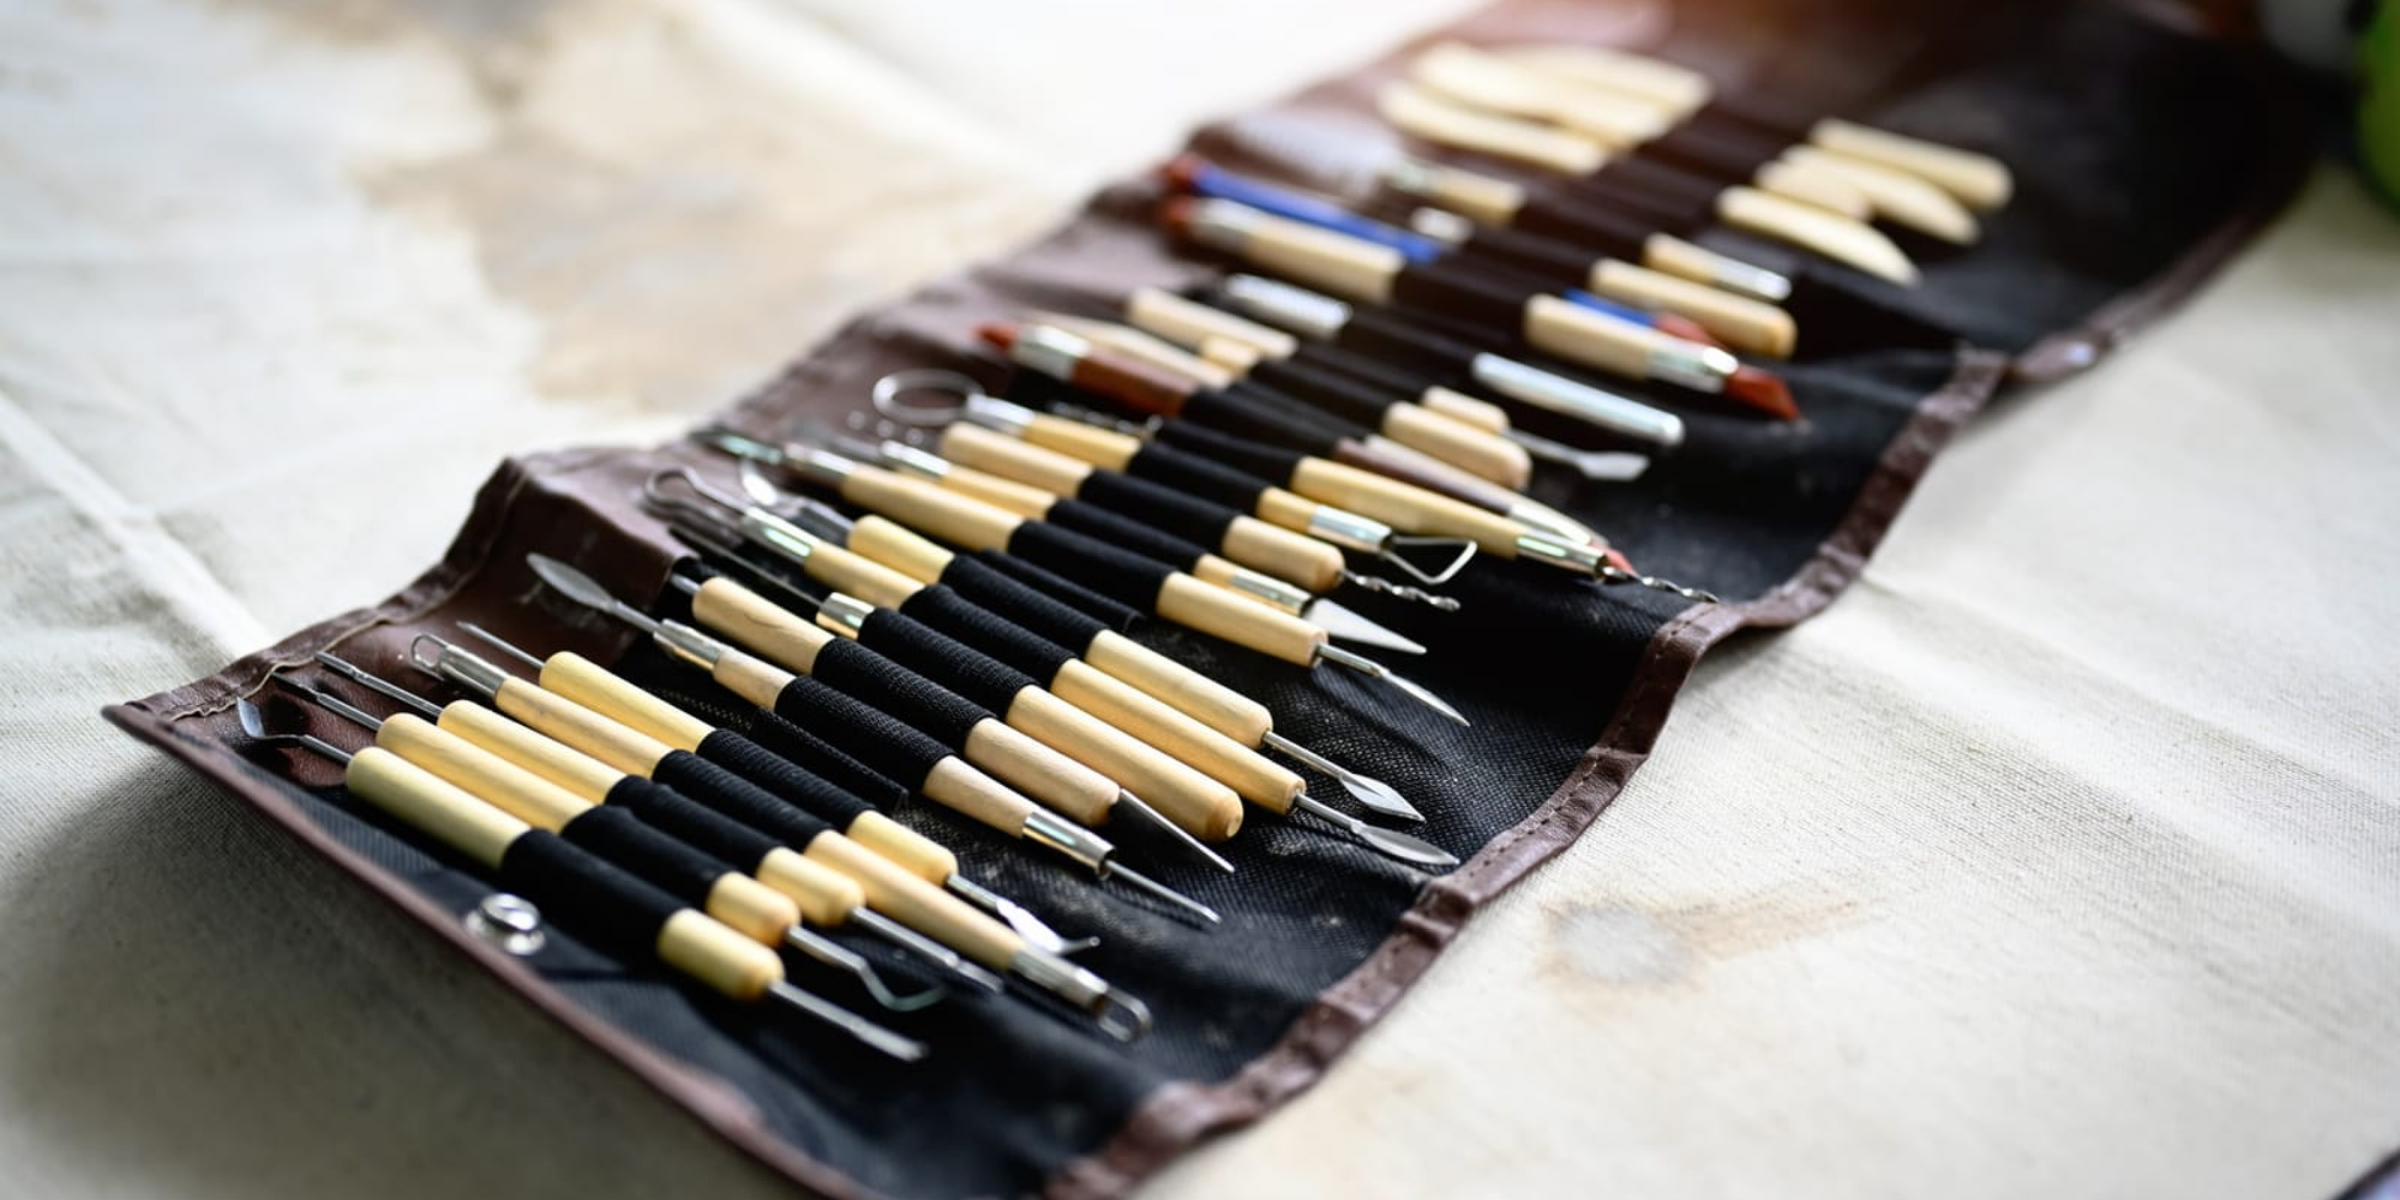
- Wooden skewer or knife back for cutting
Instructions:
Begin by rolling your clay flat and pressing a 5-inch (12.7 cm) bowl into the surface to create a circular indent.
Fold the left and right sides inward on an angle toward the center, then fold the top downward and pinch gently to form ears.
Use a marker cap or lid held at a 45-degree angle to press U-shaped feather marks into the bottom half of the circle only.
Shape the sides gently for a rounder owl body, then use a butter knife to shape and refine the beak area.
Create eye impressions with your marker cap, smooth any rough edges with water-dipped fingers, and allow the clay to air dry completely according to package instructions, typically 24–48 hours.
Once fully dried, paint your owl with vibrant acrylic colors and add fine details with acrylic paint markers for a polished finish.
Extra Tips:
Let your clay dry completely before painting to avoid smudging or distorting your carefully crafted details.
If your clay begins to dry out while you’re working on it, cover it loosely with plastic wrap to maintain moisture and workability.
Don’t overwork the clay in any one area, as excessive handling can cause it to become sticky or lose its shape.
For best results with feather details, practice your marker cap impressions on a scrap piece of clay first to get the right angle and pressure needed for consistent marks across your project.
Project Steps
You’ll start by rolling your clay into a ball and pinching the top section to form the head while keeping the bottom portion as the body.
Next, you’ll create two small balls from your remaining clay, which you’ll attach to the front of your owl’s head to serve as eyes.
Finally, you’ll add clay details for the beak by shaping a small piece and scoring both the beak and body before securing them together with water. To ensure your clay components stay firmly attached, make sure to score and use water on all surfaces where pieces connect, as this technique builds on proper clay attachment skills.
Step 1. Roll Clay Into Ball
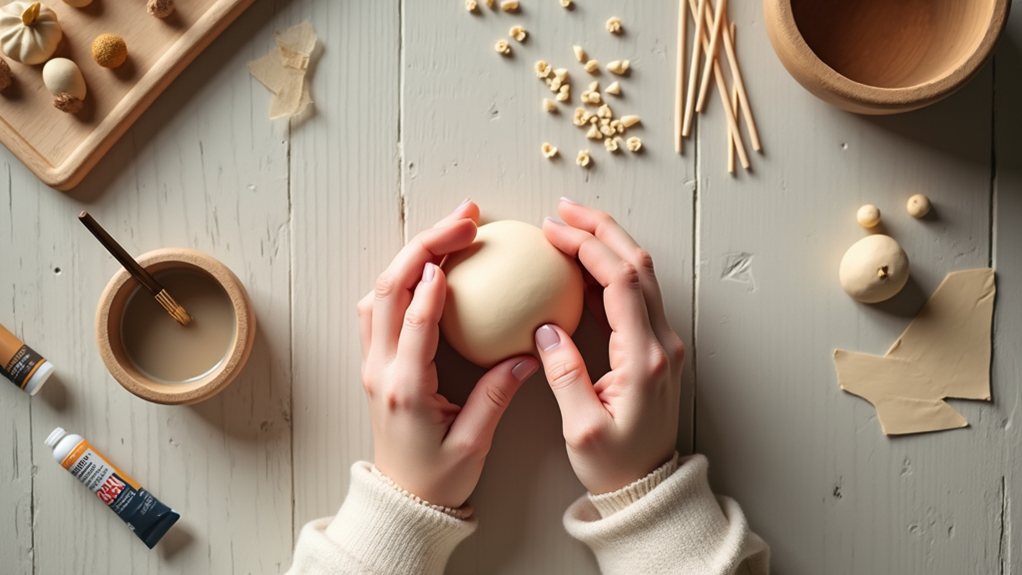
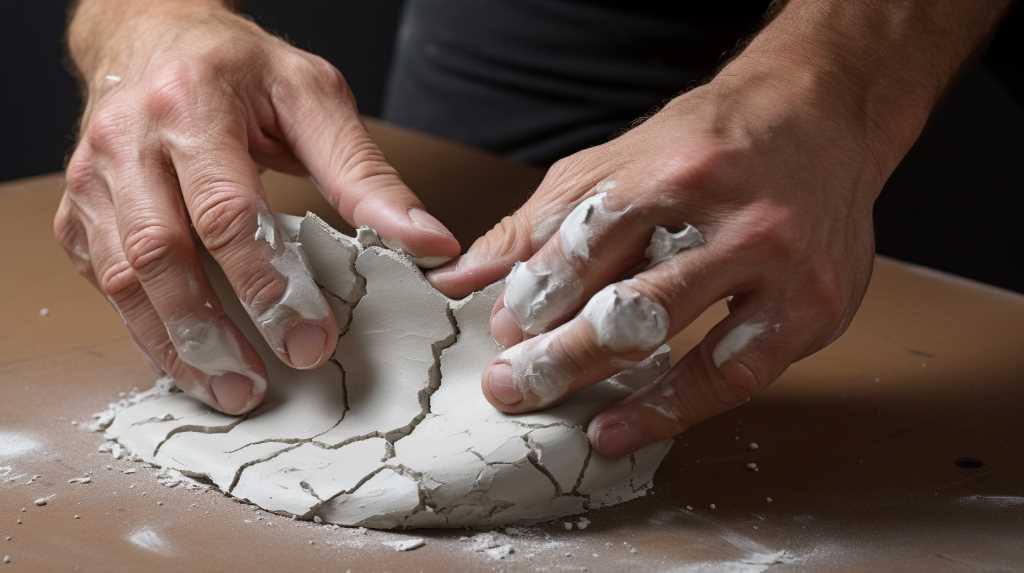
The foundation of your air dry clay owl begins with transforming a rectangular clay block into a smooth, workable sphere—a process that requires both technique and patience. Start by slamming, smushing, and crushing your initial lump to eliminate trapped air pockets that could compromise your final piece.
Once you’ve broken down the clay, gently roll it between your palms to form a ball while the material remains wet and formable. Allow your clay to firm up over several hours, which gives you better molding control during subsequent shaping.
Continue rolling periodically as the clay hardens, maintaining consistent pressure to achieve a uniform sphere. For best results, test your texture tools on a flattened clay sample first to understand the pressure needed for impressions before committing to your owl’s surface. This foundational step determines your owl’s overall quality and structural integrity.
Step 2. # Pinch Head and Body
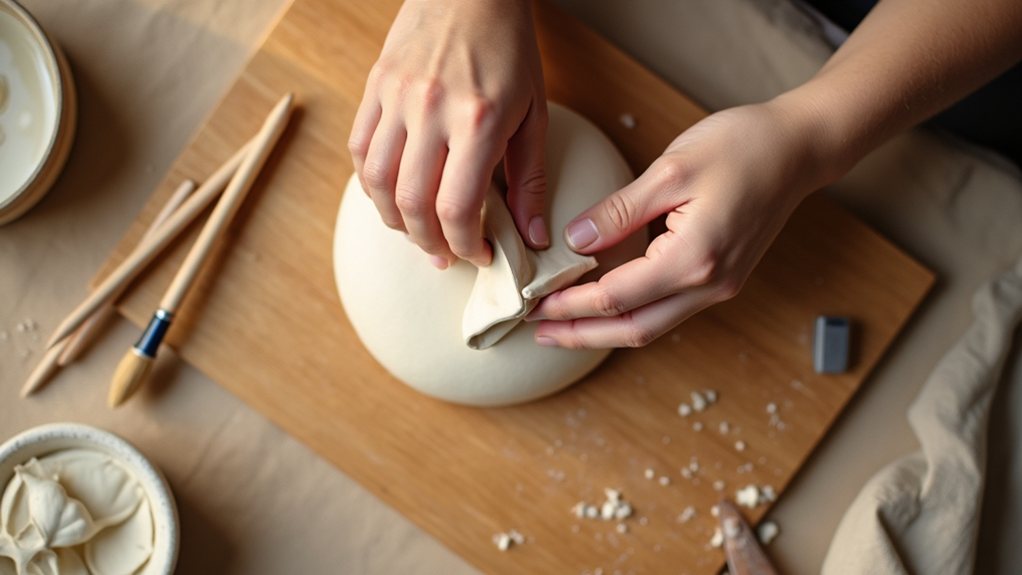
Now that your clay ball’s been properly formed and firmed to the ideal consistency, it’s time to transform it into your owl’s body through the pinch pot technique.
Push your thumb into the center of the ball as far as possible without breaking through the bottom.
Carefully pinch the walls outward and upward, working around the entire sphere to create an even cup shape.
Maintain consistent wall thickness throughout to prevent fragility during the drying process.
If you’re assisting younger children, guide their hands to ensure a deeper pinch for structural stability.
Once complete, smooth both the interior and exterior surfaces with your fingers, creating a uniform shape that’ll serve as your owl’s sturdy foundation for subsequent assembly steps. For best results, aim for a thickness as fat as your thumb to achieve the proper proportions for your finished owl.
Step 3. # Create Two Small Balls
With your owl’s body foundation complete and properly smoothed, it’s time to shape two additional clay balls that’ll become your owl’s distinctive head and charming facial features.
Take a medium handful of clay and divide it into two portions: one slightly larger for the head and one smaller for the body ball.
Hand-knead each piece into a sphere using gentle, consistent pressure between your palms.
Roll them on a flat surface with light, even strokes until they achieve smooth, uniform roundness.
Maintain approximately one to two inch diameters for proper proportions.
Avoid applying excessive pressure, which creates air bubbles and potential cracks during the drying process. Remember to condition your clay before rolling to remove any existing air bubbles and reduce the likelihood of cracking as your owl dries.
Your balls should feel firm yet uniform before proceeding to assembly.
Step 4. Attach Balls for Eyes
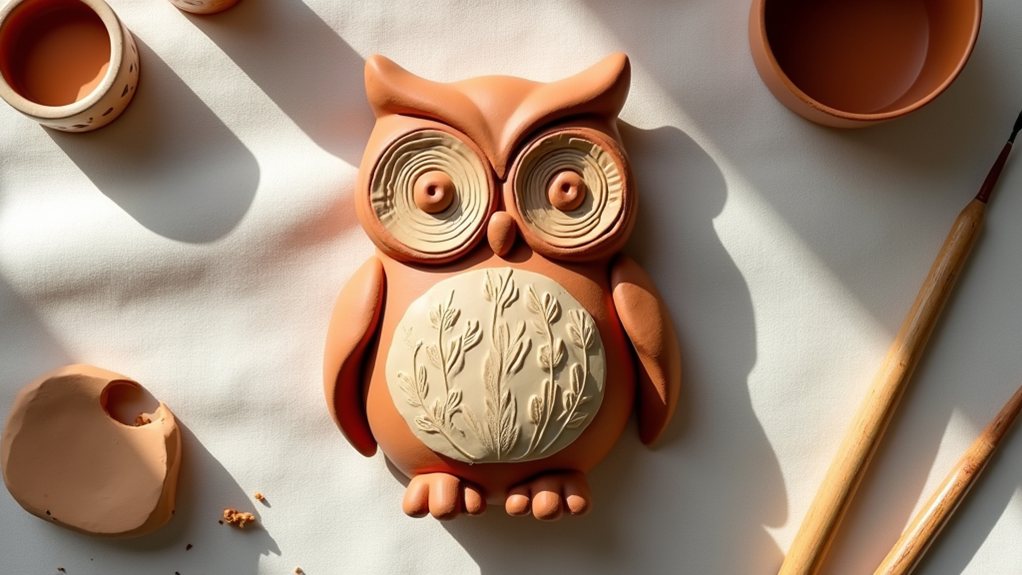
Your owl’s personality comes to life once you’ve positioned those carefully crafted eye balls, so you’ll want to prepare the head with precision before attachment.
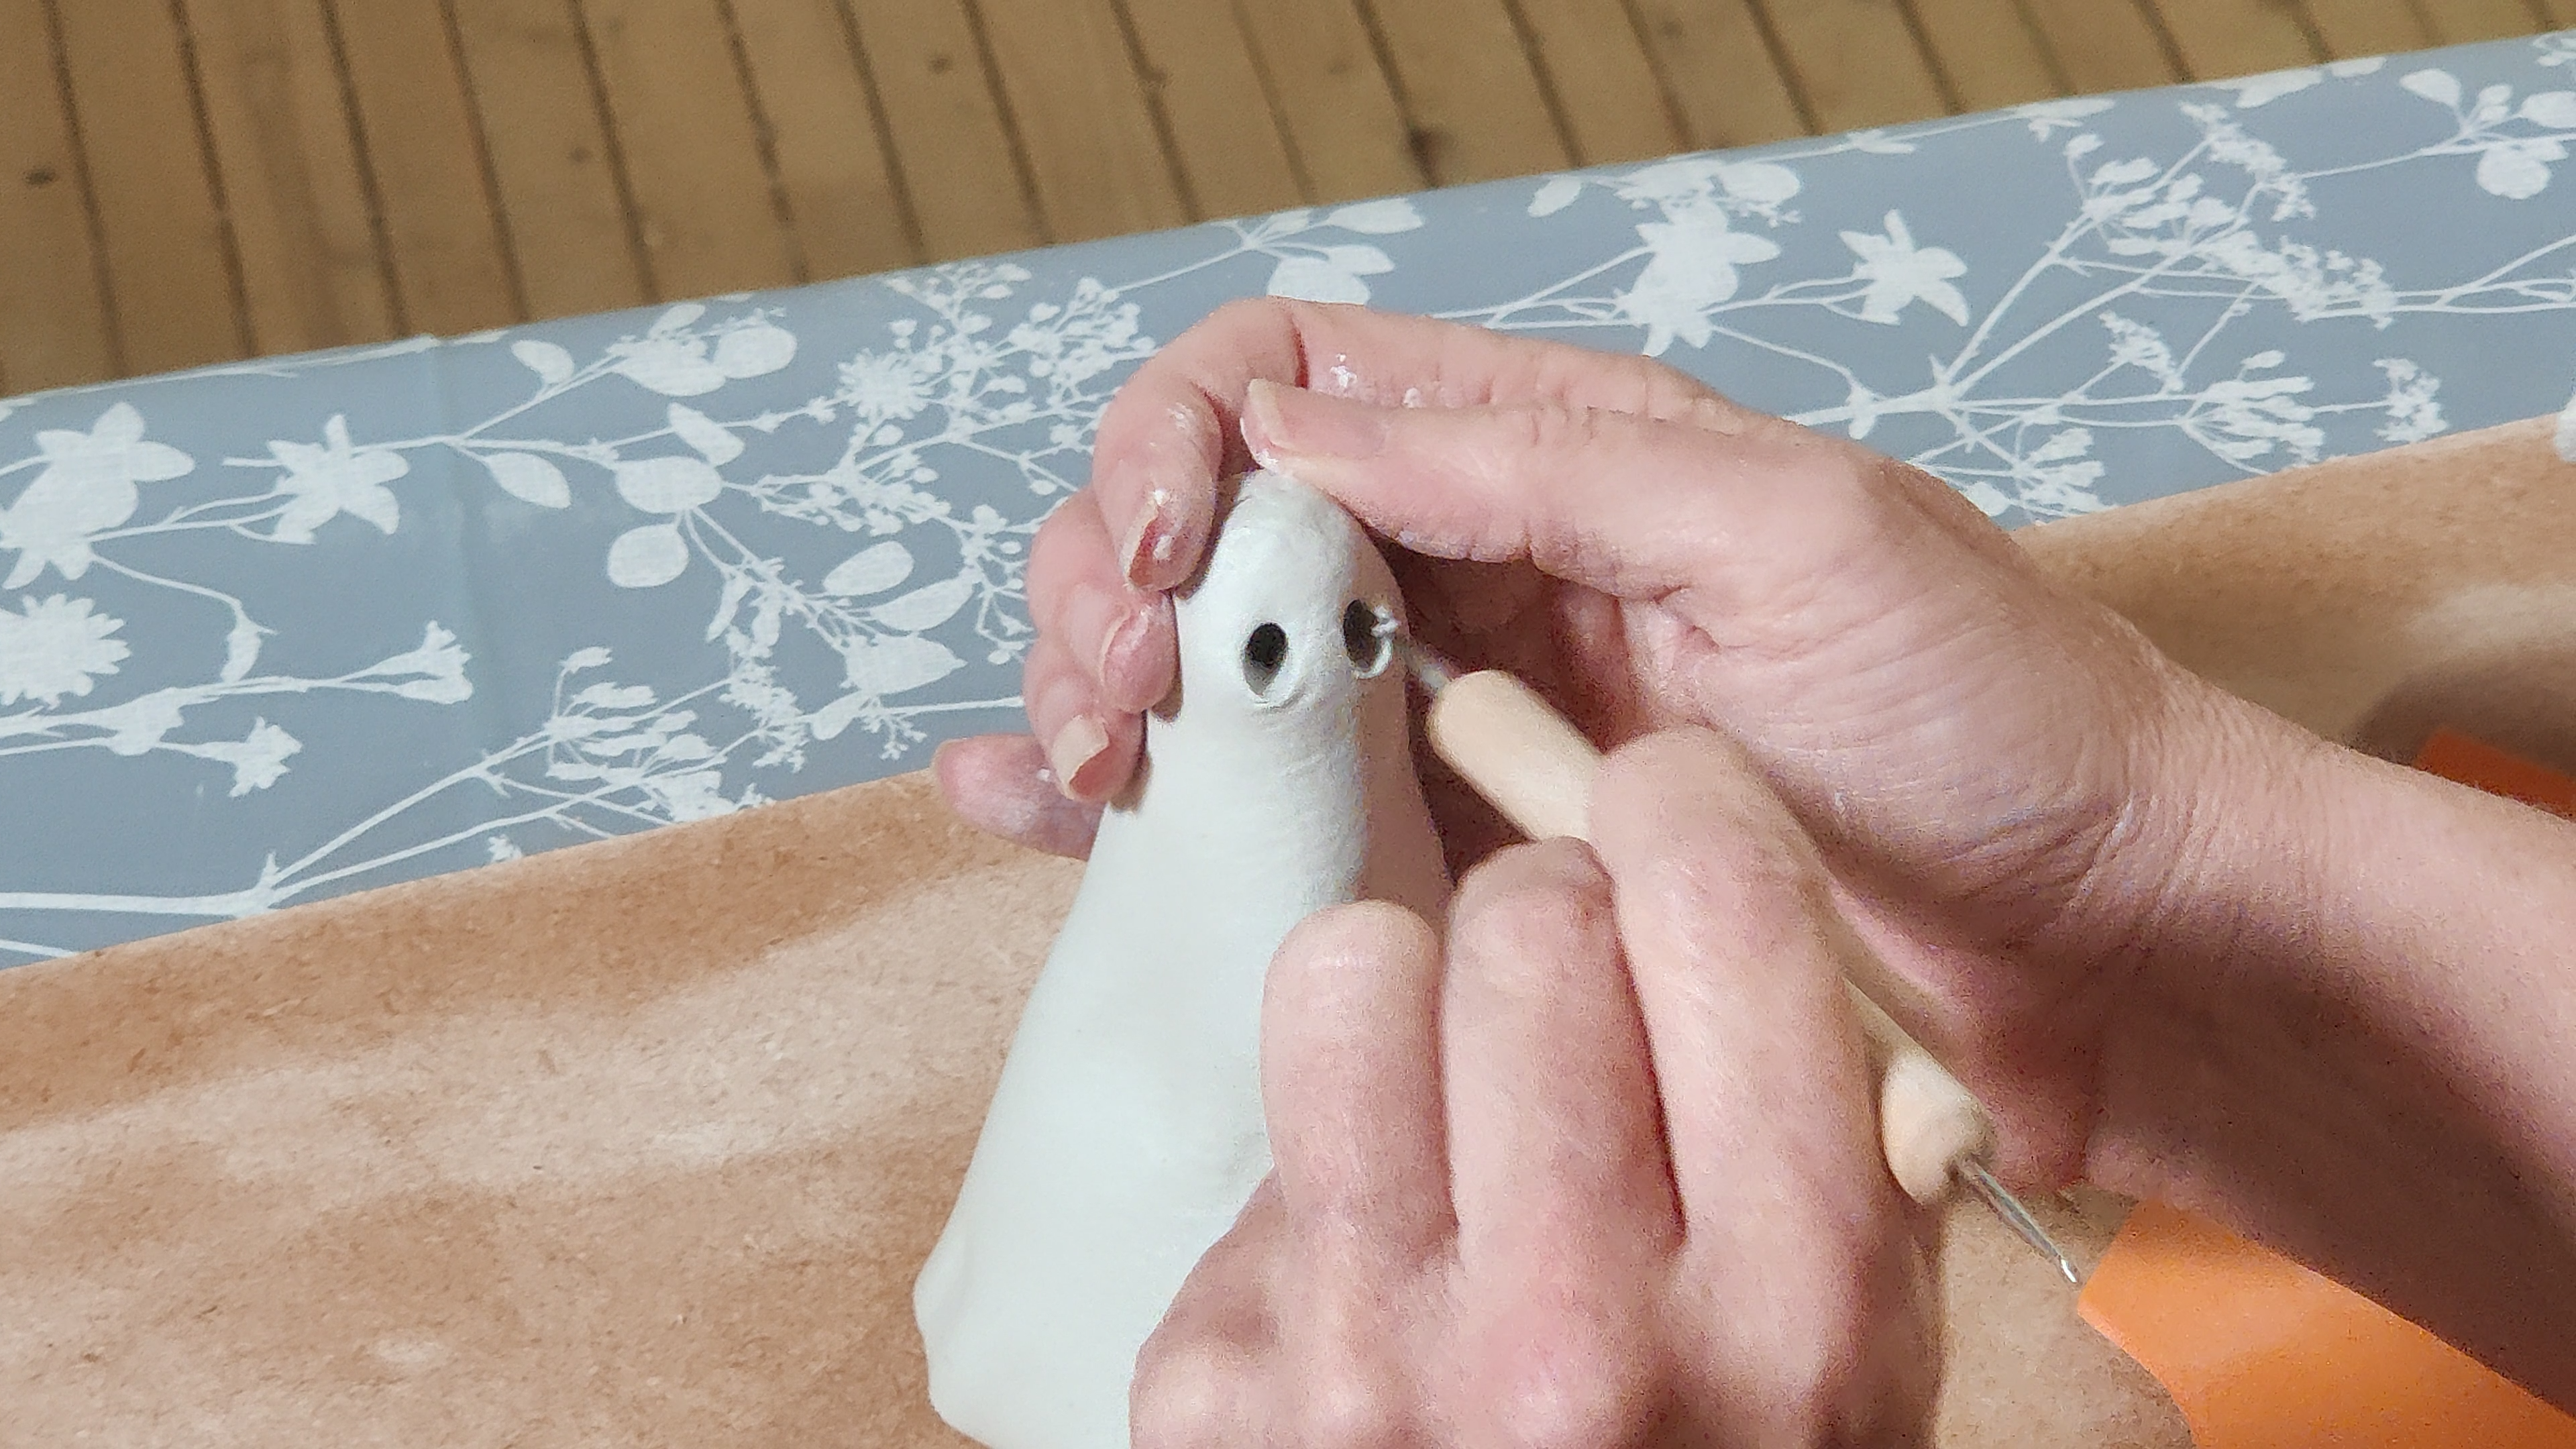
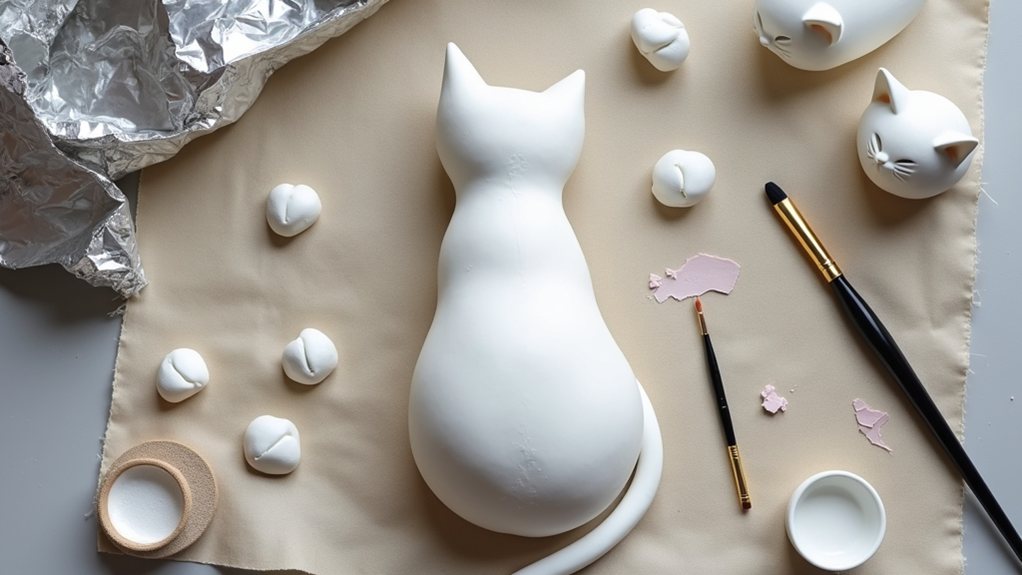
Start by creating symmetrical eye sockets using nearby objects like marker lids to form even indents across the head. Use a ball tool to ream out slit depth in the wet clay, ensuring balanced placement.
Cut toothpicks into small pieces and insert them into your prepared dents while the clay remains wet. This reinforcement secures the connection between eyeballs and body. Dala Air-Drying Clay works best for this attachment method as it holds toothpicks firmly in place during the shaping process.
Next, apply a thin adhesive layer behind each pre-rolled ball before pressing them firmly onto the toothpick pieces. Build up the eyelid area with additional wet clay, smoothing edges with a wet finger. Verify symmetry before the clay dries completely.
Step 5. Add Clay Details for Beak
Once you’ve perfected your owl’s eyes, it’s time to craft and attach the beak, which’ll serve as the focal point of your bird’s face and define its character.
Roll a small sphere of clay into a cone shape for the basic beak form, then pinch one end into a pointed tip.
For an owl, curve this pointed end to create that distinctive hooked appearance.
Position your cone directly below the eyes, using slip or water as adhesive.
Press the clay firmly and blend it with your thumb, ensuring secure attachment.
Use a pointy skewer to press horizontal impressions on both sides, creating a V-shaped outline.
Add nostrils with a blunt needle on the beak tip.
Dip your finger in water to smooth edges and refine the overall definition around your beak area. Ensure the beak is securely attached before moving on to the next steps of your owl construction.
Final Thoughts
Creating air dry clay owls offers more than just a quick craft project—it’s an accessible entry point into sculptural art that welcomes beginners and experienced crafters alike.
You’ve now mastered fundamental techniques that extend far beyond owl designs, including texture creation, detail work, and finishing methods.
Your newfound skills transfer directly to other clay projects, from miniatures to decorative pieces.
As you continue crafting, you’ll discover that experimenting with different clay brands, paint colors, and embellishment options keeps the creative process fresh and engaging.
Whether you’re working with children or pursuing a personal hobby, these projects build confidence and artistic expression.
Store your dried pieces carefully, display them proudly, and don’t hesitate to refine your techniques with each new creation you undertake.